Create & Edit Multisig Wallets
A multisig wallet comprises an alias, member addresses, and a threshold. A multisig alias functions similarly to a regular Camino Wallet address, but it lacks a private key. Therefore, signing transactions for this address necessitates signatures from its member addresses. The required number of signatures is determined by the wallet's threshold. Funds within the wallet can only be accessed when the requisite number of member addresses provides their signatures.
Let's walk through the process of creating and editing a multisig wallet.
For further details on multisig wallets, please refer to the Multisig Wallets & Aliases page.
Remember that multisig aliases are specific to their respective networks. This means an alias created on the mainnet cannot be directly used on the testnet, and vice versa. If you wish to use a multisig alias on a different network, you'll need to set up a separate multisig on that network.
Creating a Multisig Alias
1. Login with a Member Wallet
Log in to the Camino Wallet using one of the member accounts you intend to include in the multisig wallet.
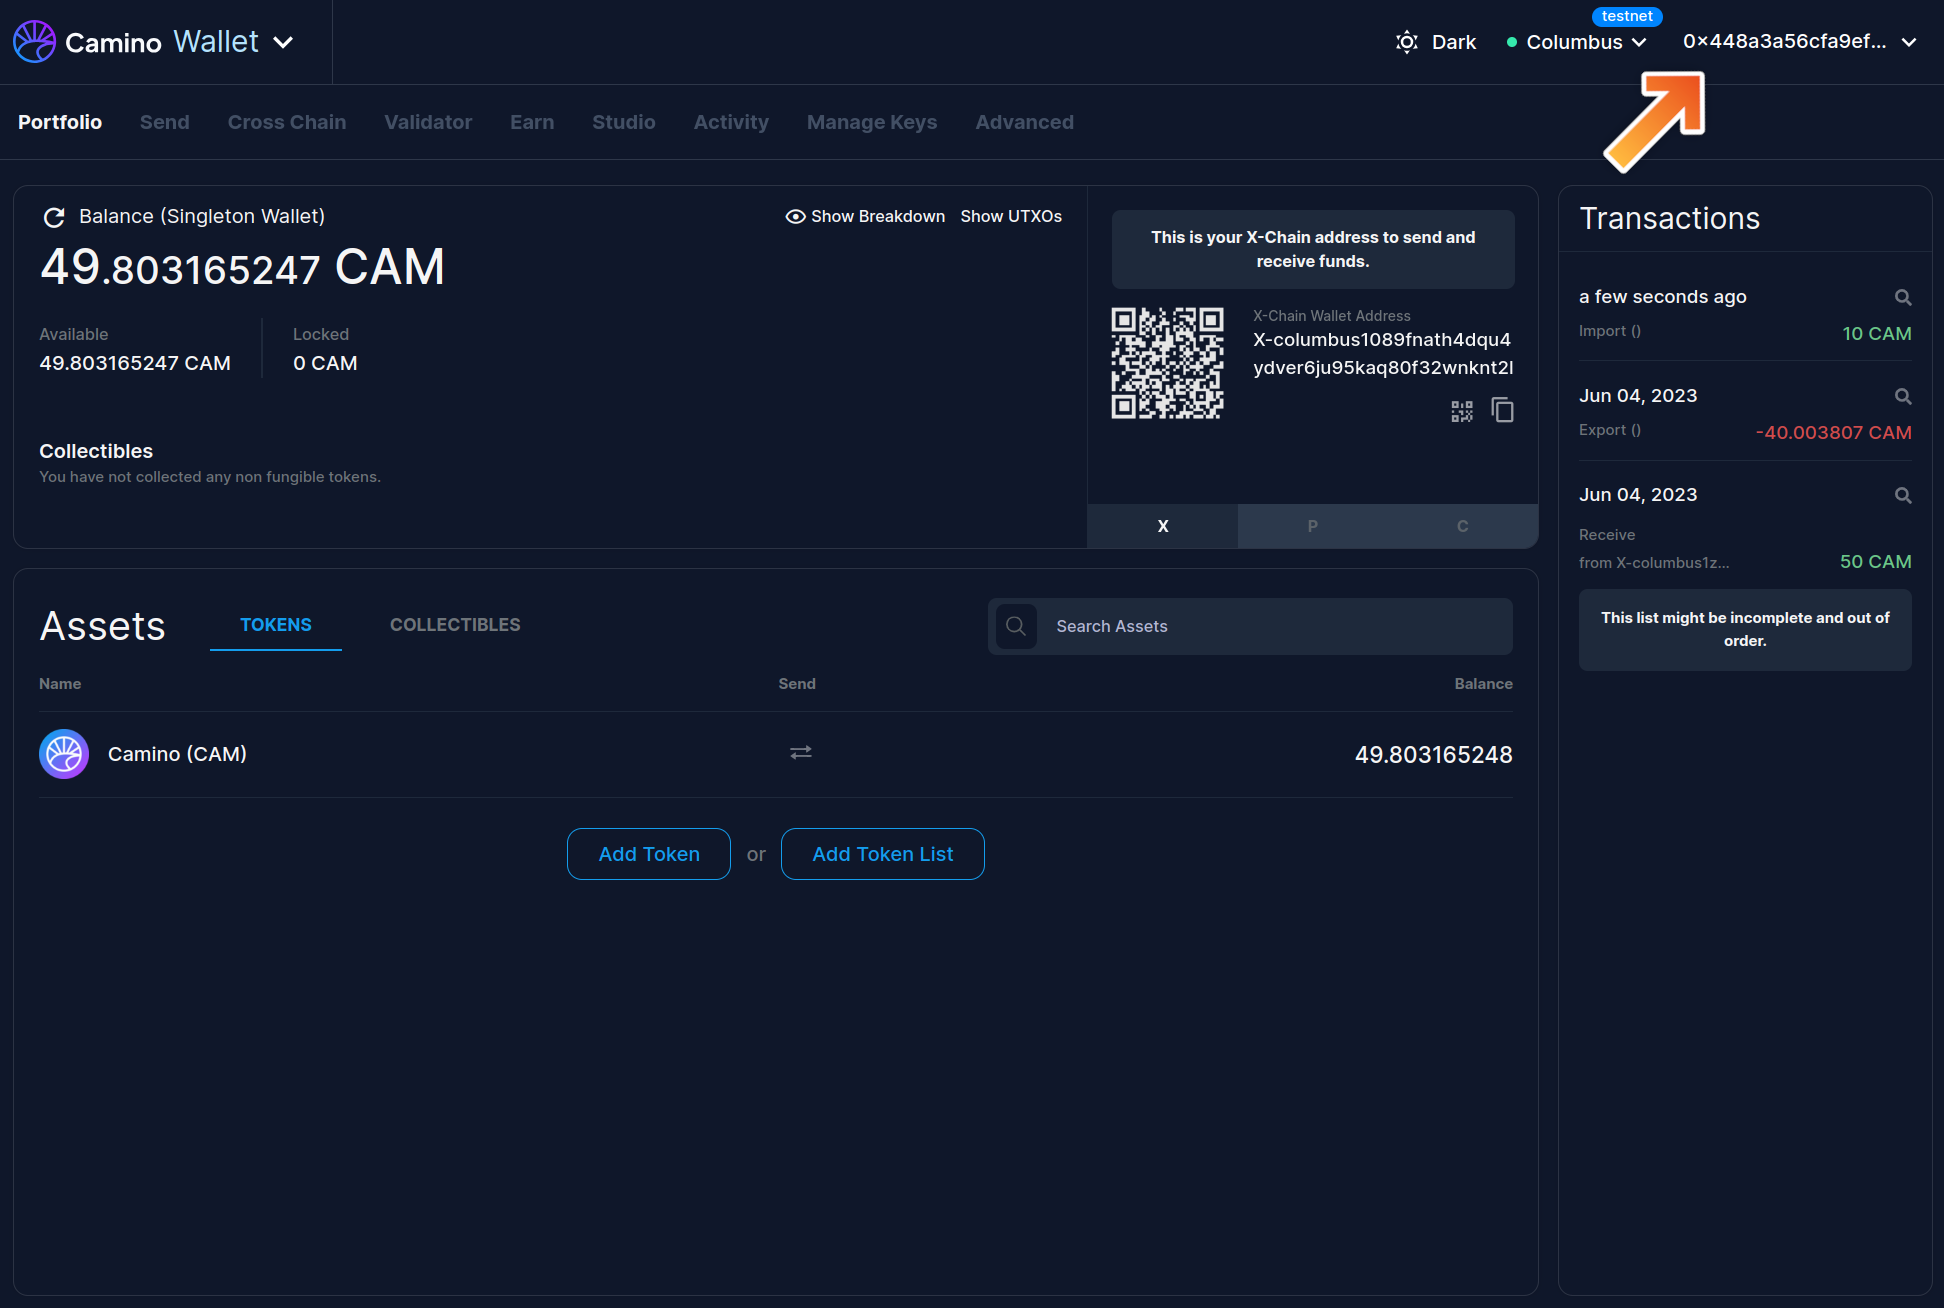
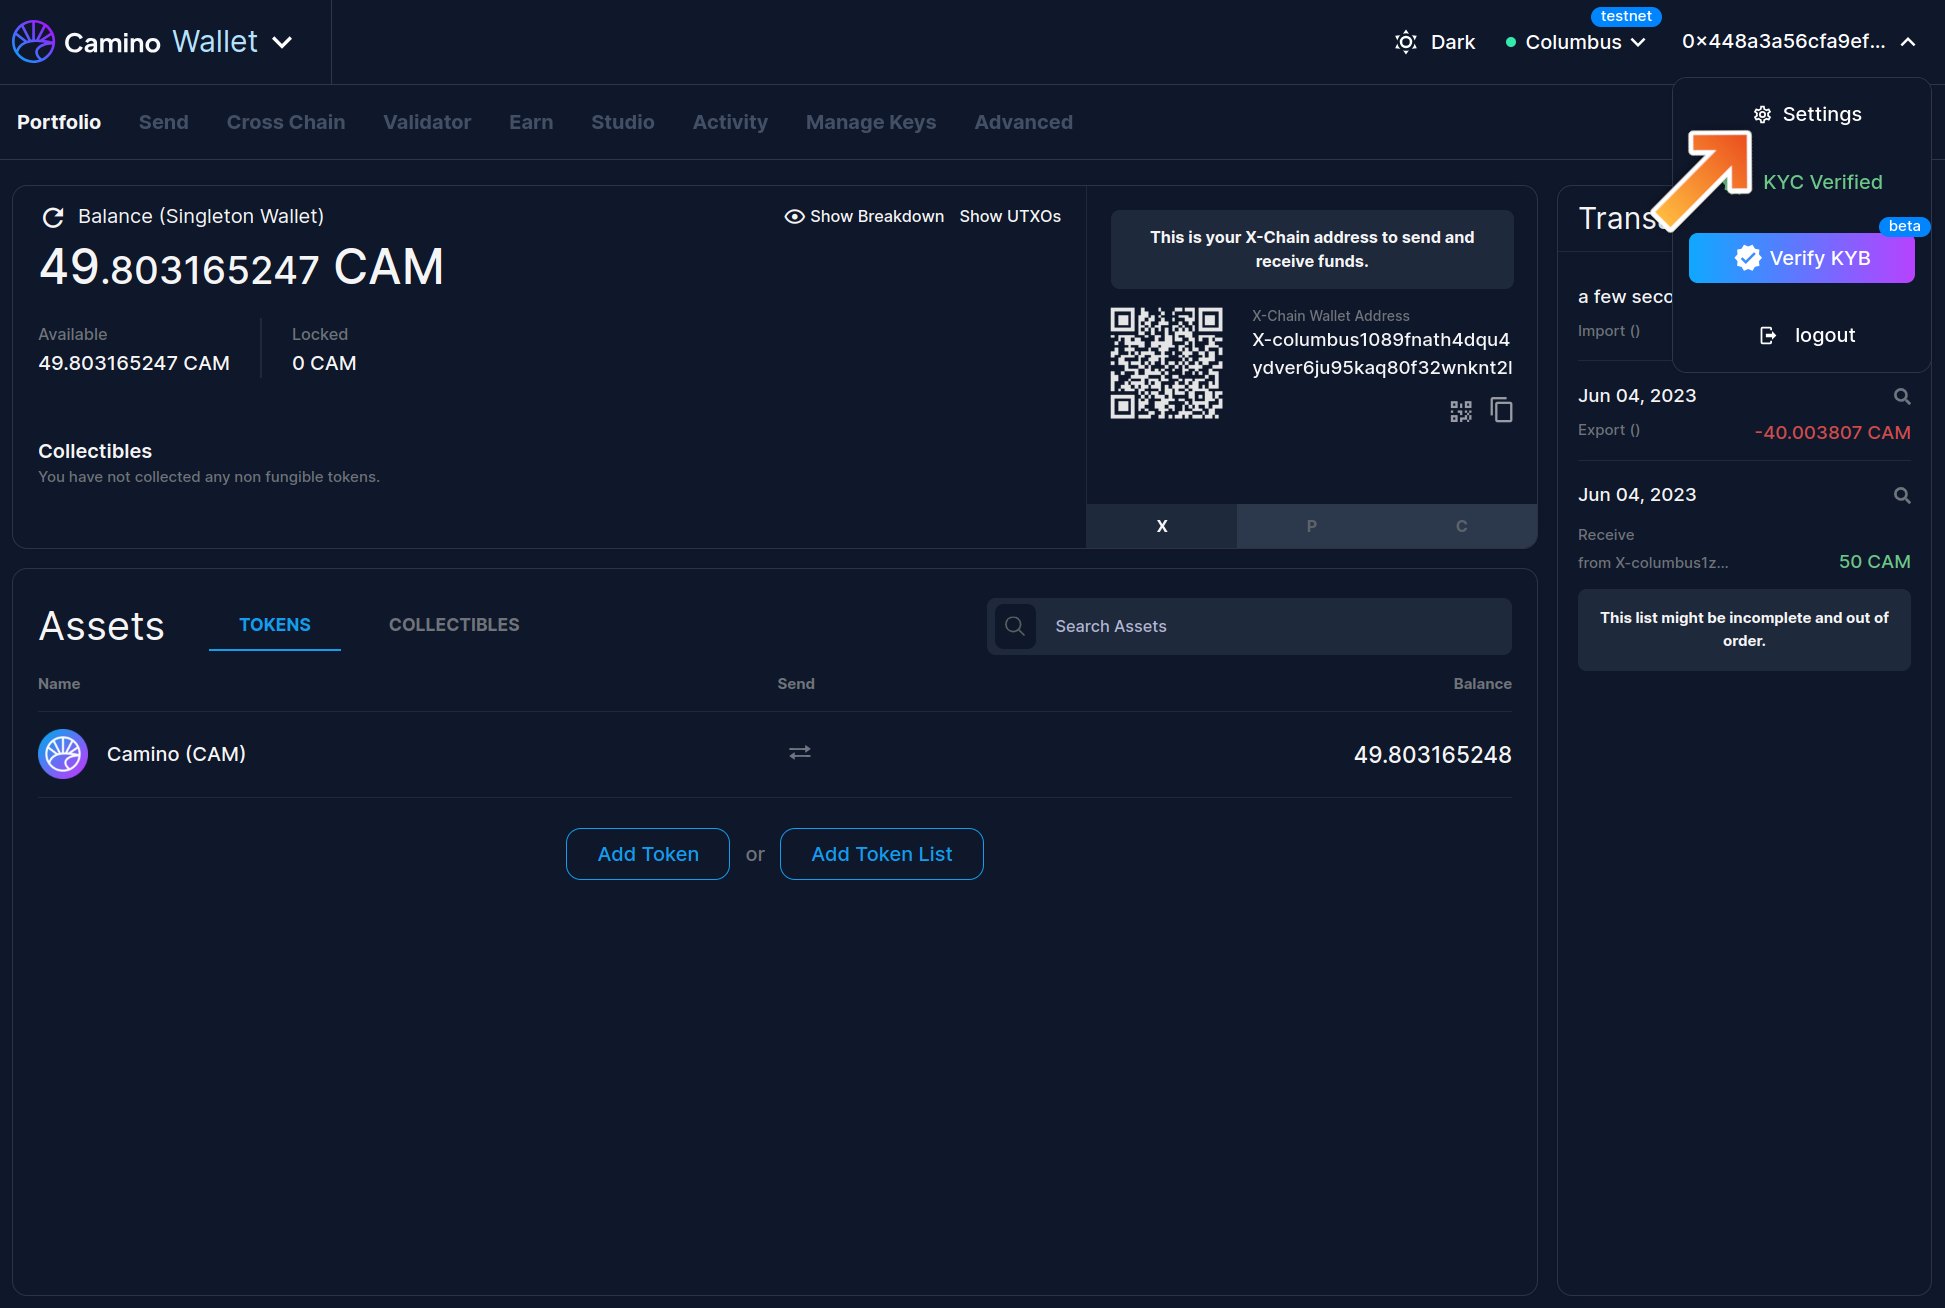
2. Navigate to Settings
- On the top right, find and select the "Settings" option.
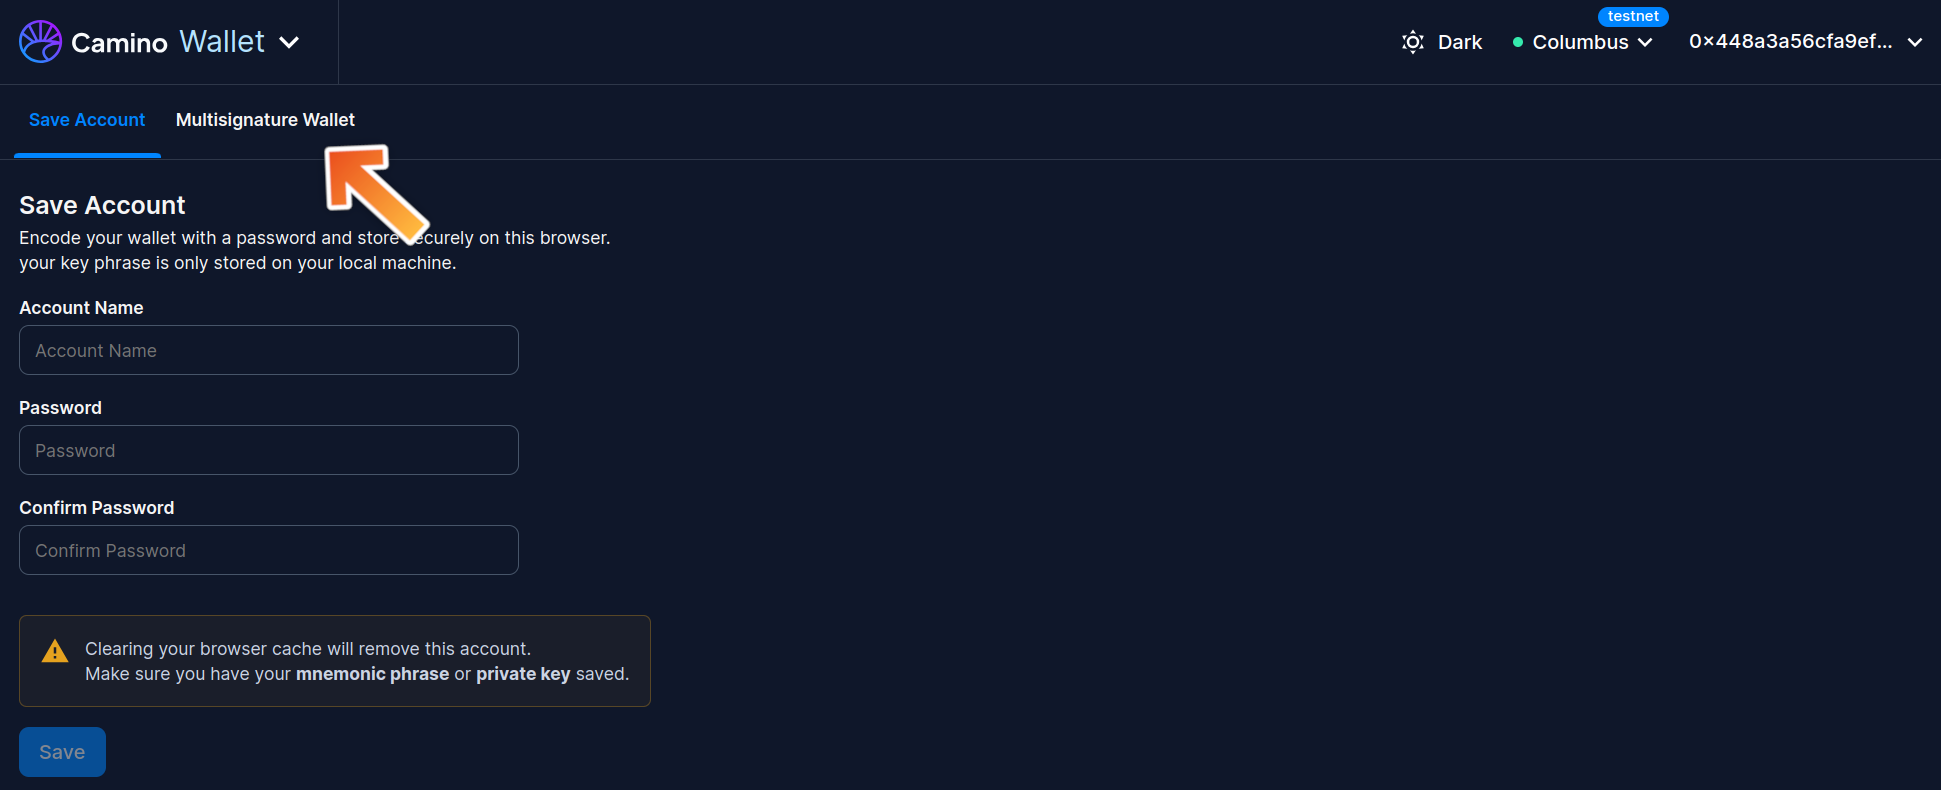
3. Access the Multisignature Wallet Tab
- Within "Settings", find and click on the "Multisignature Wallet" tab.
4. Understand the Input Fields
- Multisignature Name: This names your multisig wallet and gets recorded on the blockchain. Ensure it doesn't contain any private or sensitive information.
- Multisignature Co-owners: Lists members of the multisig wallet. The initial member is the account you've logged in with. Add more members by clicking the green '+' icon. Note: names in this section are stored in your browser's local cache and aren't blockchain entries.
It's crucial to understand that multisig aliases must not be entered as member addresses here. Nested multisigs are not supported. The implementation of MultiSig Aliases is such that they can only be signed by single-sig accounts. Consequently, signing a pending request of a MultiSig Alias with another MultiSig Alias as a member is not possible in the Frontend.
- Multisignature Threshold: Dictates the minimum number of signatures needed for transaction approval. Choose any number between 1 and the total count of members.
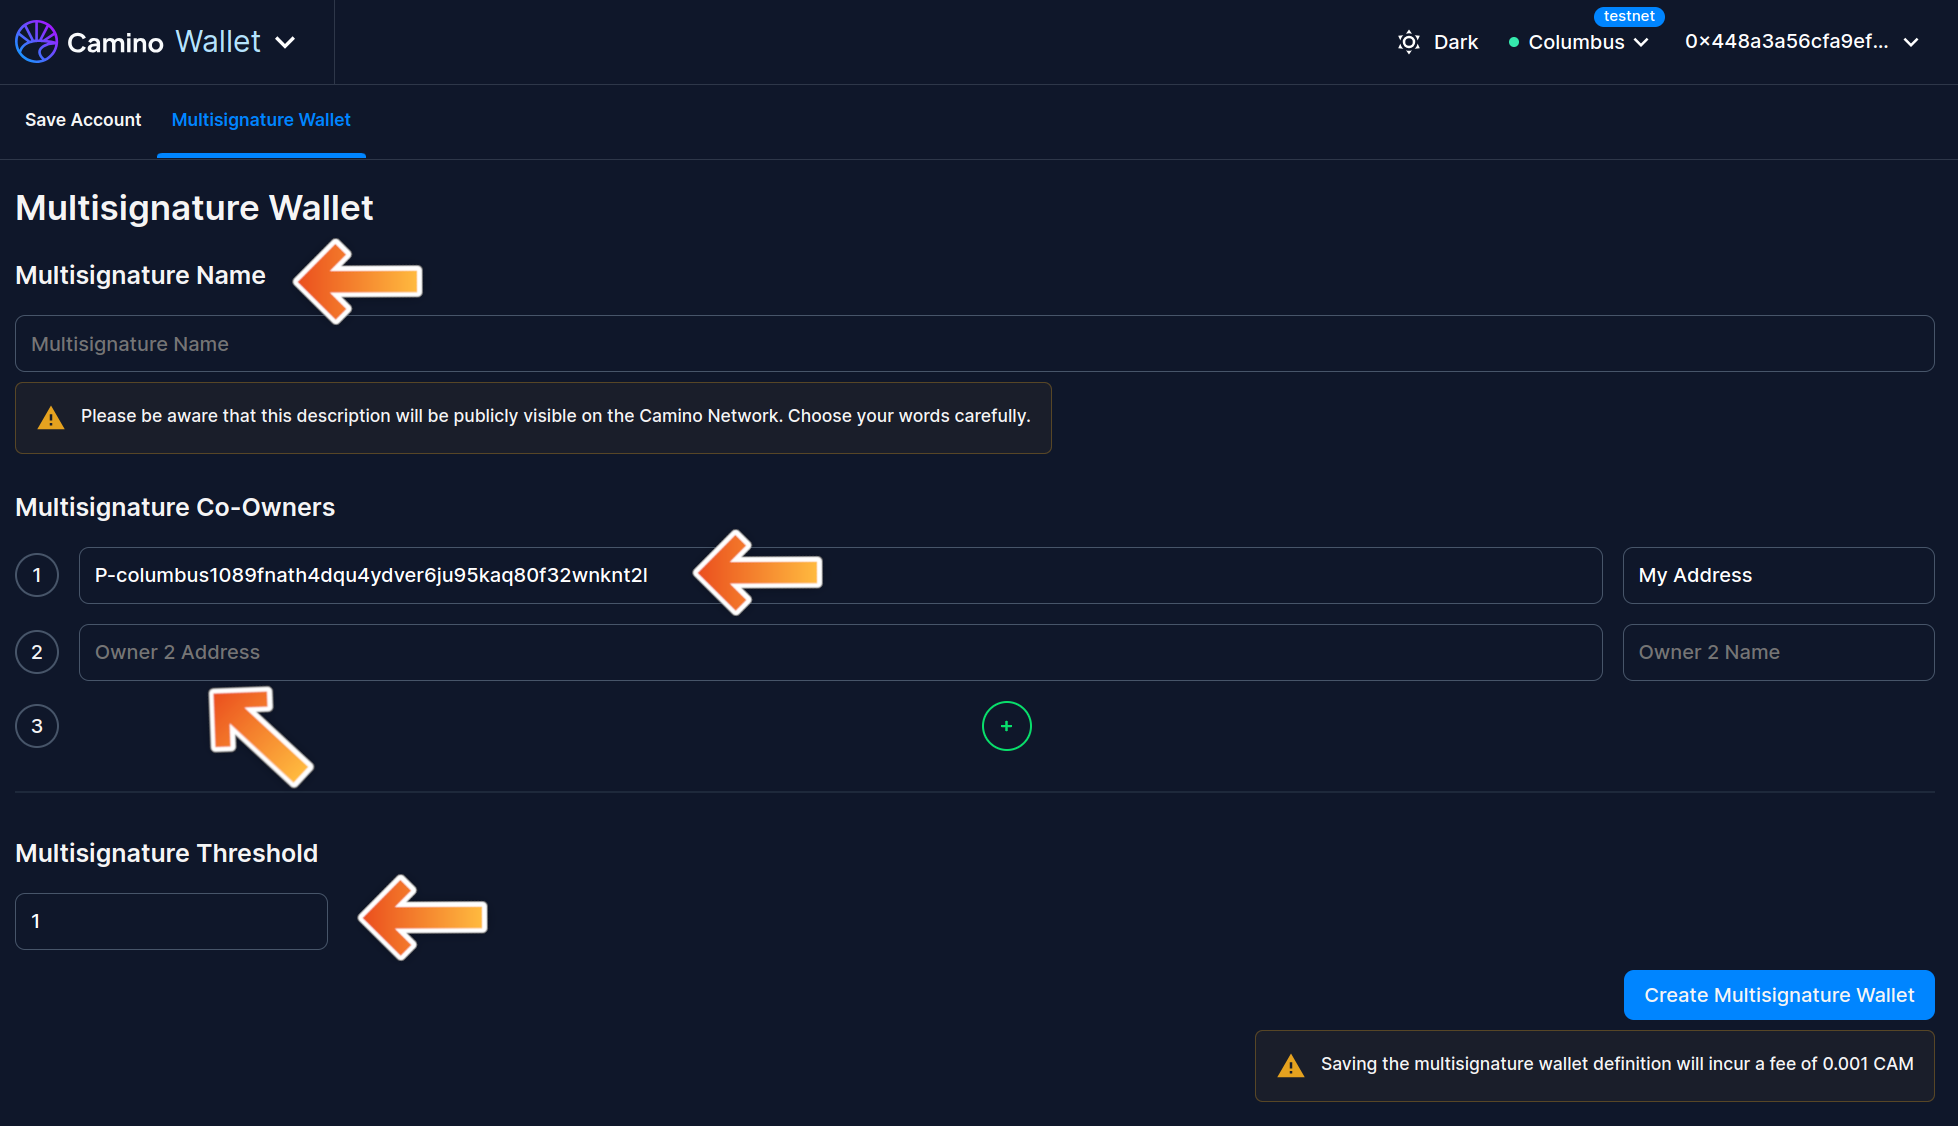
5. Complete the Form
- Type in a chosen name for the multisig wallet.
- Add member addresses, ensuring you're using P-Chain addresses for multisig wallets.
- Define your desired threshold (e.g., set to 2 for this example).
- Once all details are filled in, click the "Create Multisignature Wallet" button.
Remember, multisig operations are conducted as P-Chain transactions. Ensure you have sufficient CAM tokens in your P-Chain balance to cover transaction costs.
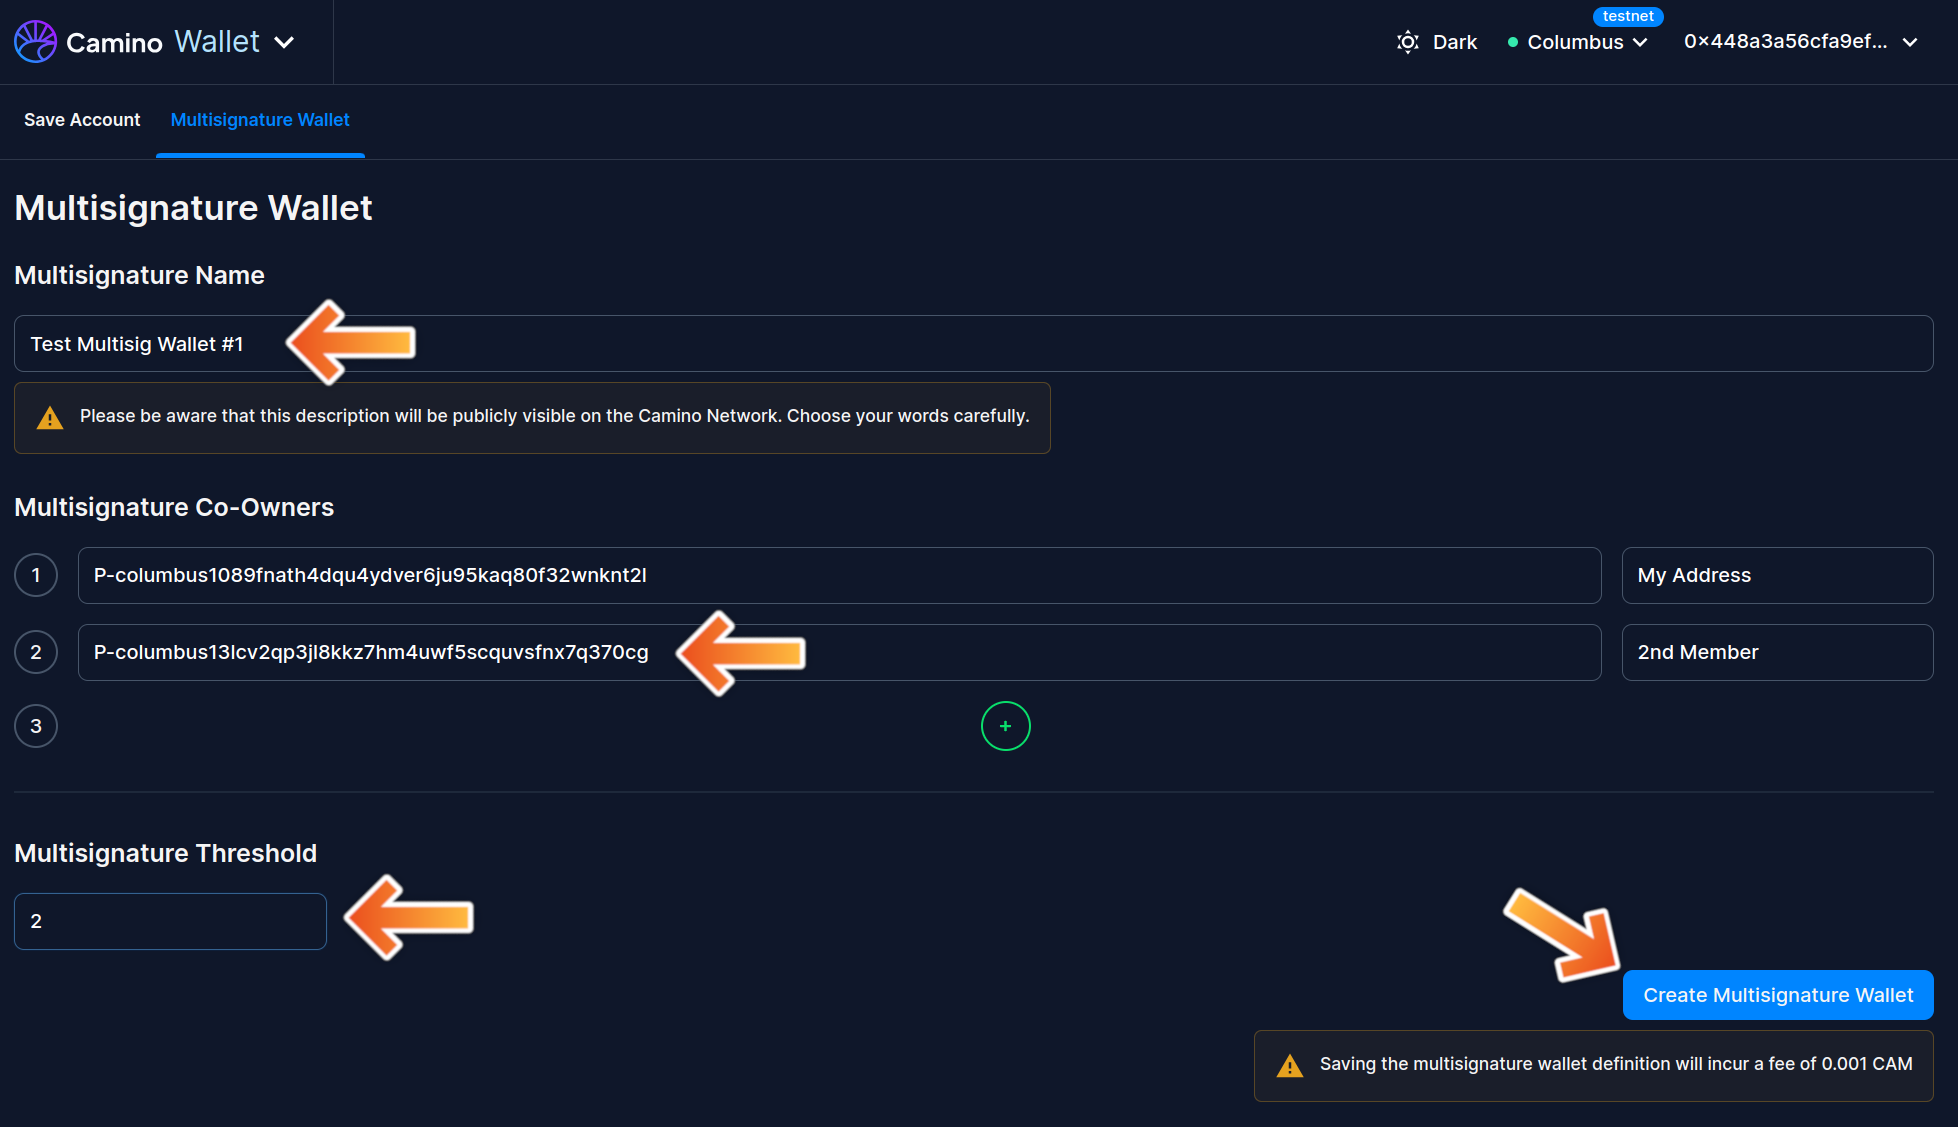
6. Activate the Multisig Wallet
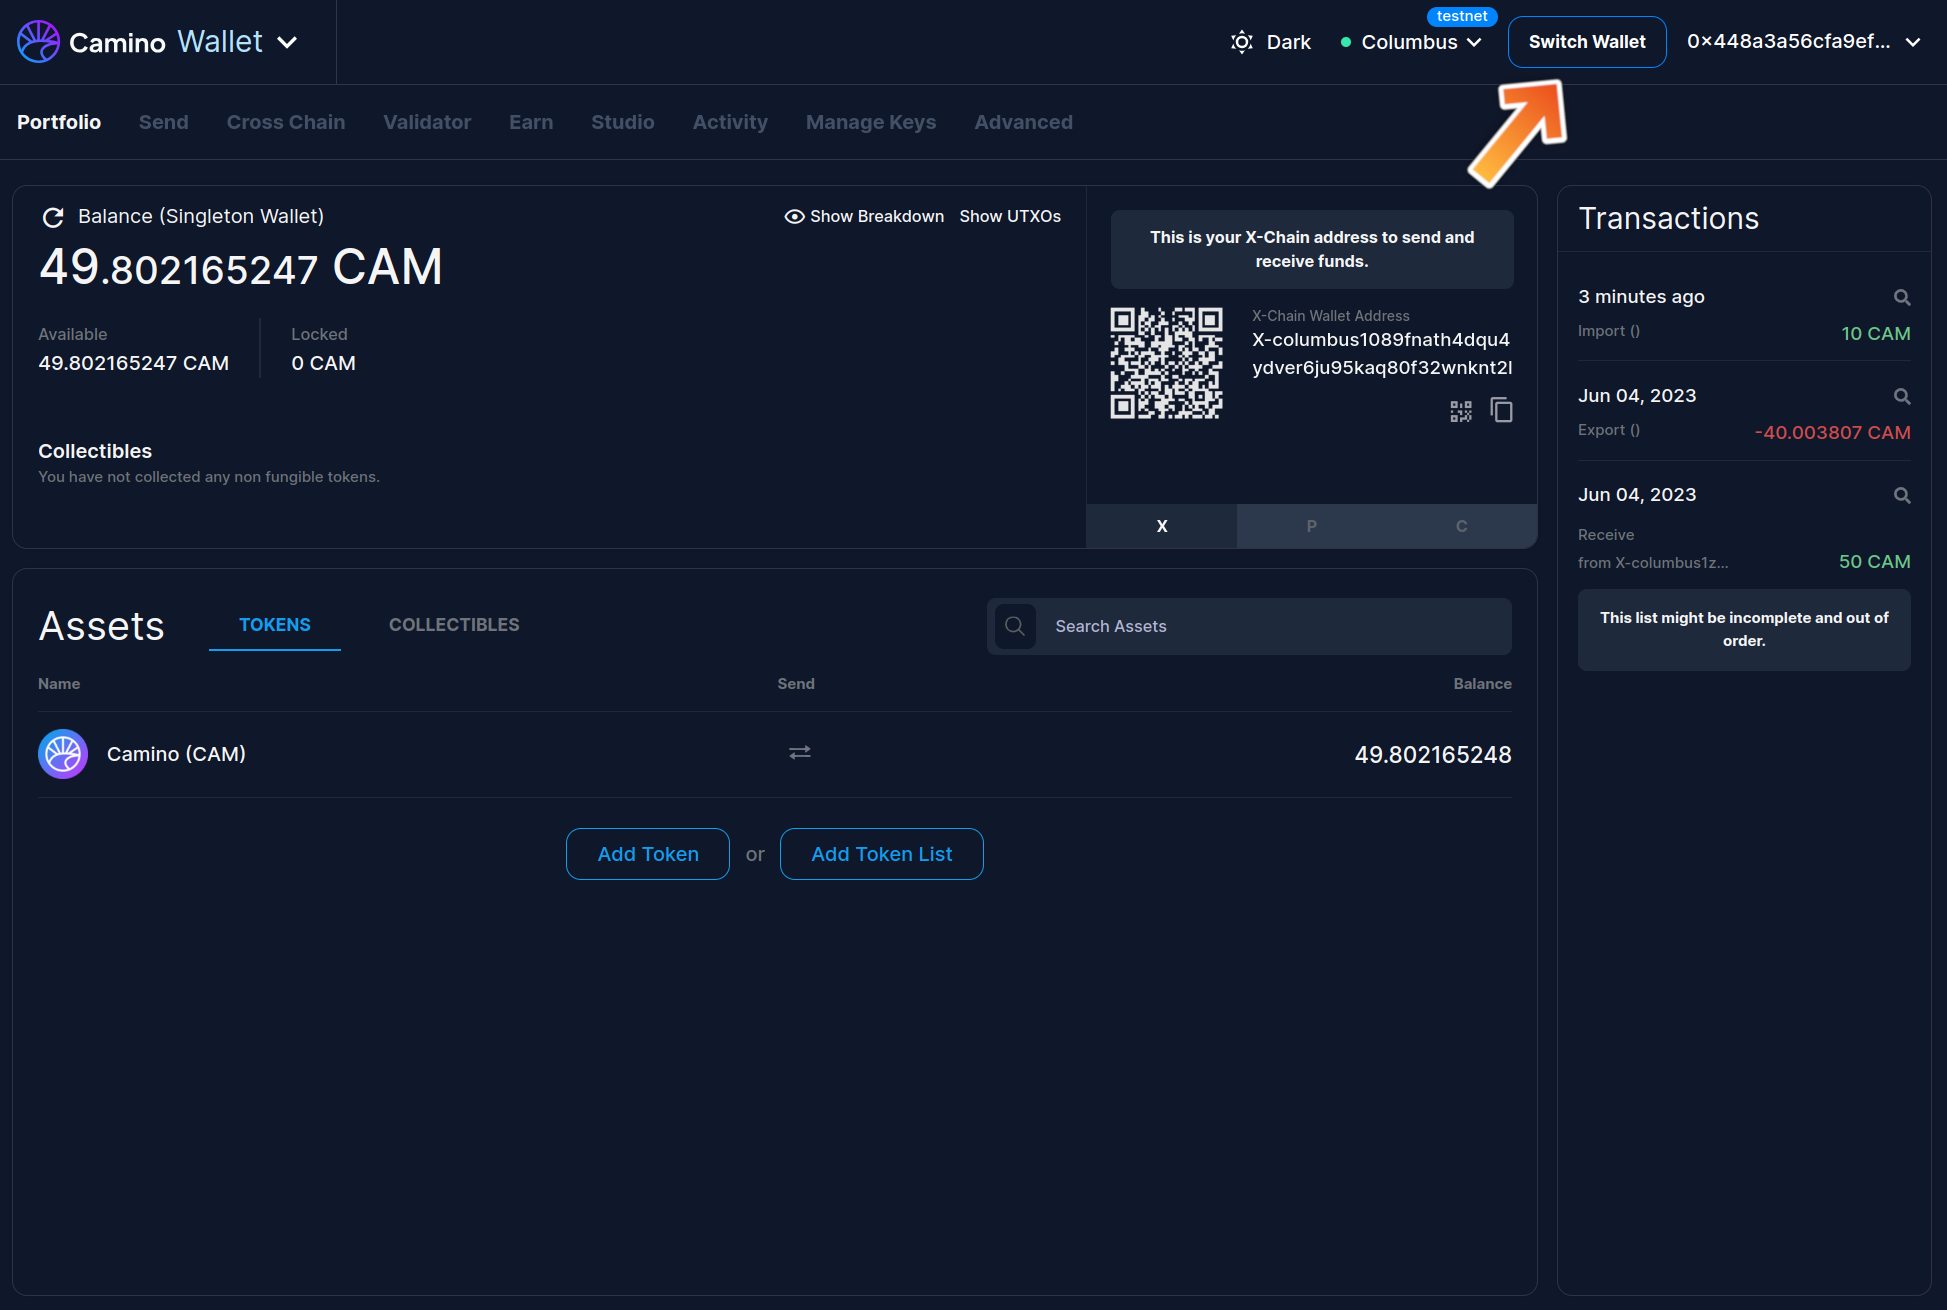
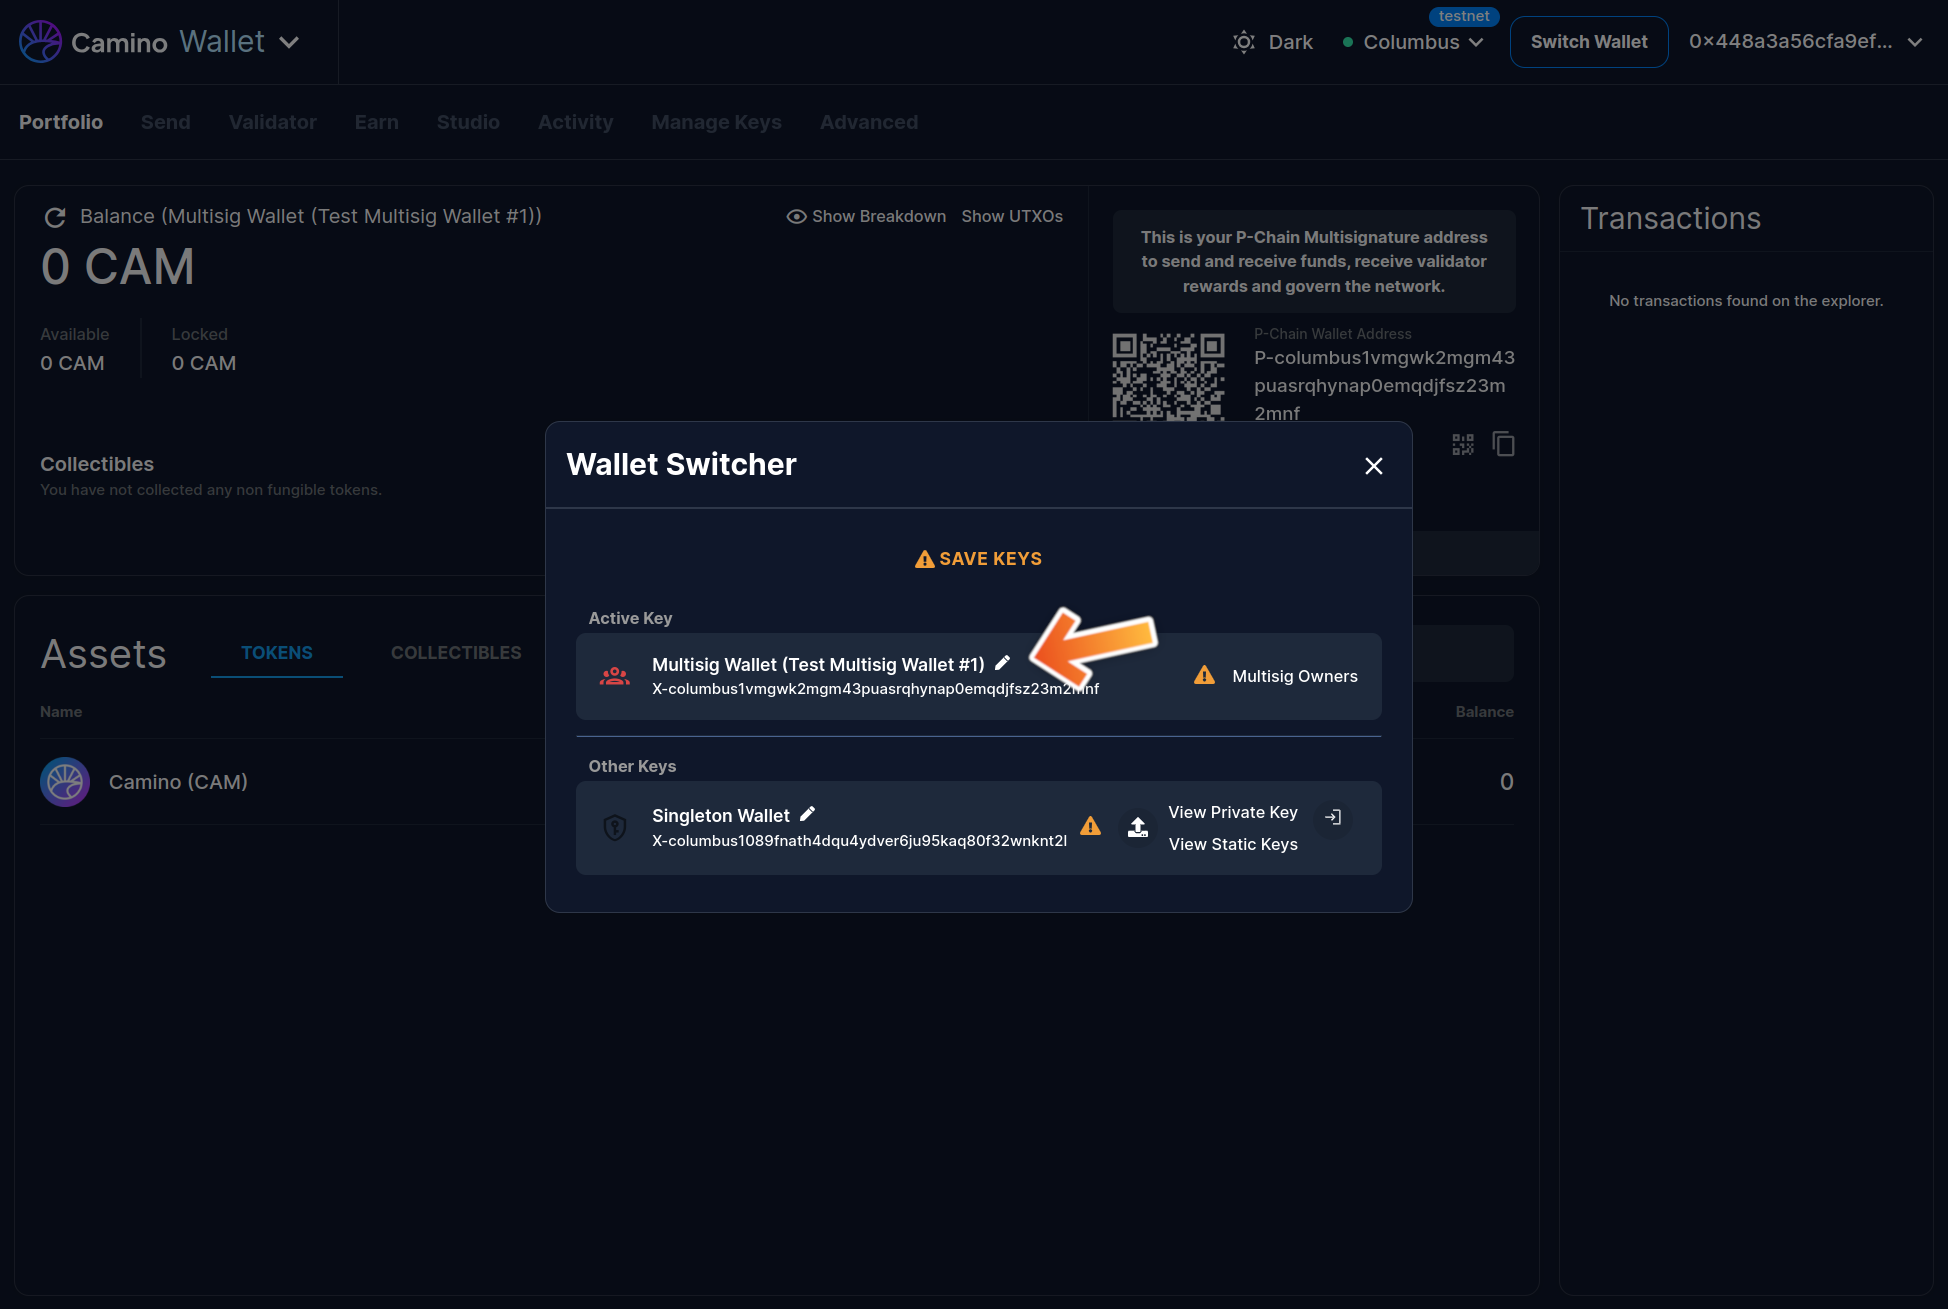
- After creation, locate and click on "Switch Wallet" in the top-right corner.
- Next, hit the small arrow button to activate your new multisig wallet.
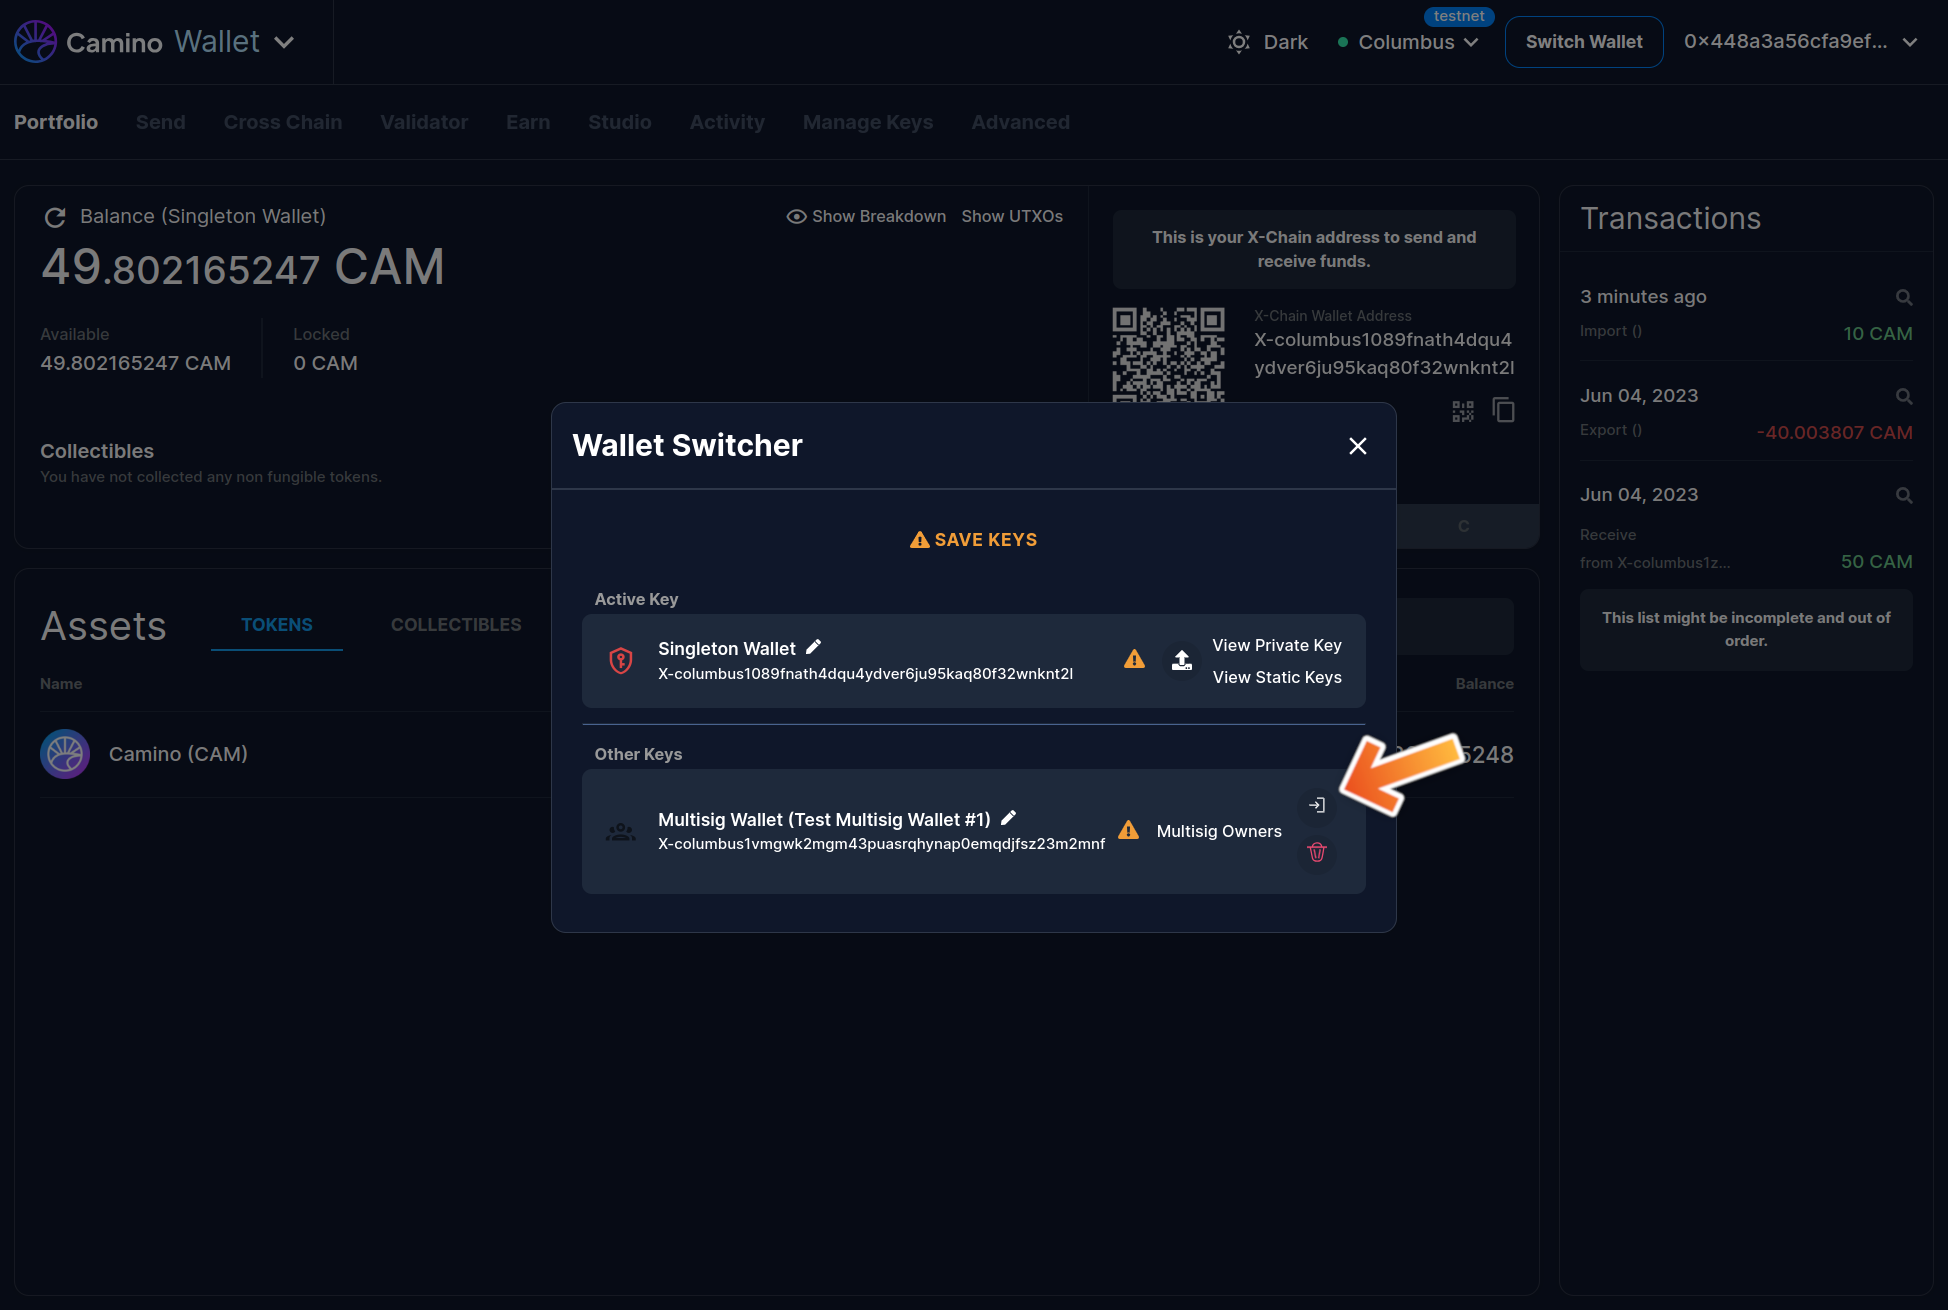
- On the dashboard, the "Active Key" section should now reflect the name of your multisig wallet.
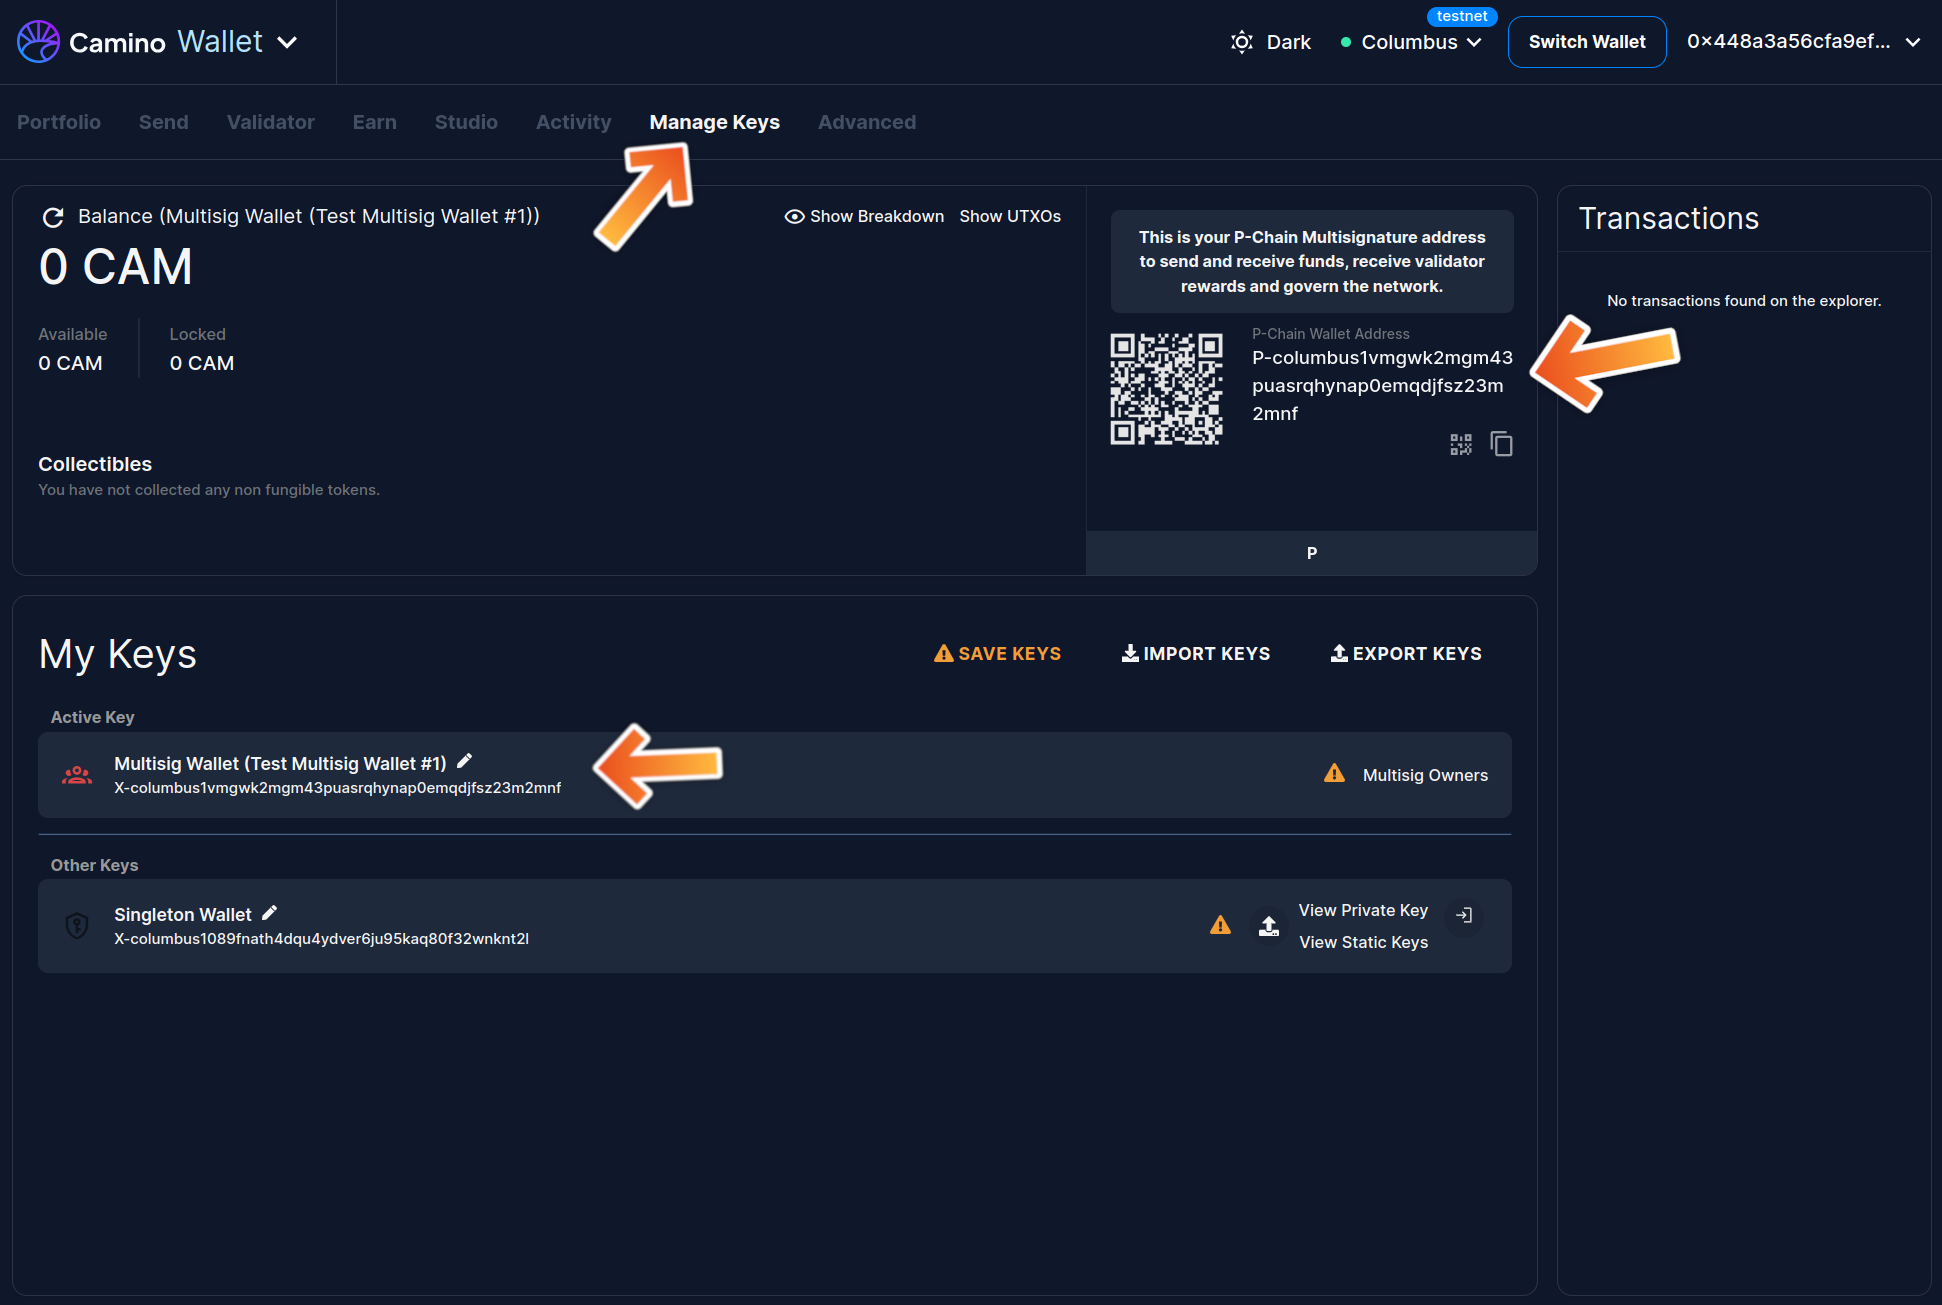
- Optionally, review your active wallet within the "Manage Keys" section of Camino Wallet.
The Camino Wallet exclusively displays the P-Chain address for multisig wallets. Currently, the multisig functionality is limited to the P-Chain, though there are plans to extend this feature to other chains in the future.
Editing Multisig Wallet
1. Open the Multisignature Wallet Settings
- Navigate back to the "Settings" section from the top right.
- Within "Settings", click on the "Multisignature Wallet" tab.
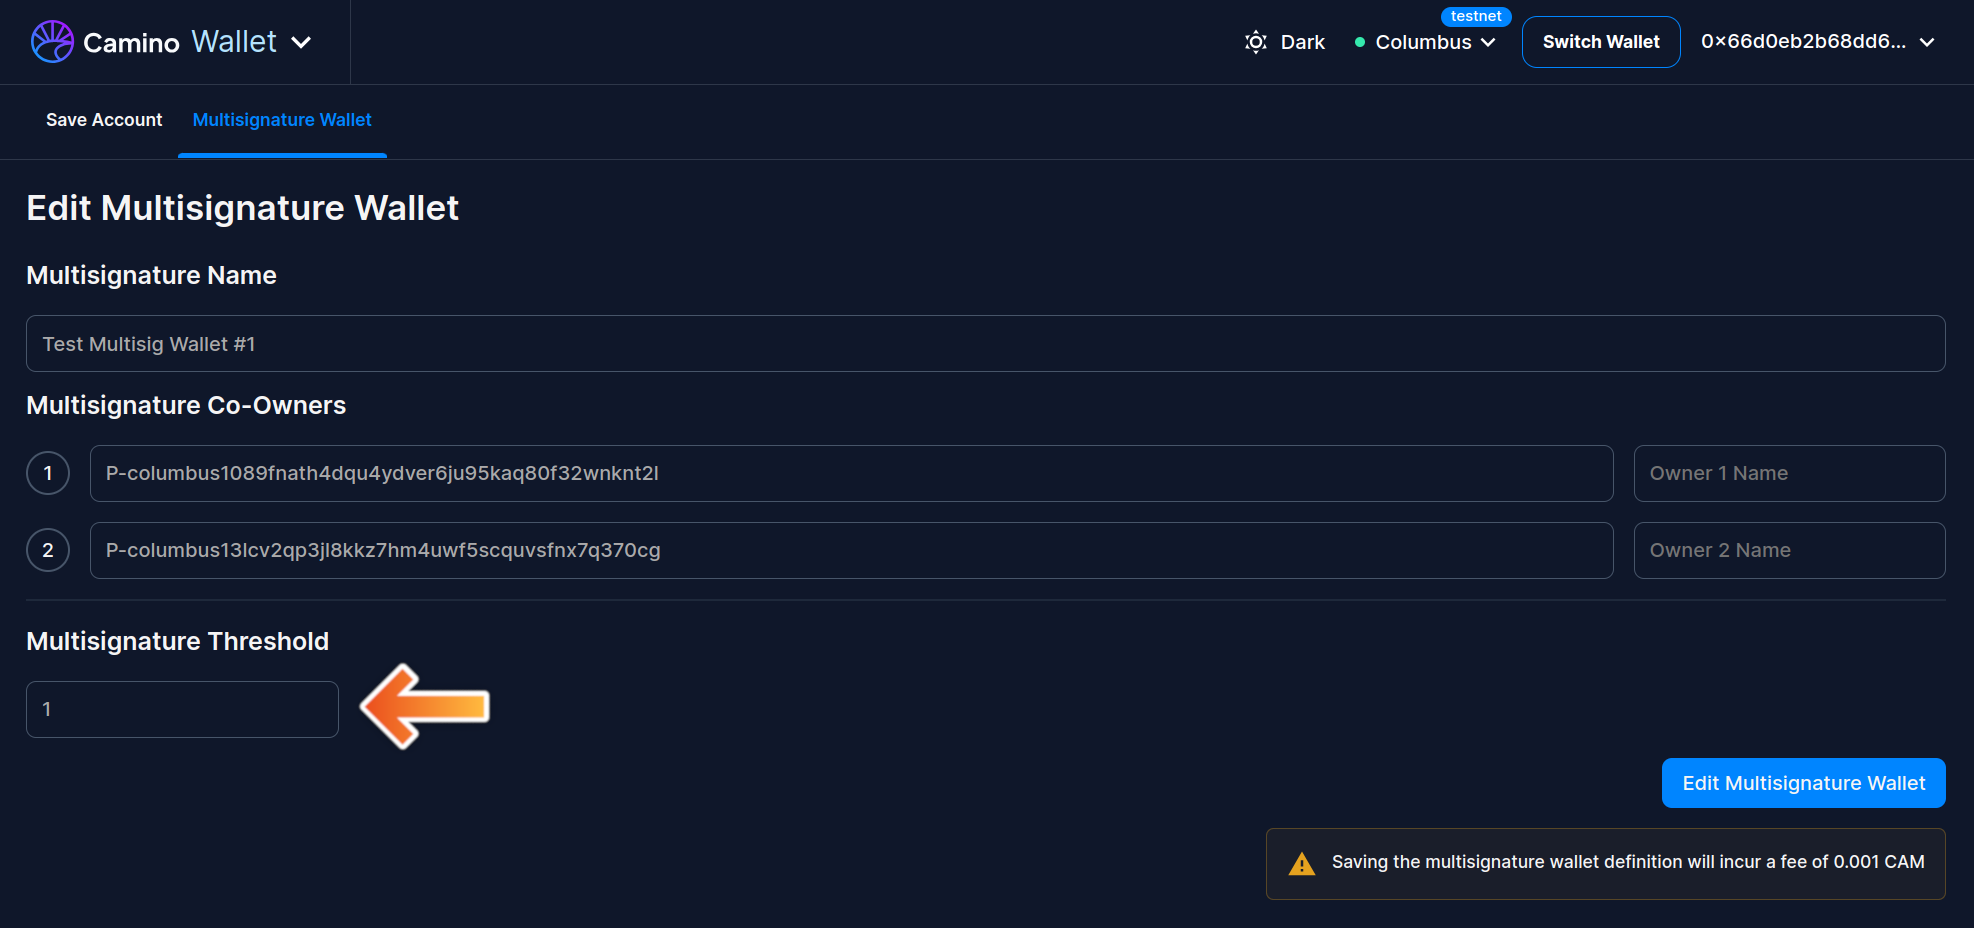
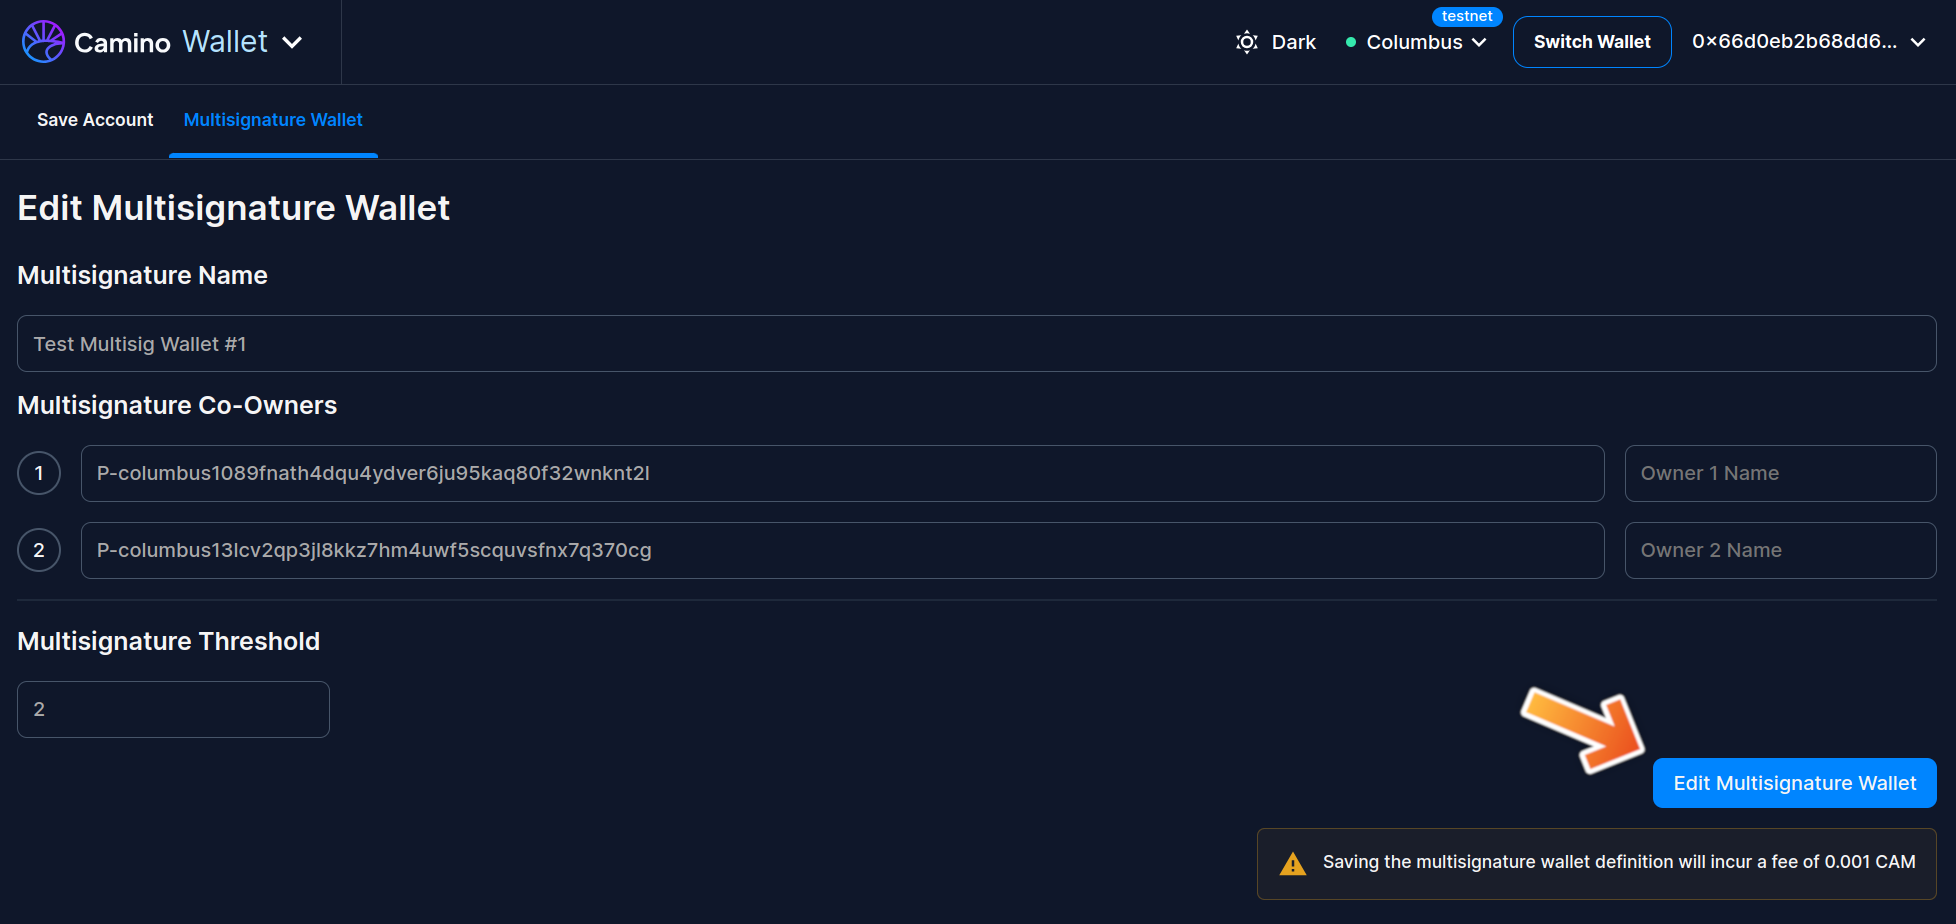
- Locate and select the "Edit Multisignature Wallet" button to initiate edits.
2. Modify the Details
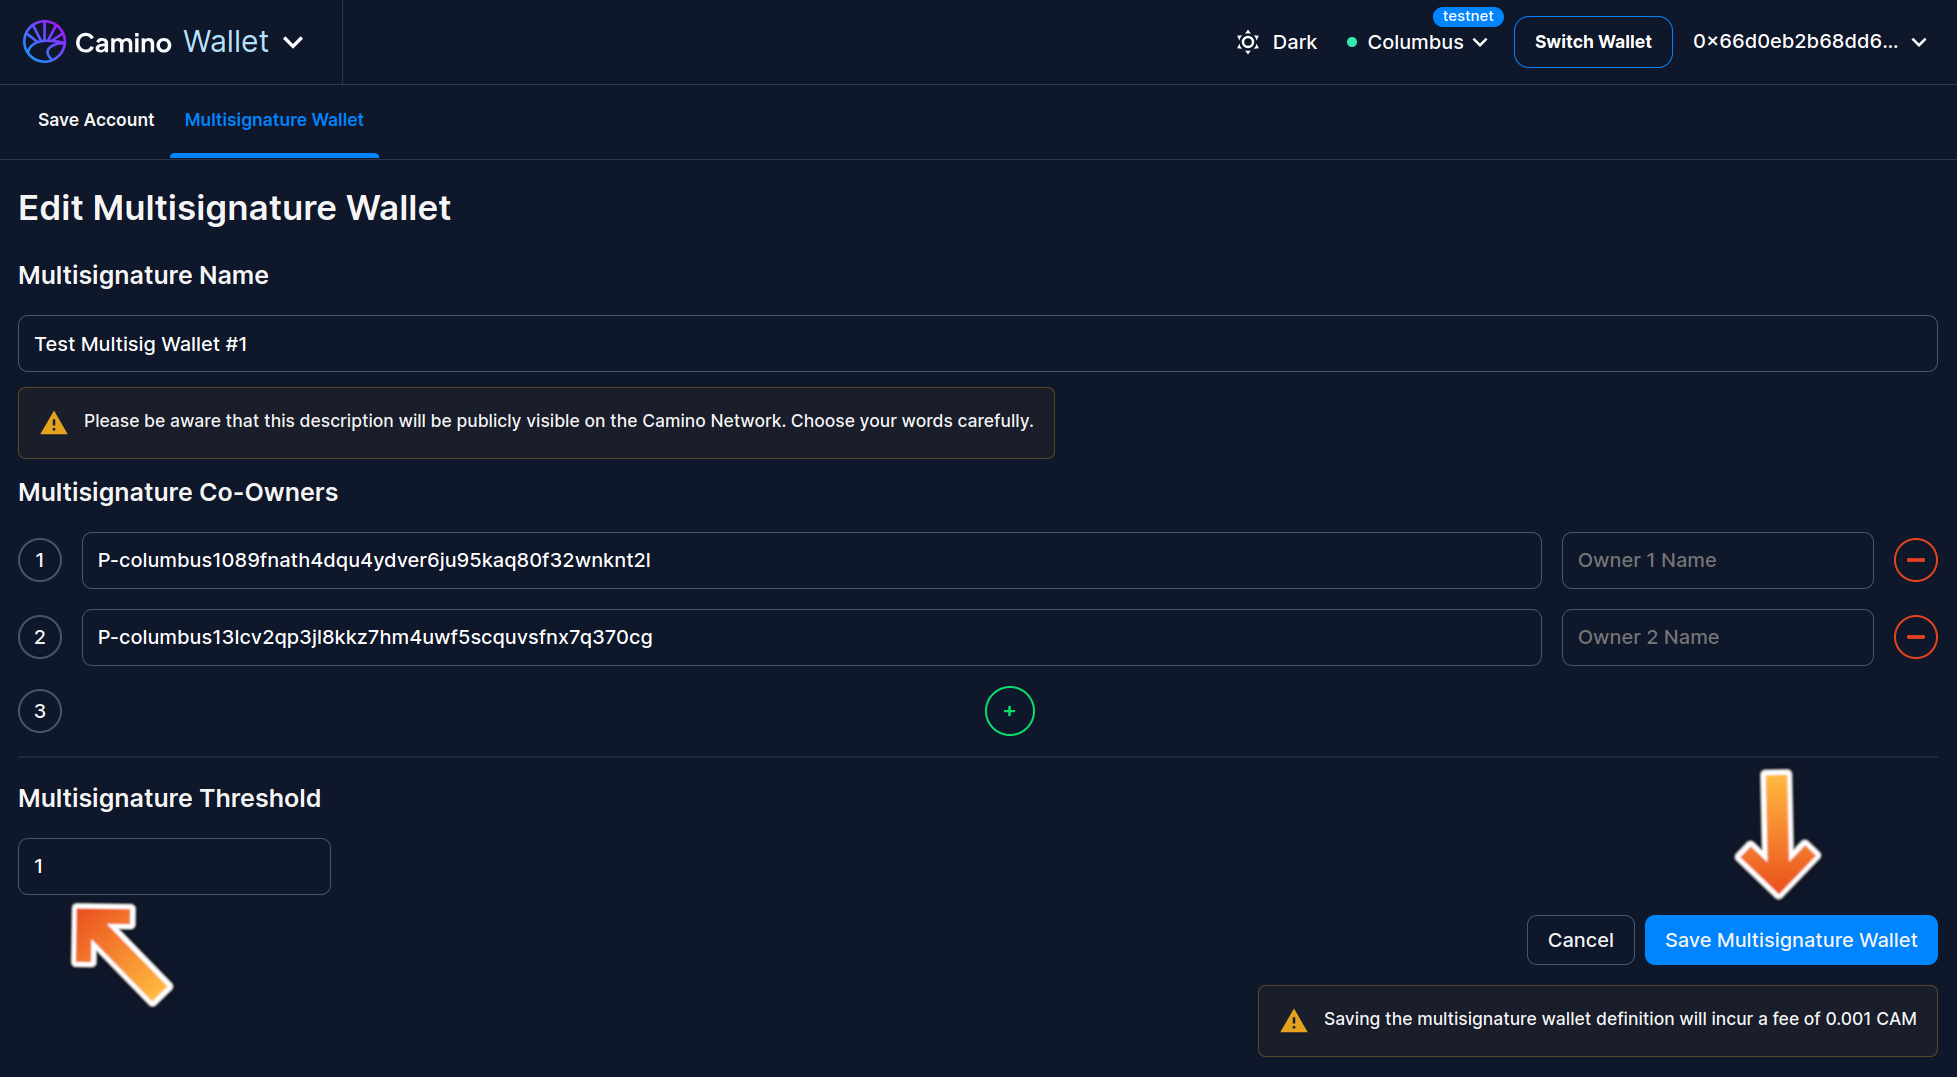
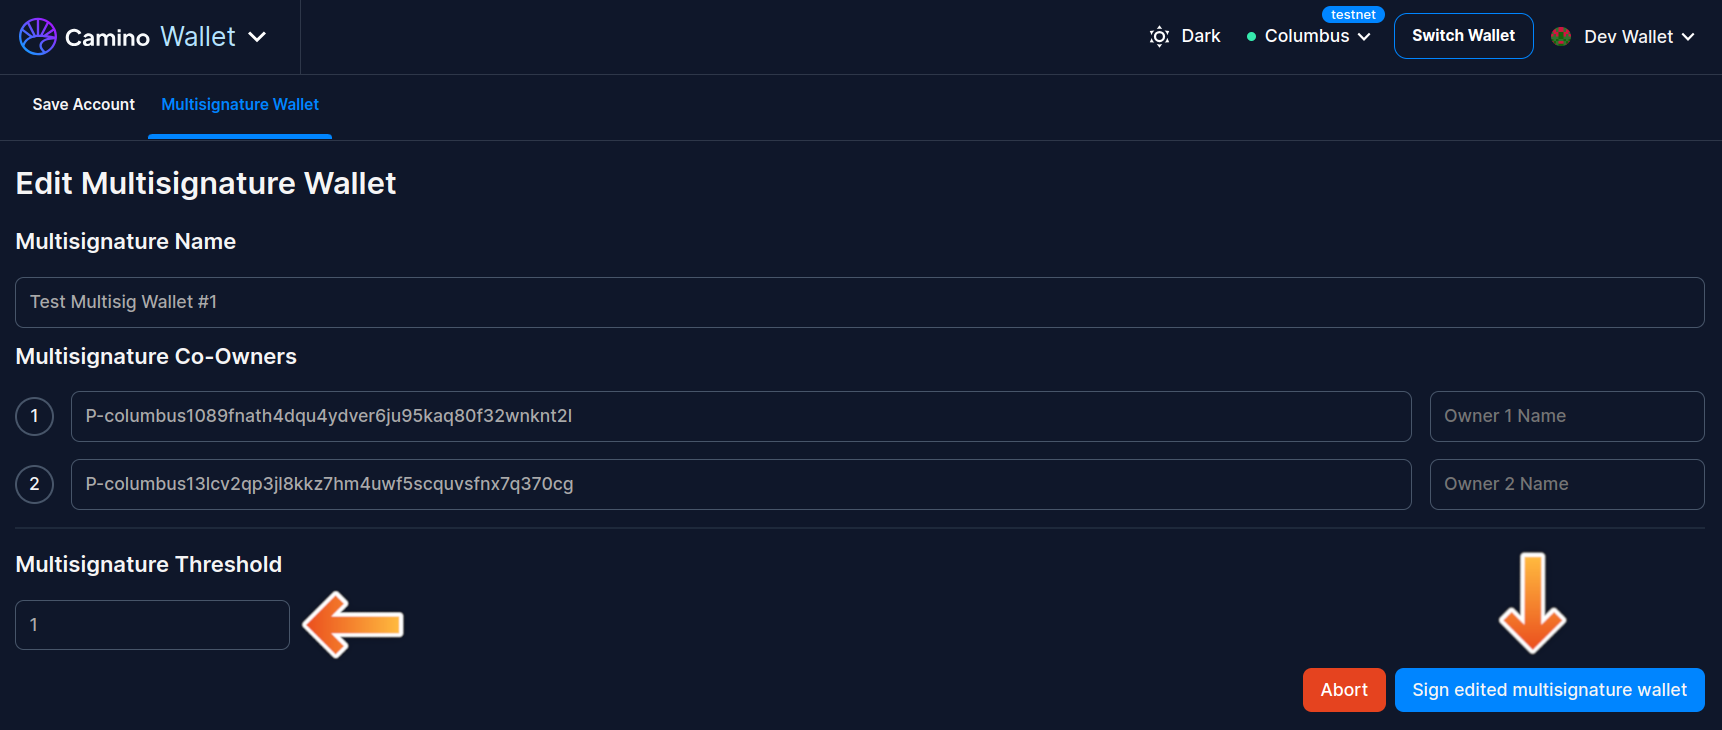
- Adjust the required fields. For instance, you might change the threshold from 2 to 1.
- Make any other desired changes, ensuring all modifications are accurately filled.
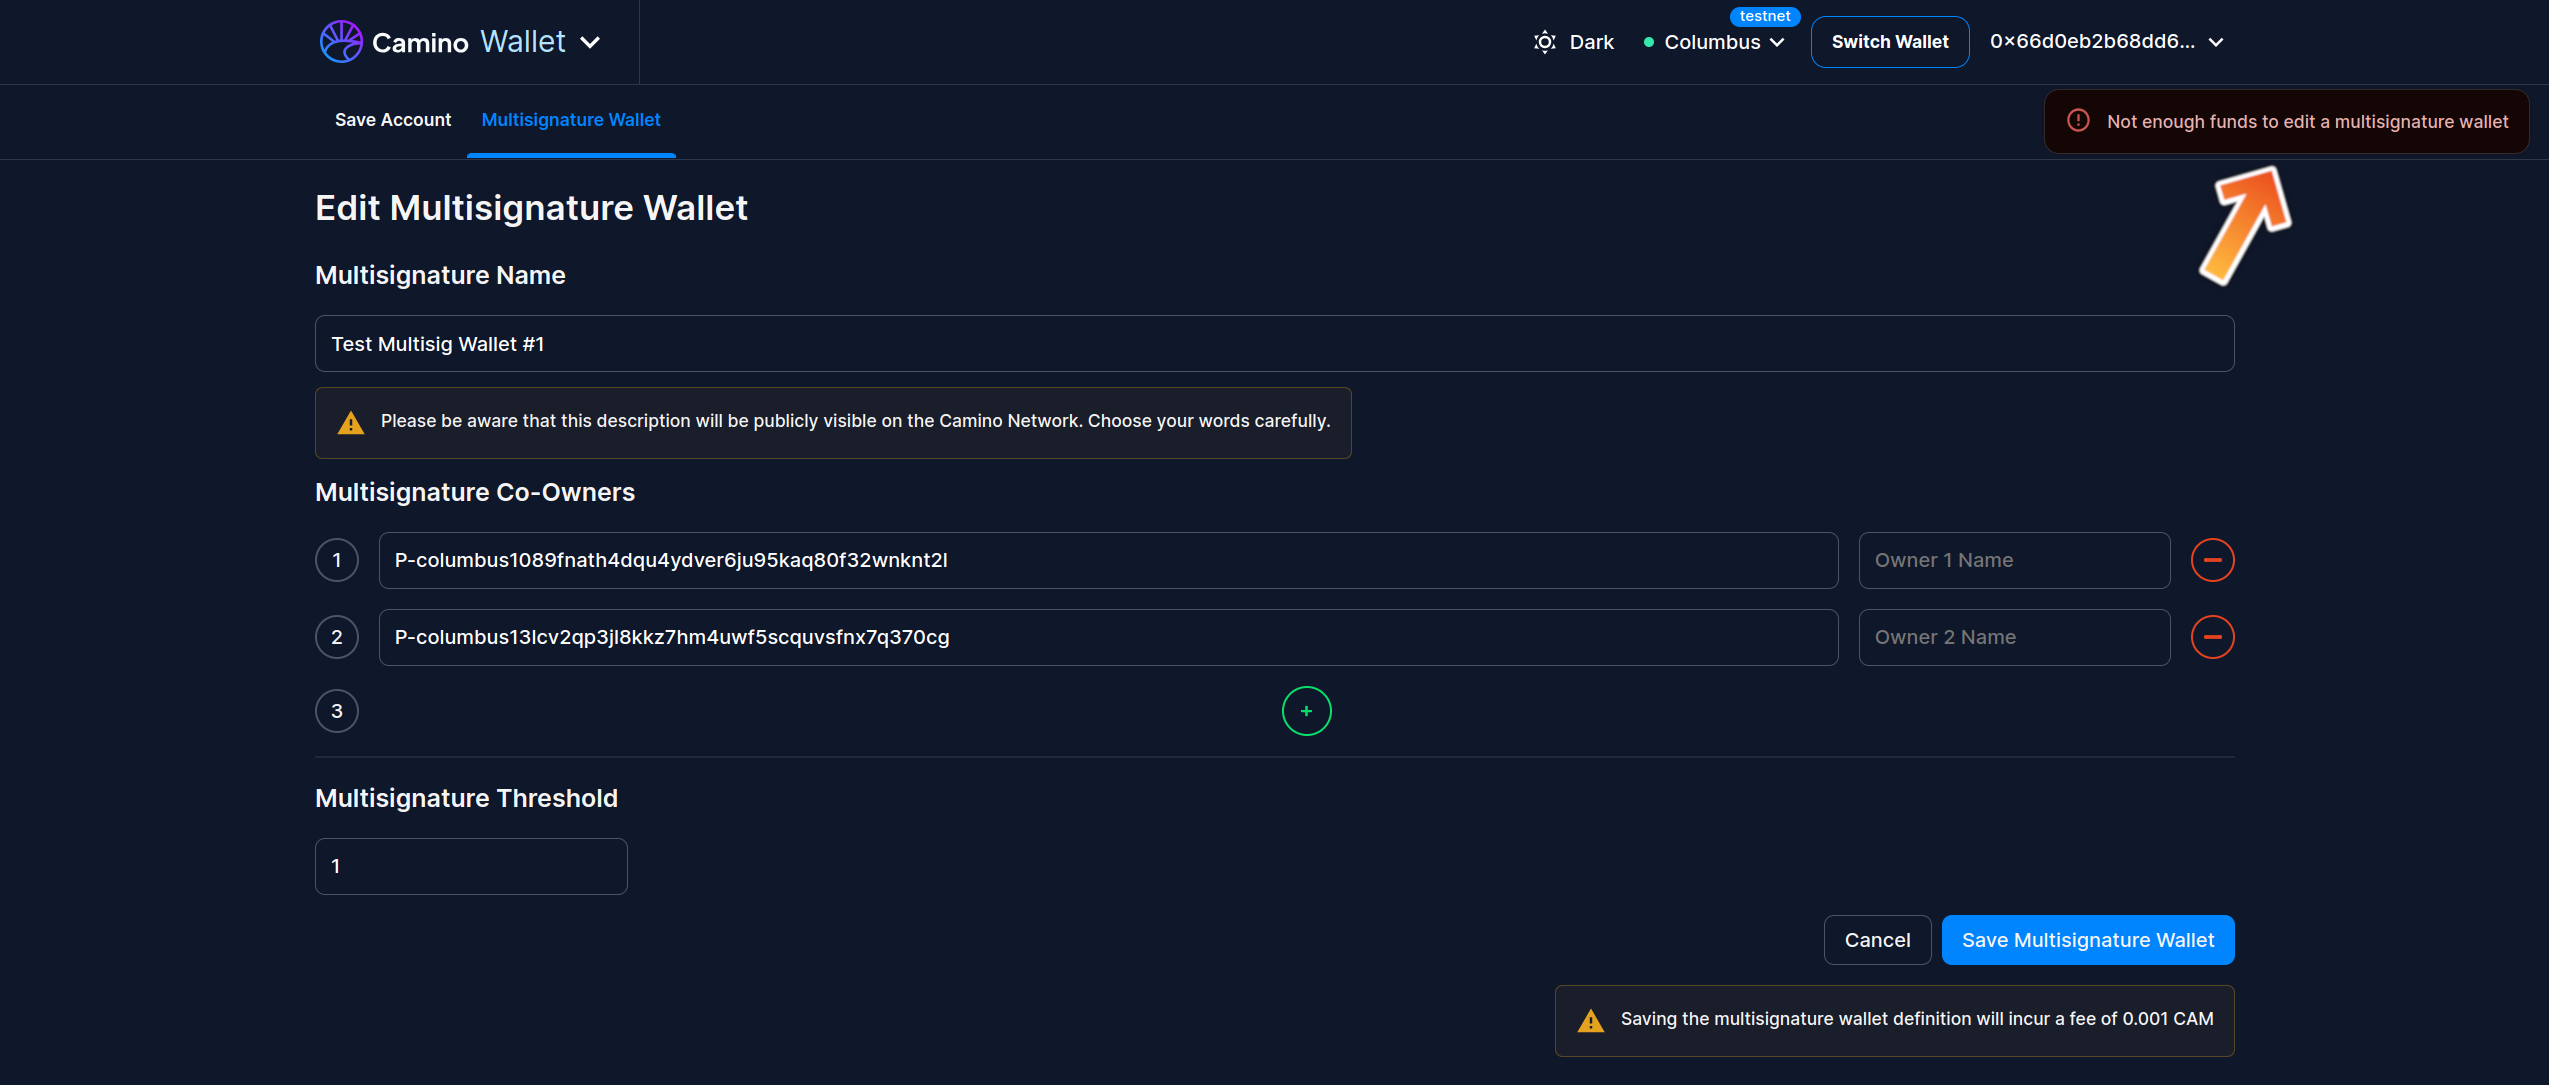
- After making your edits, click on the "Save Multisignature Wallet" button to update the wallet settings.
3. Ensure Your Multisig Wallet Has Sufficient Funds
- If an error message indicating insufficient funds appears (which it will if you did follow this guide and haven't transferred any funds to your multisig wallet in between), you'll need to transfer some CAM to your multisig wallet to cover the transaction fees.
- To do this, copy your multisig wallet's P-Chain address. (See "SPOT THE ADDRESS" tip above)
- Navigate to your primary (or single sig) wallet, initiate a fund transfer to the copied multisig address, and confirm the transaction.
4. Apply the Changes
- After ensuring your multisig wallet has sufficient funds, return to the "Multisignature Wallet" settings.
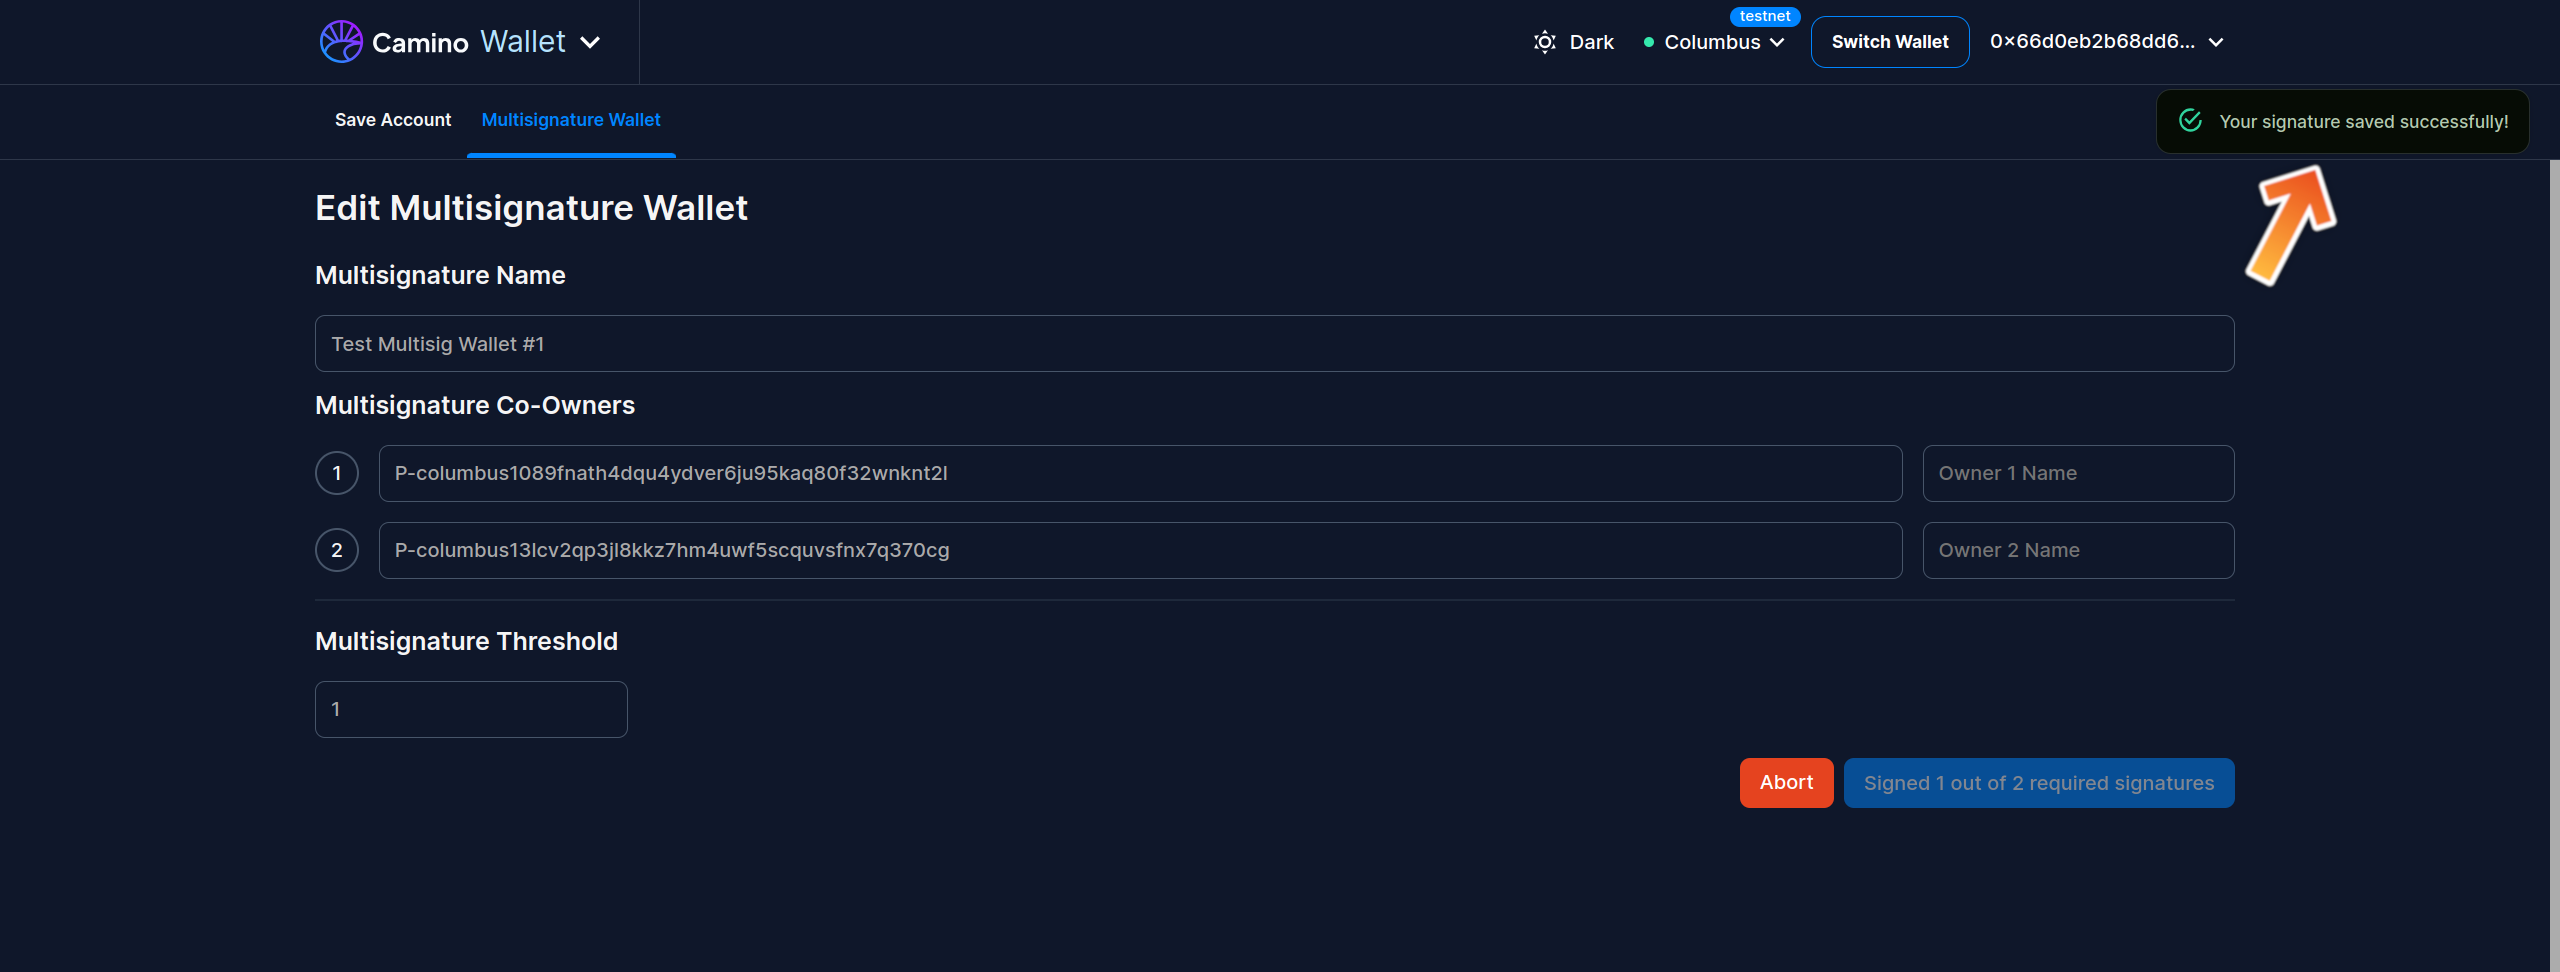
- Try saving the wallet again. A success message should display in green, indicating the updates have been saved.
- The button will update to display "Signed 1 out of 2 required signatures". Next, log in with the other member's account to sign the edit operation, enabling the transaction's execution.
5. Sign in with Another Member Account
- In a separate browser tab, sign in with the credentials of the next member account required to co-sign the transaction.
- Proceed to the "Multisignature Wallet" tab under "Settings".
- Review the modifications and, if they meet your approval, confirm the changes made earlier.
6. Finalize the Transaction
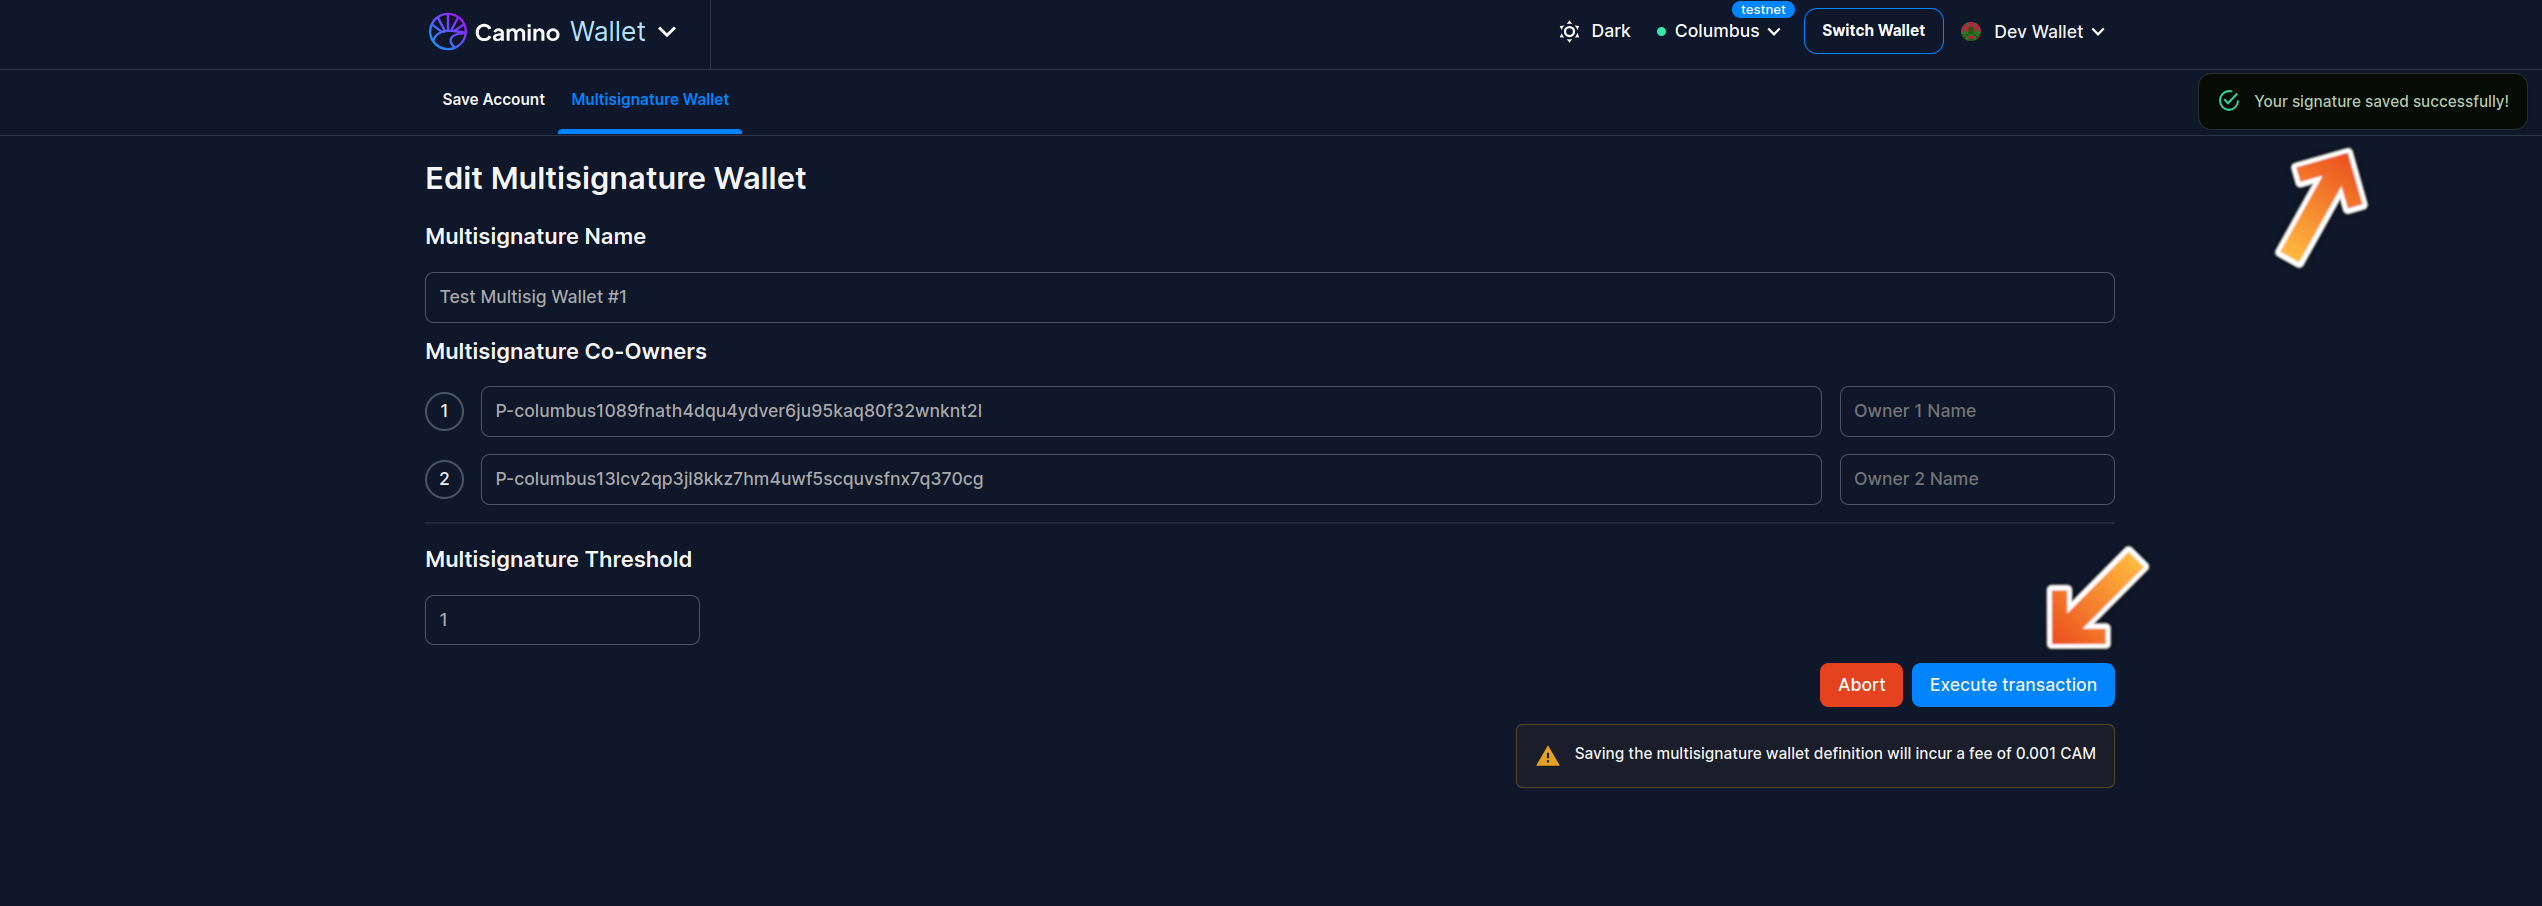
- After all required member accounts have approved the changes, execute the transaction.
7. Confirm the Transaction
- A confirmation message should appear, validating the success of the transaction.
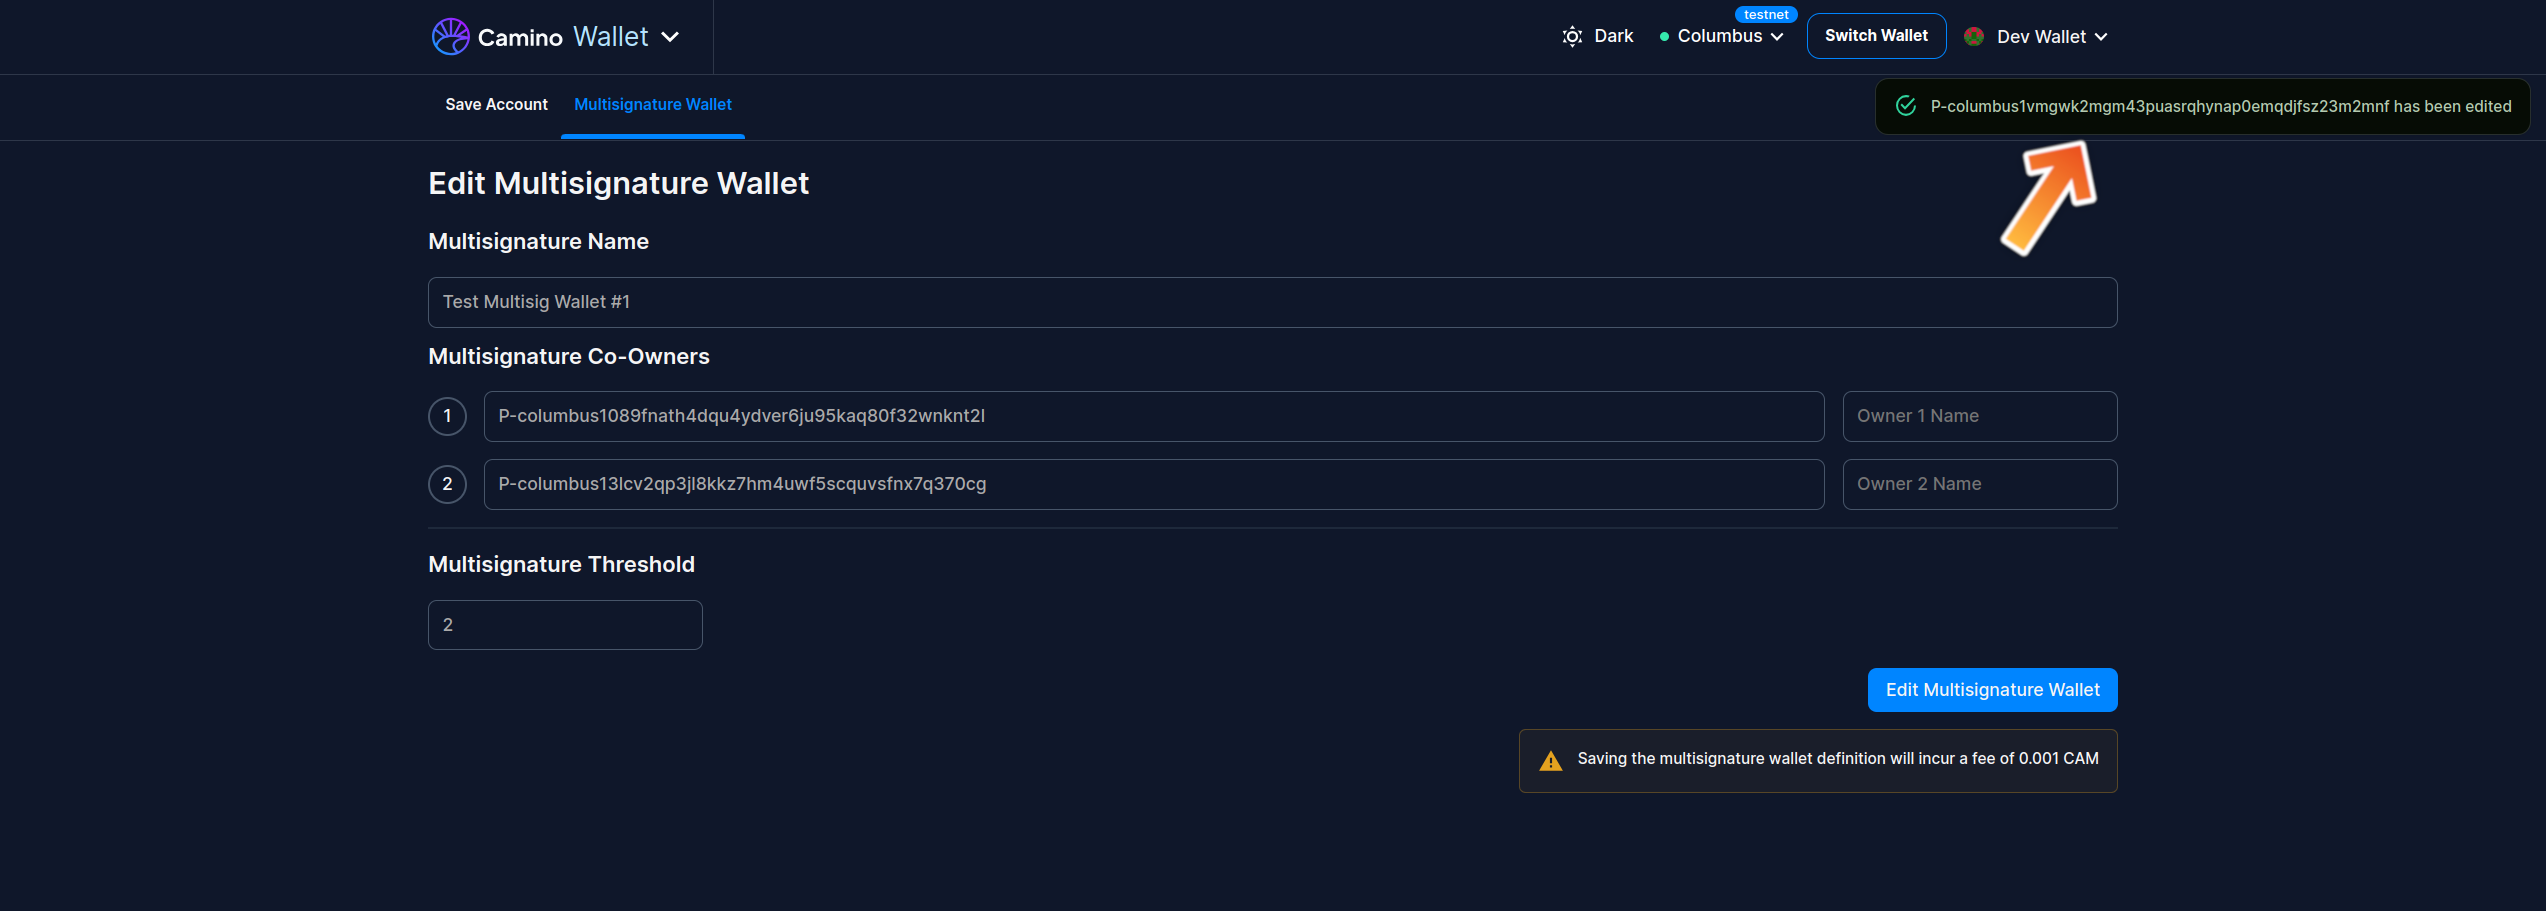
8. Verify with the Initial Member
- Optionally, you can log back in with the first member account to verify the edits.
- Navigate to the "Multisignature Wallet" tab and ensure the displayed settings match the recent changes, like the updated threshold value.
