Adding a Validator Node using the Wallet
This guide will walk you through the process of adding a validator node using your consortium member address with Camino Wallet.
Kindly note that the wallets of a majority of the consortium members are multi-signature (multi-sig) wallets. If your wallet is also a multisig wallet, please consult the Adding a Validator Node with MultiSig Wallet documentation.
Please ensure that you use the correct wallet address for this guide: https://suite.camino.network/
Always verify that the domain is camino.network while using the wallet.
Overview
To add a validator node with Camino Wallet, you will need to follow the steps below:
- Check and verify the requirements
- Retrieve your node's private key
- Register your node with your wallet
- Add your node as a validator
- Verify that the validator is online
1. Requirements
Before you begin the process of adding a validator node, there are a few requirements you must fulfill.
Below is a list of these requirements for the mainnet (camino) and testnet (columbus).
Camino Mainnet & Columbus Testnet
- NodeID: This is the address of your node, similar to a regular wallet address.
- Node's PrivateKey: You will need this to prove ownership of the NodeID.
Keep it safe and secure! - 100,000 non-bonded CAMs in your P-Chain wallet. And a few CAMs for paying for transaction fees.
- Consortium Member: Your wallet address must be a consortium member.
If you are unsure about this, please reach out to us on Discord for clarification. - KYC/KYB Verified: You must be Know-Your-Customer (KYC) or Know-Your-Business (KYB) verified.
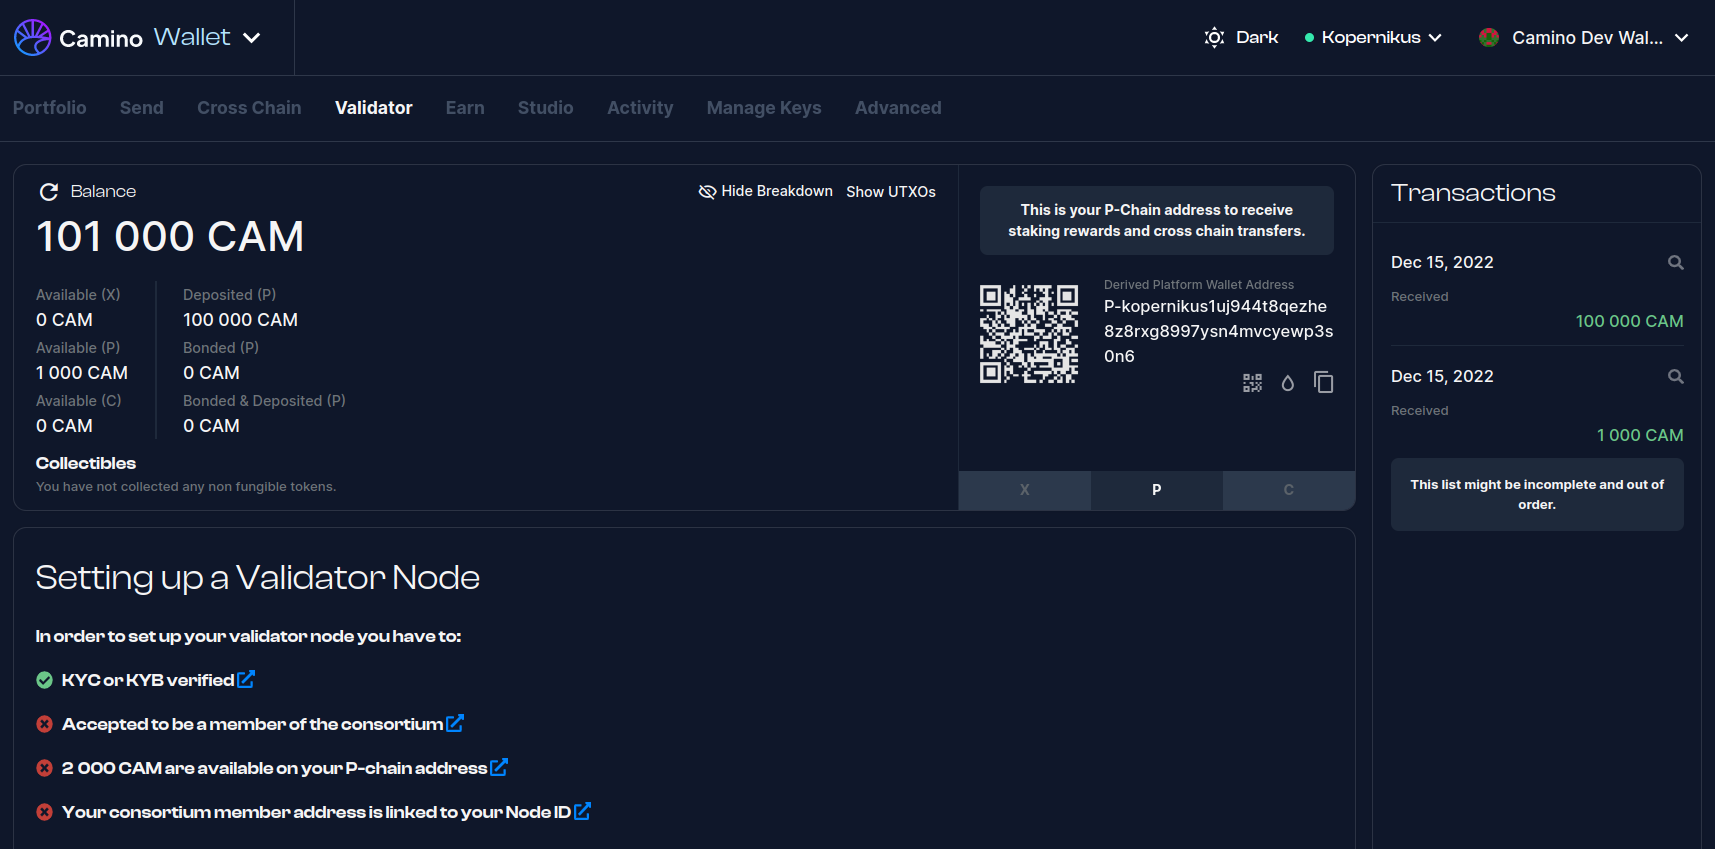
Checking Requirements Using Camino Wallet
You can verify if you meet these requirements by accessing the Validator tab in your wallet's navigation bar after logging in.
If some of the requirements are not met, you will see a page similar to this:
2. Retrieving Your Node's Private Key
To register your node to your consortium address, you need to prove that you own the node. Therefore, the wallet needs to sign the register node transaction with the node's private key. This is why you need to provide your node's private key to the wallet.
For more information on how to retrieve your node's private key, please refer to the Retrieving Your Node's Private Key guide.
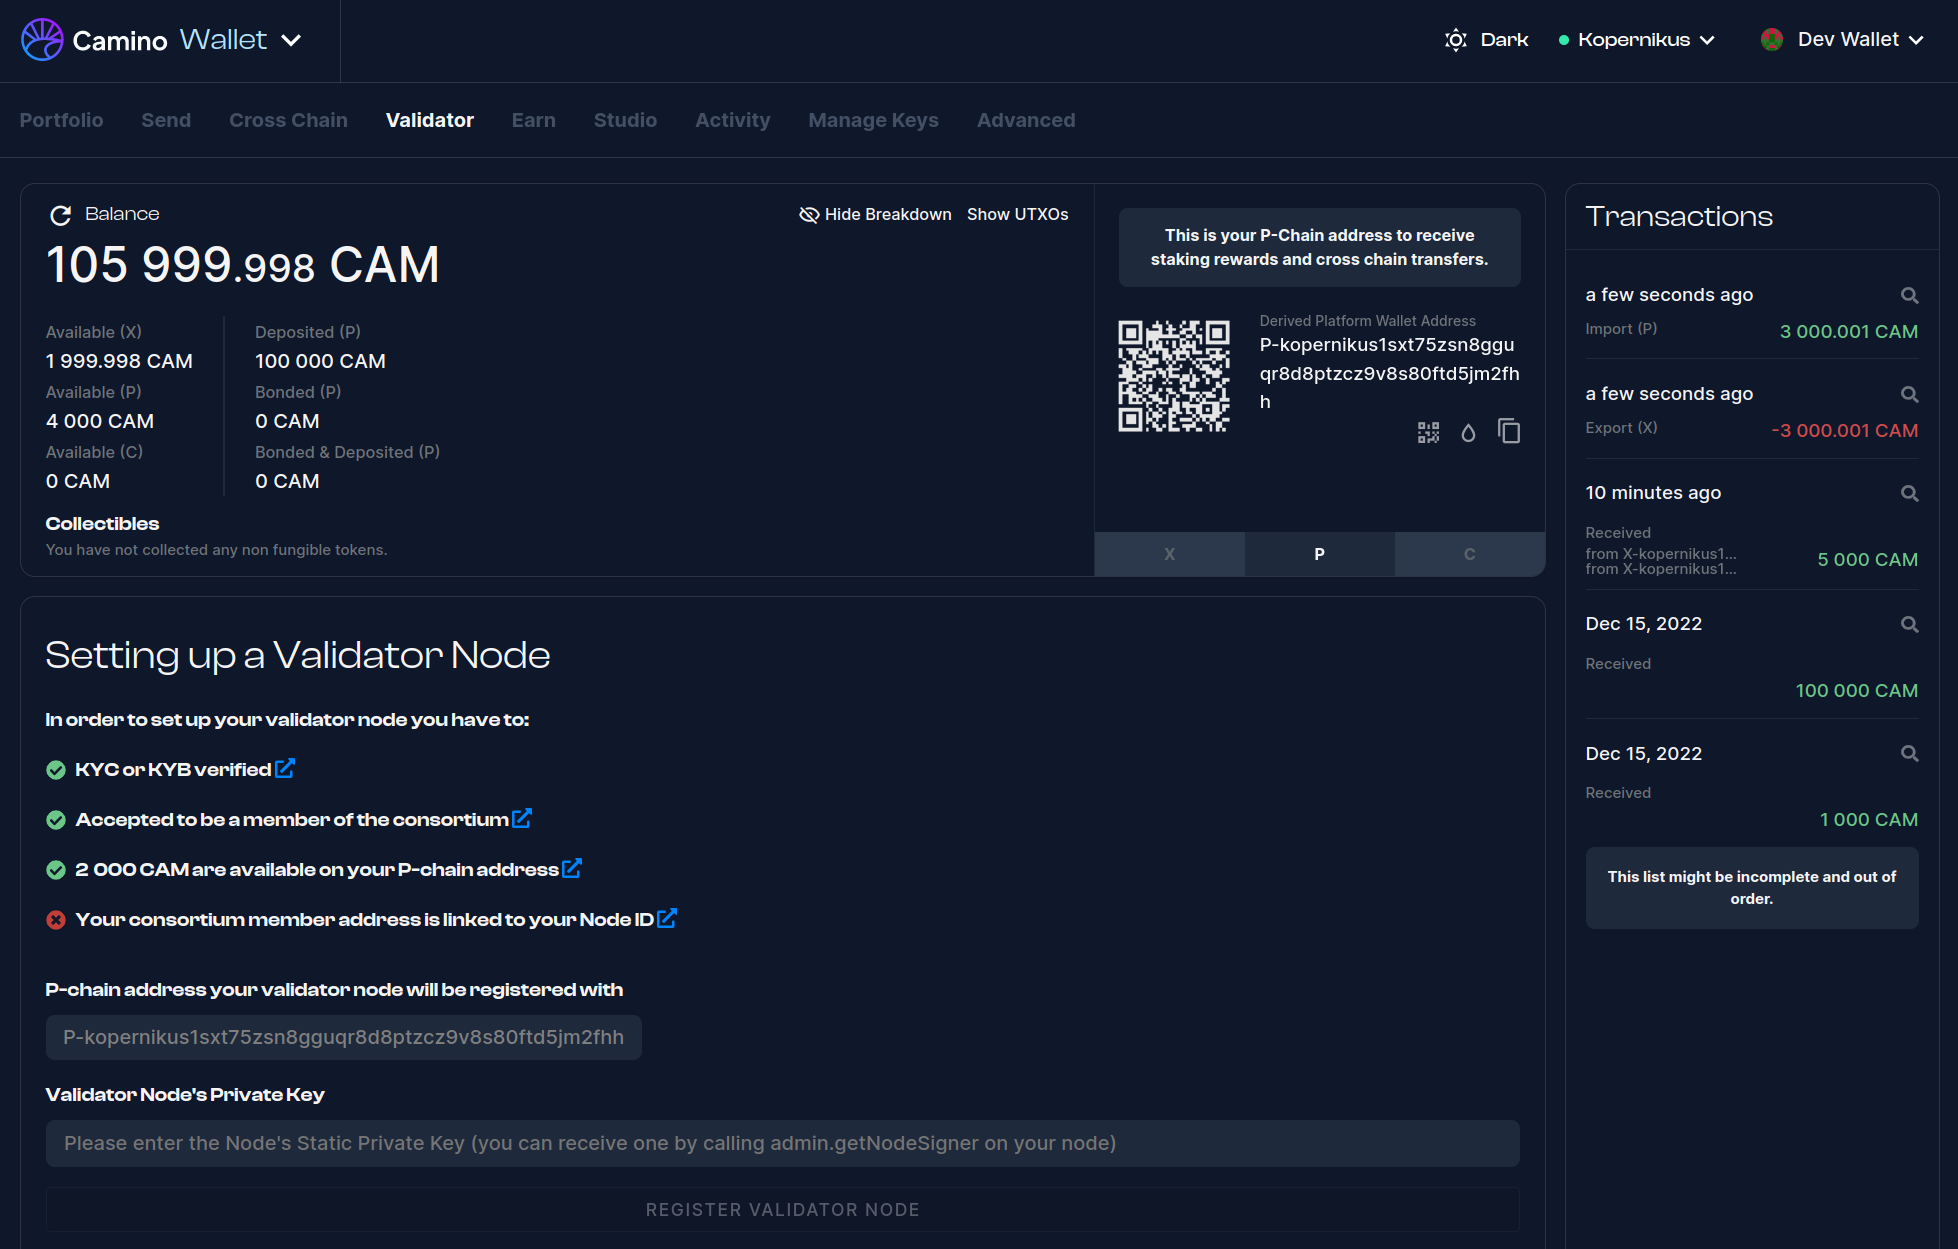
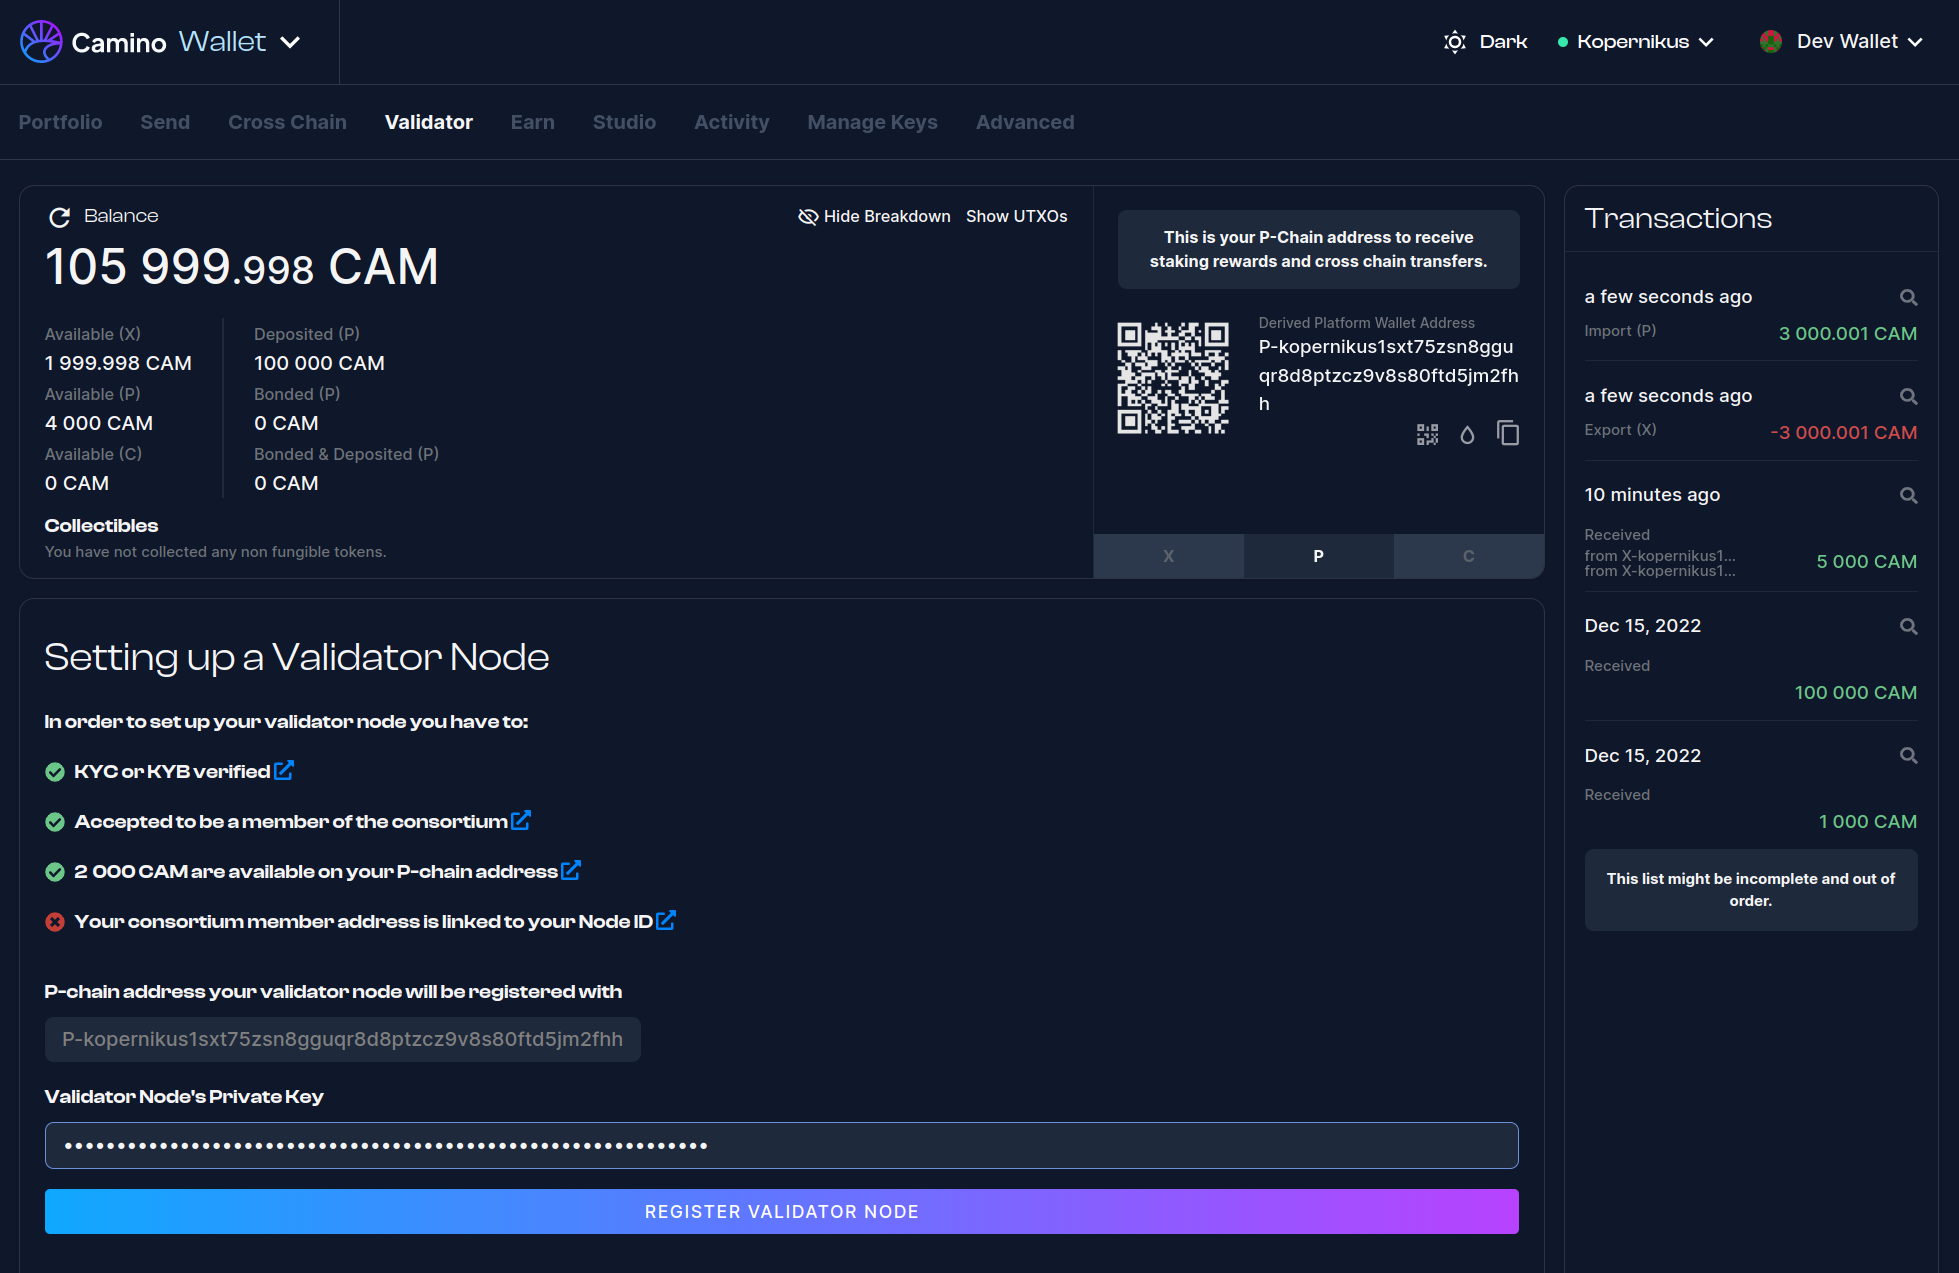
3. Register Your Node
Once you have fulfilled the requirements outlined above, you can proceed to register your node. You should see a page as in the Fig.2 screenshot.
Simply enter your node's private key into the designated field and click on the REGISTER VALIDATOR NODE button.
4. Add Your Node as a Validator
After successfully registering your node, the validator page will update and appear as follows:
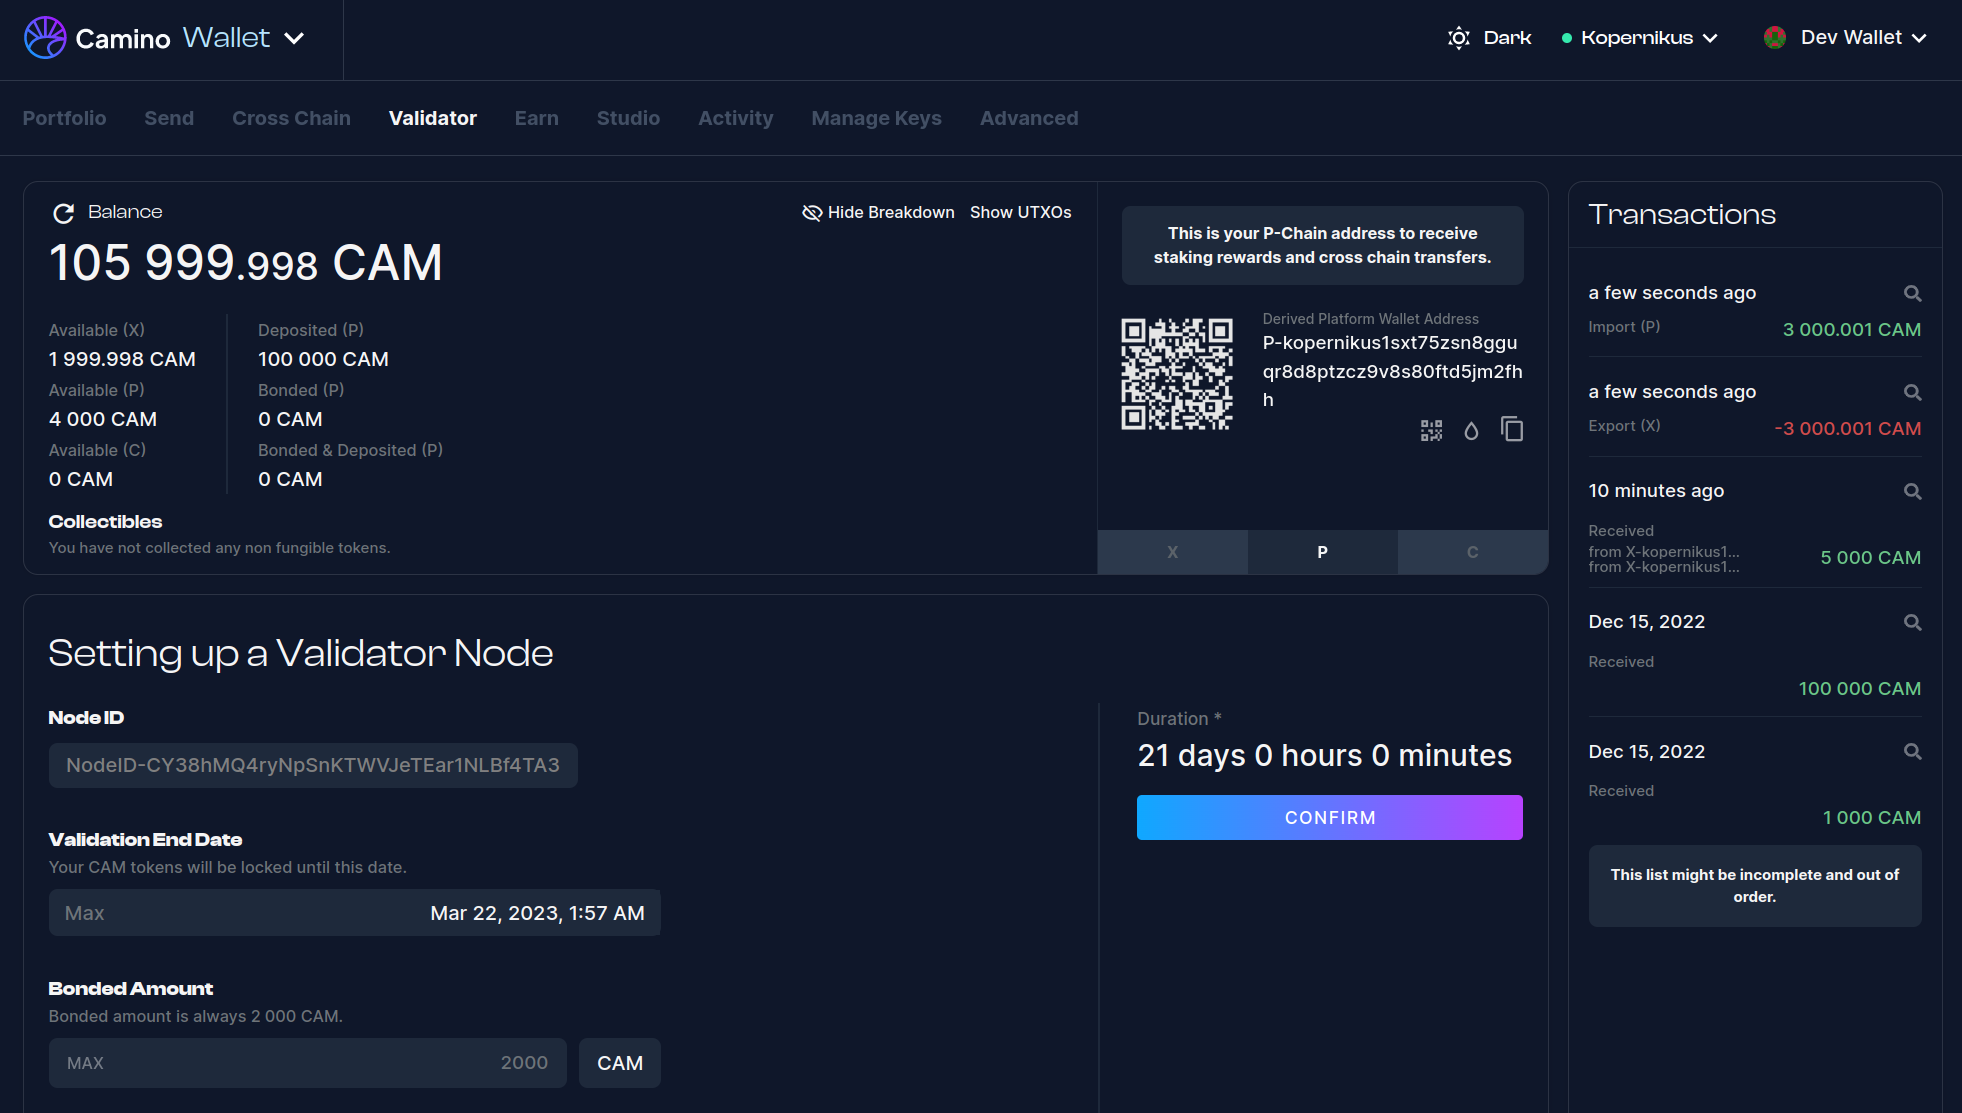
Enter the Required Details
- Node ID: Your node's ID will be automatically retrieved from the registered node of your address.
- Validation End Date: Enter the date when you want the validation period to end. The minimum value is two weeks, and the maximum is one year. You can click the
MAXbutton for the maximum value. - Validation End Date: Enter the date when you want the validation period to end. The minimum value is two weeks, and the maximum is one year. You can click on the
MAXbutton to select the maximum value. - Bonded Amount: For Camino, this value is a fixed amount of 100,000 CAMs. The field will be pre-set with this value.
Please note that the value shown in the screenshot above is 2000 CAMs, which is used for documentation purposes only, as a development network is being used.
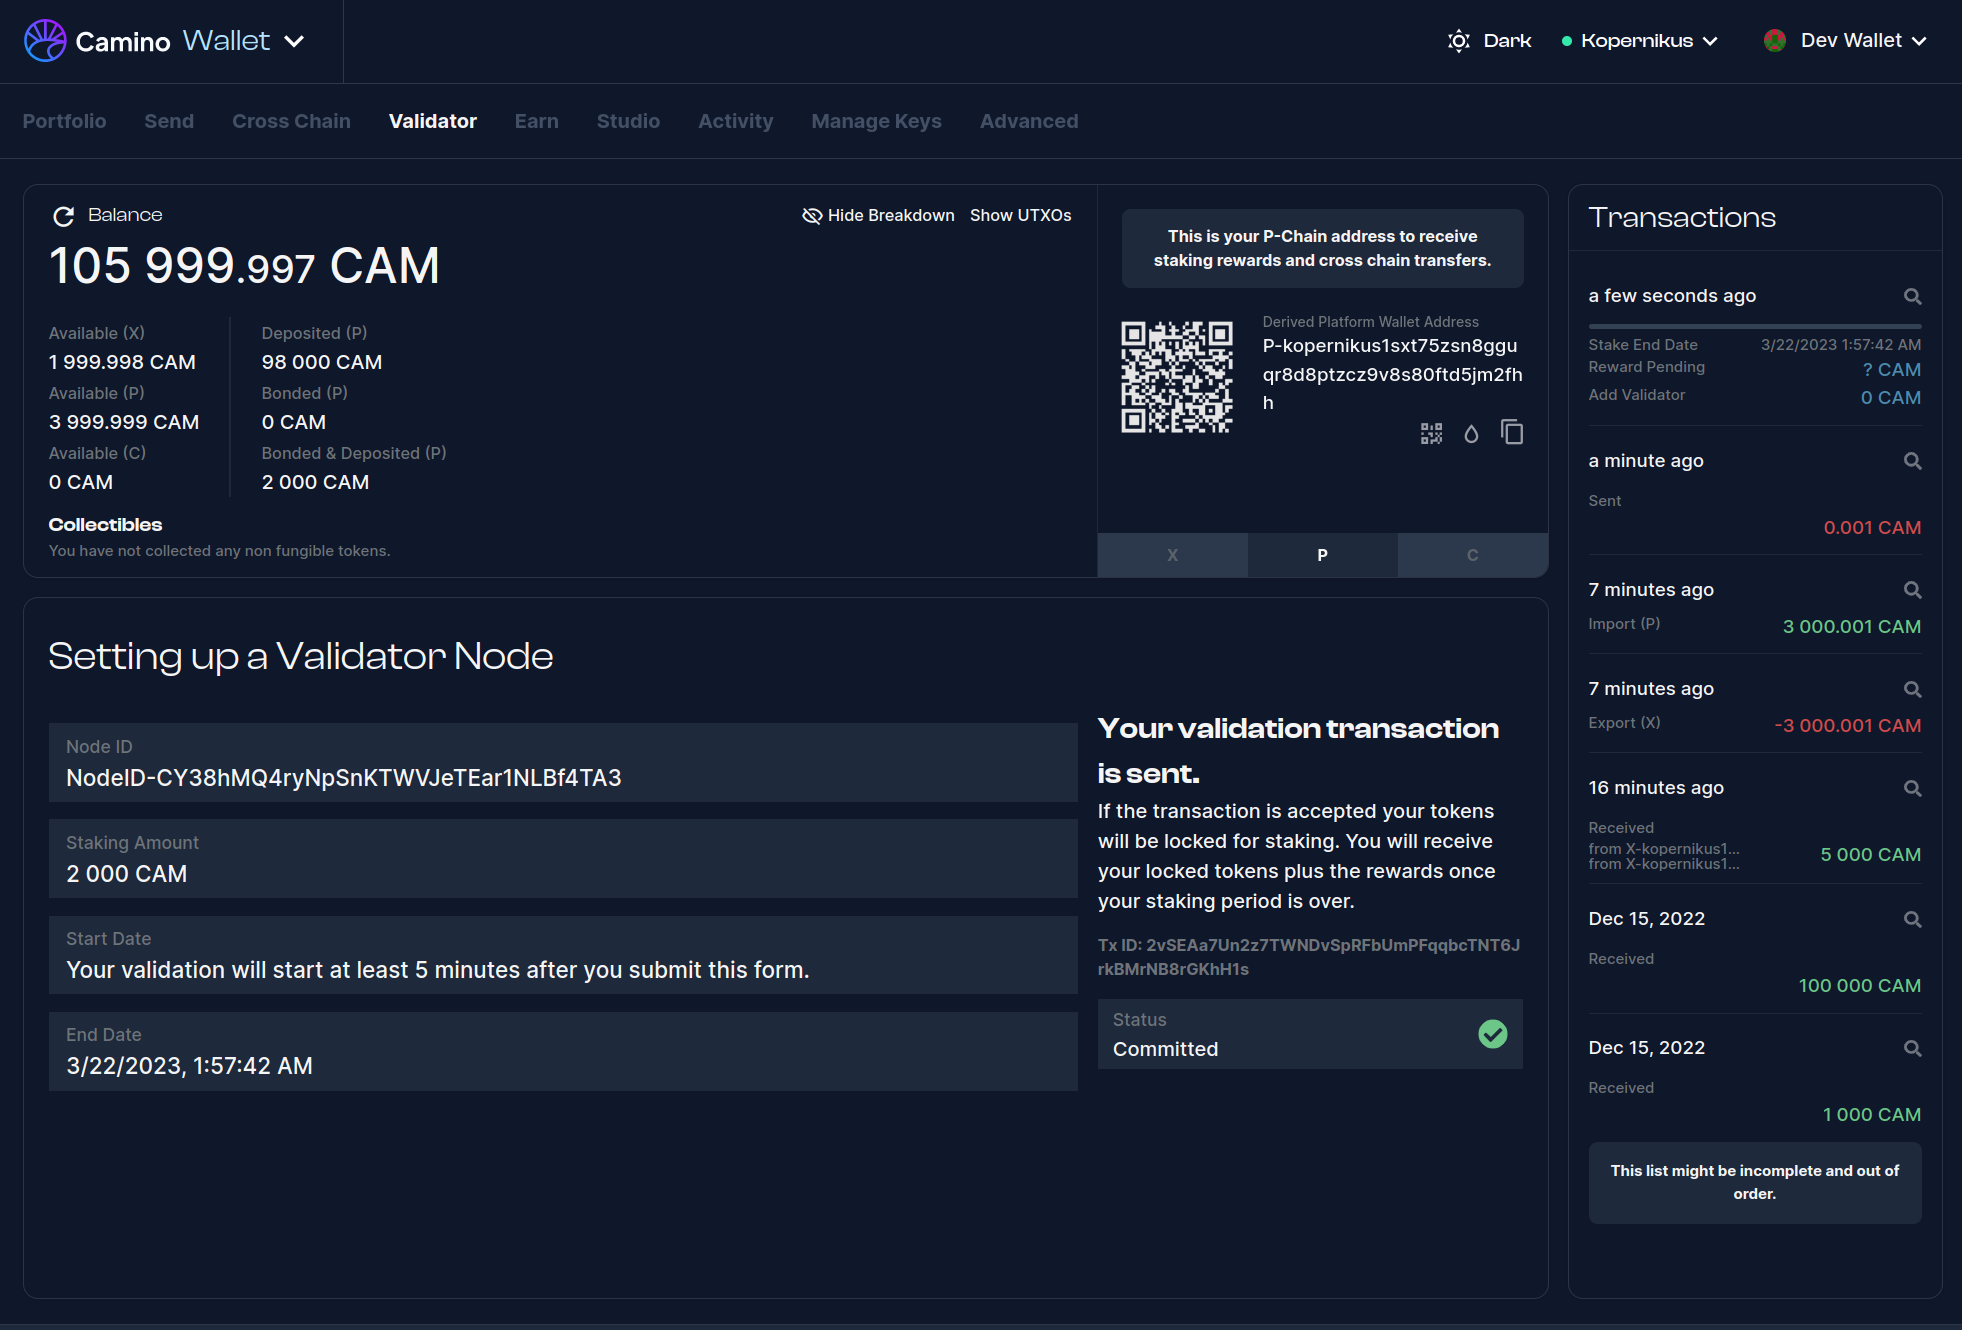
Confirm & Submit
After filling in the required details, click the Confirm button located on the right side of the page. You will be presented with the information you entered.
Verify the information carefully, and if you are satisfied with it, click on the Submit button.
Please note that once you have added your validator, you cannot undo this operation or change the end date of the validation period. Therefore, it is crucial to double-check the entered information before submitting.

5. Check your Validator
After you have submitted your transaction, you should see the status as committed with a green checkmark:
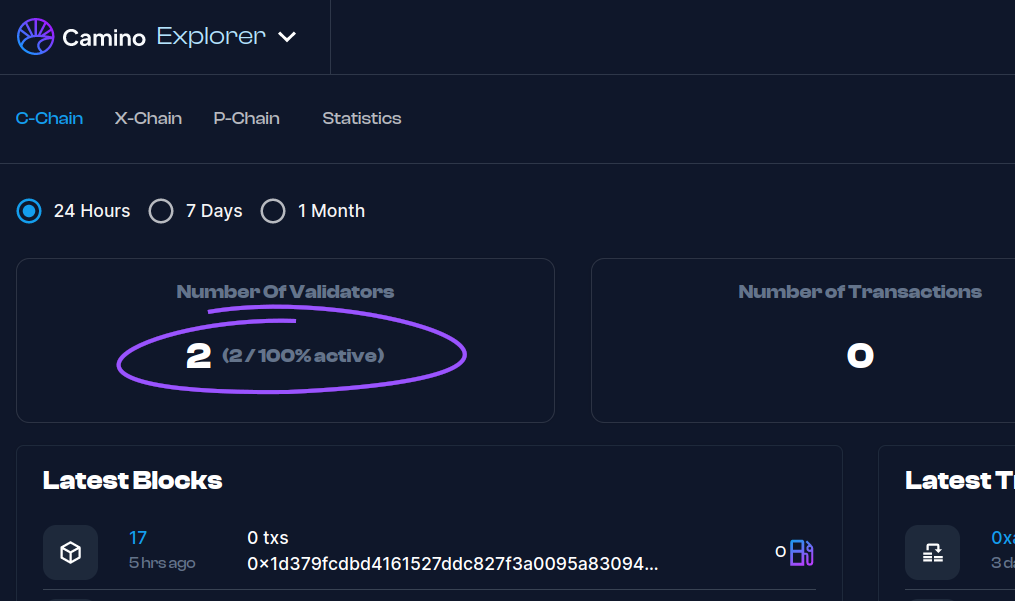
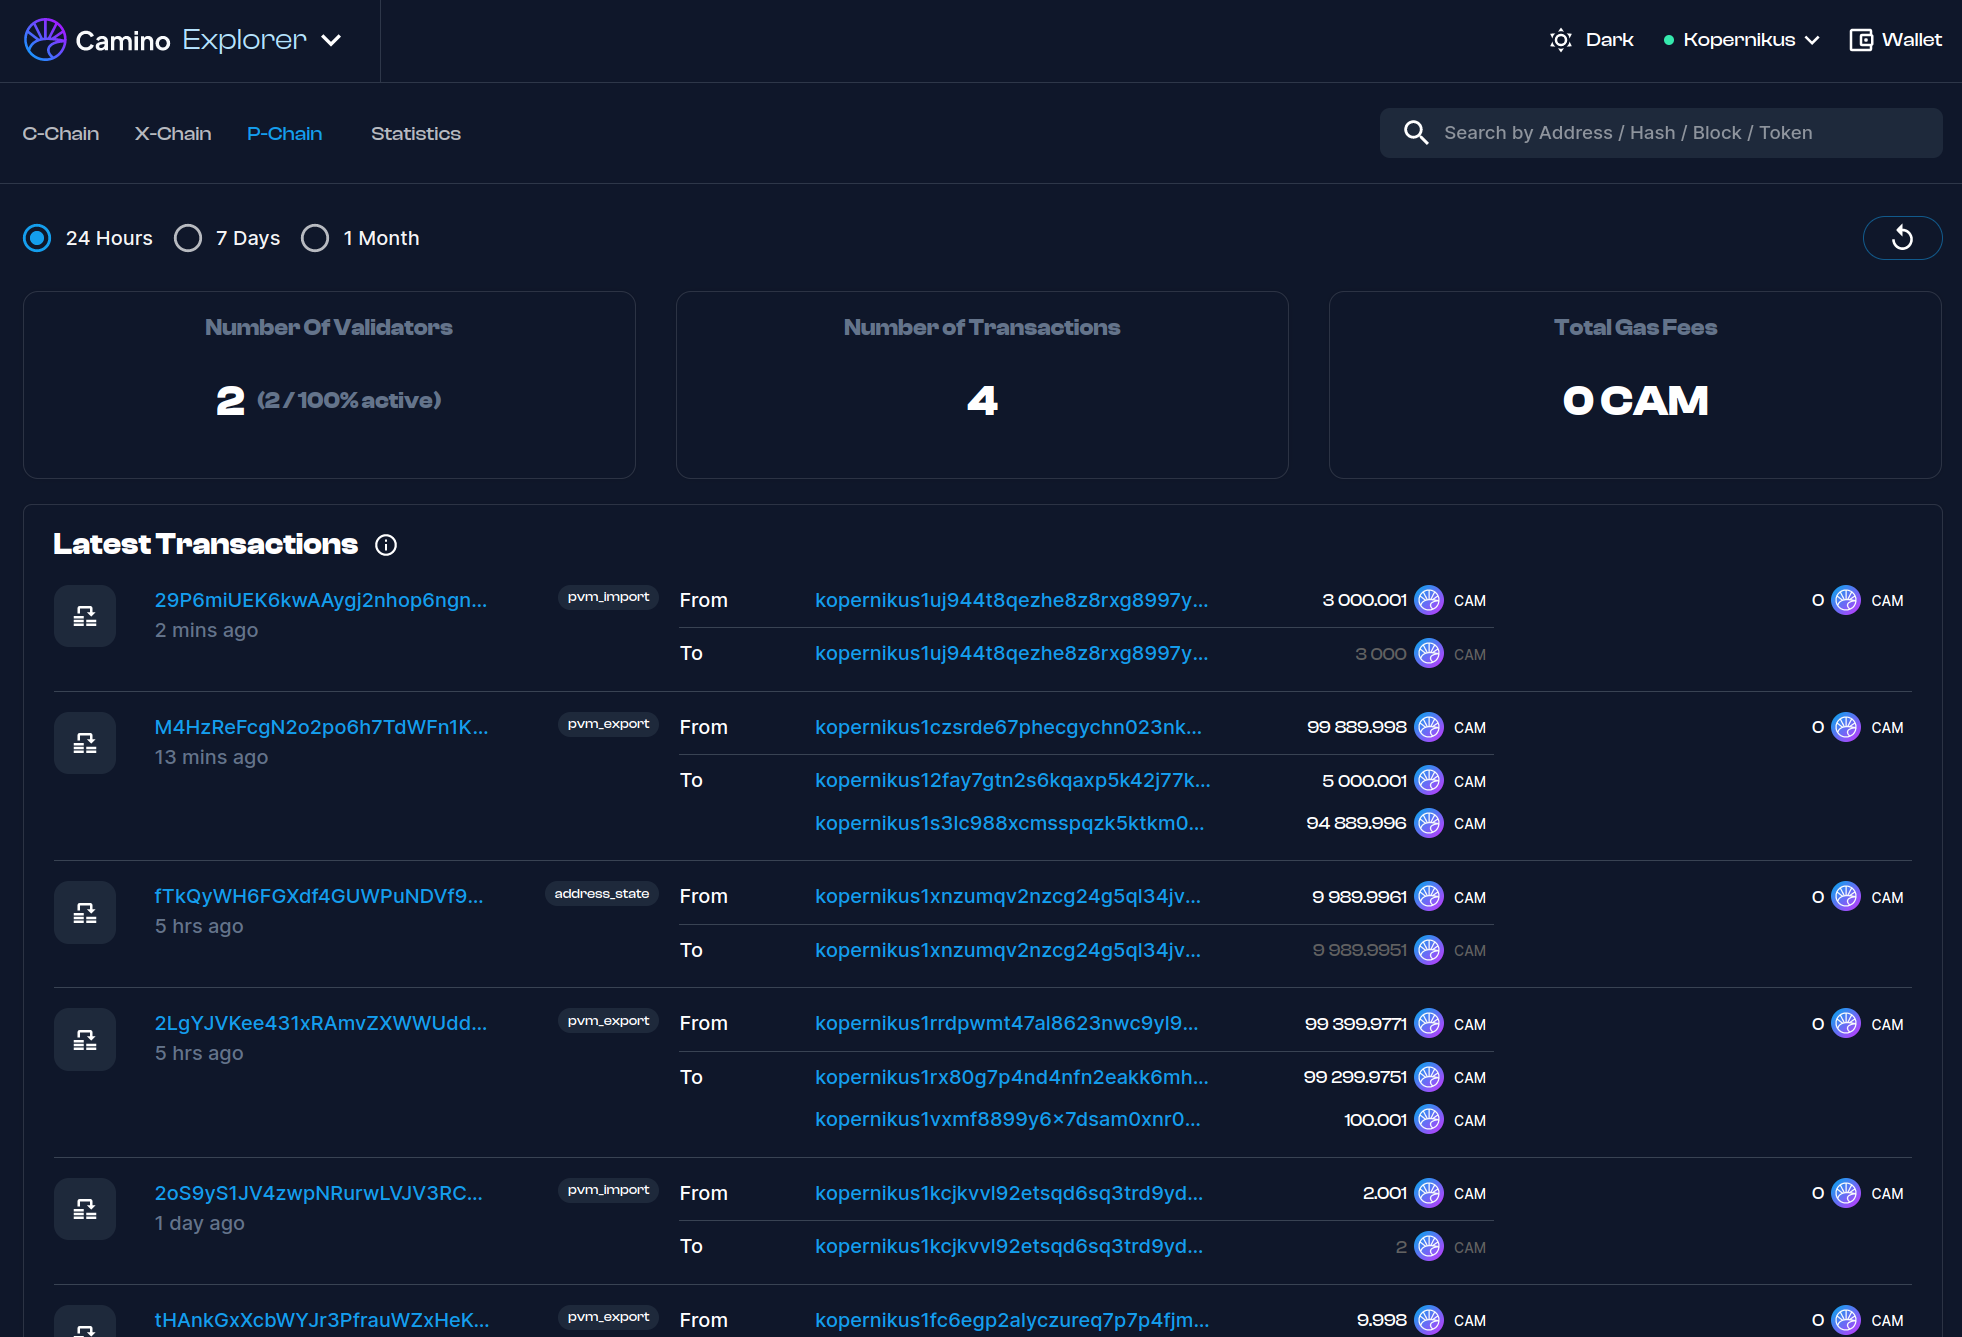
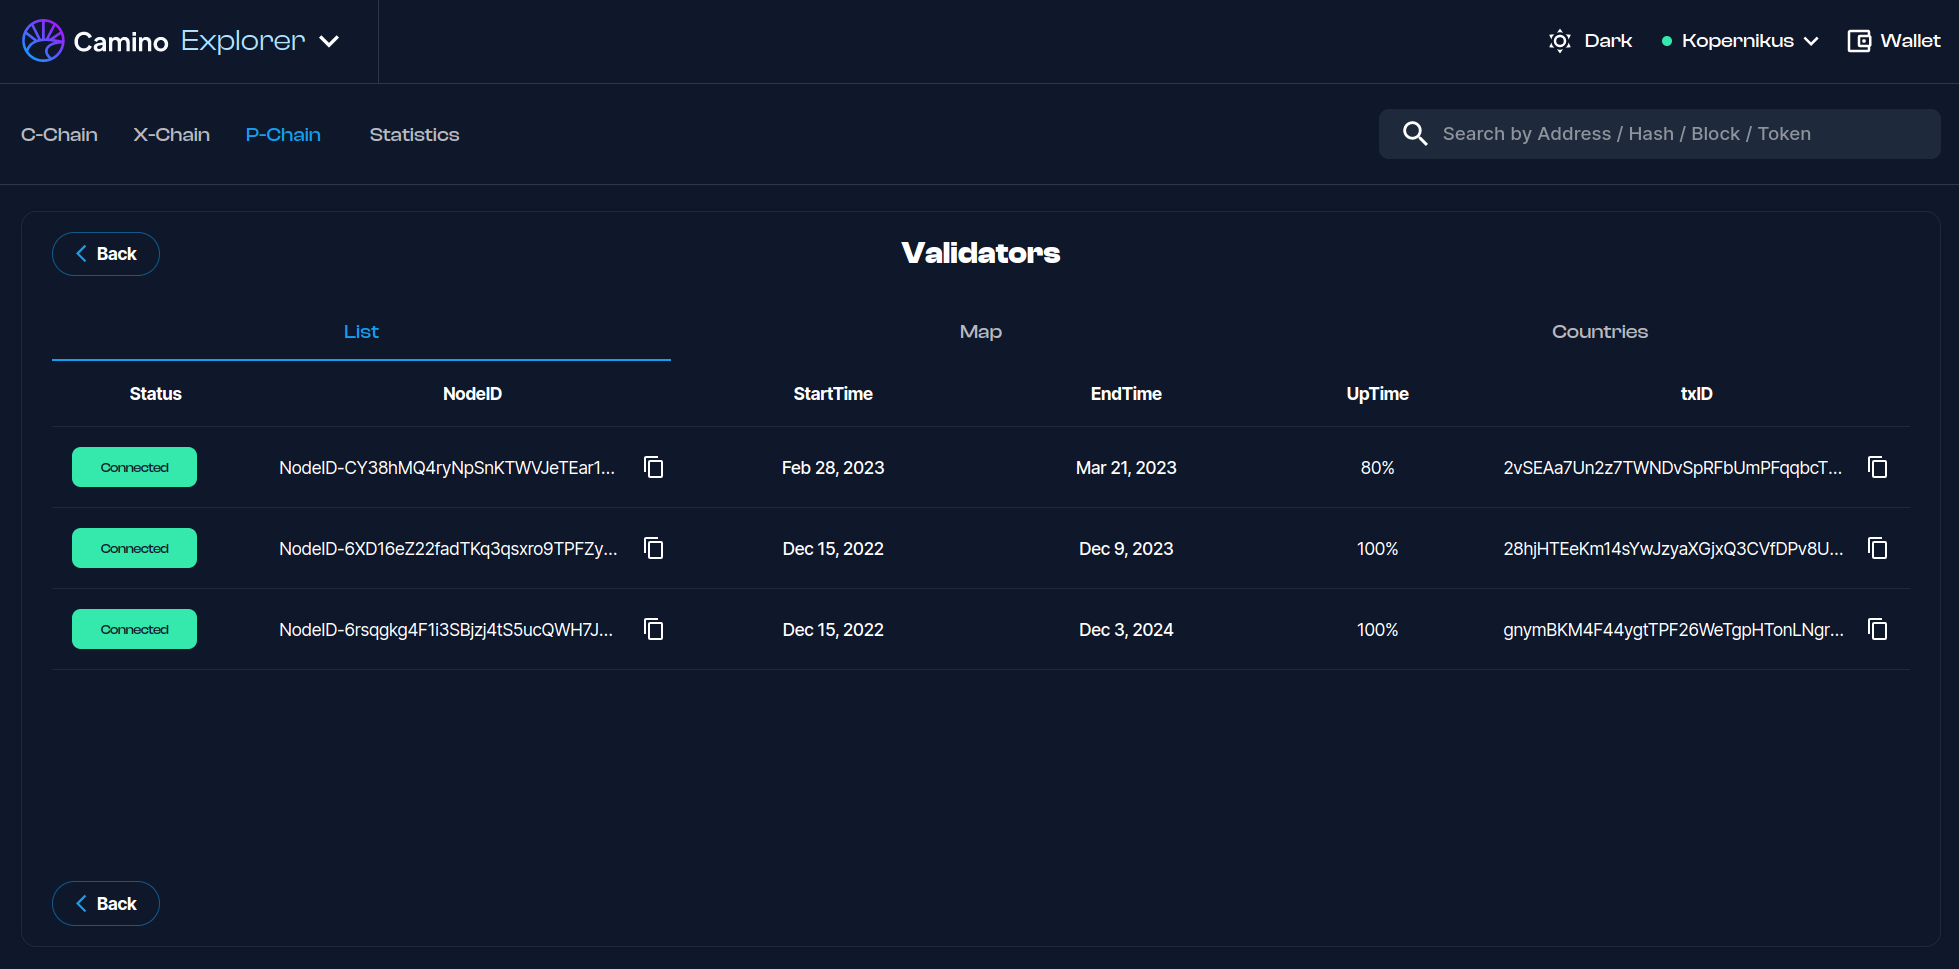
5.1 Check Camino Explorer
In a few minutes, your validator should be online in Explorer's validators page
To access the Validators List, click on the "Number of Validators" on the Camino Explorer:
Before the Add Validator Transaction
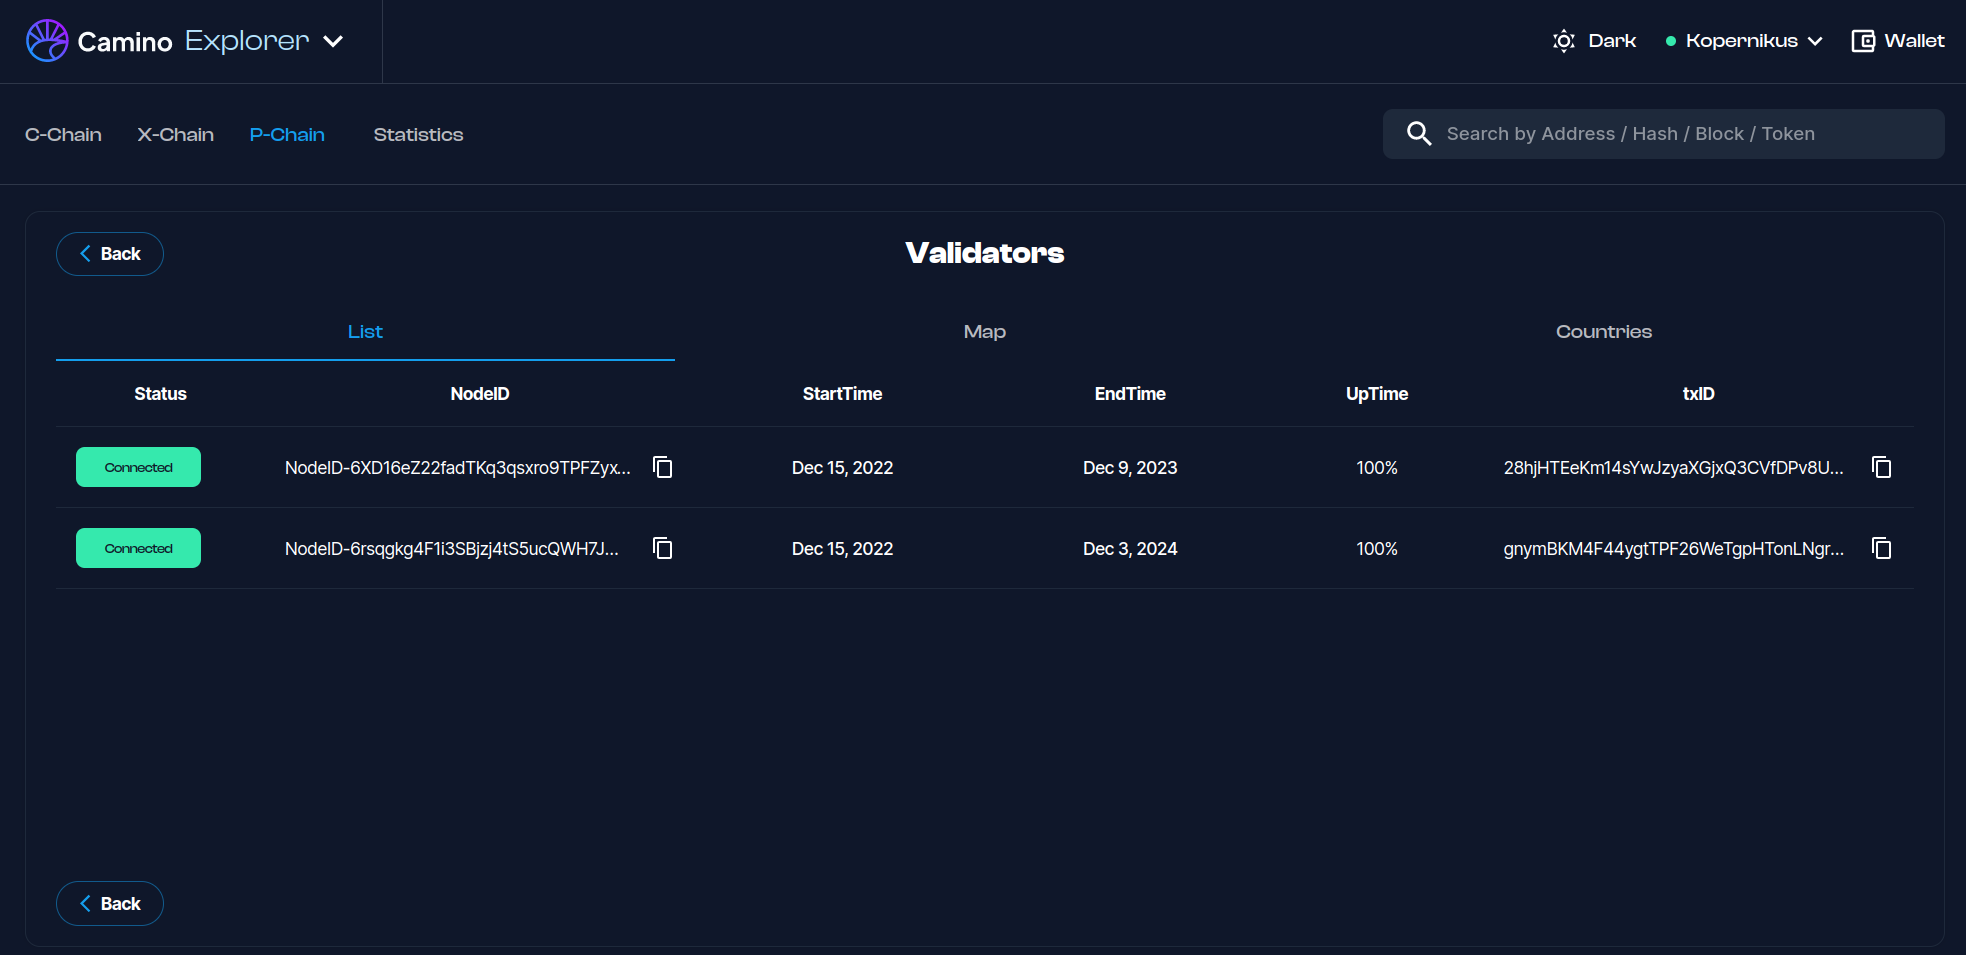
After the Add Validator Transaction

All Done!
Congratulations! You have successfully added your validator node.
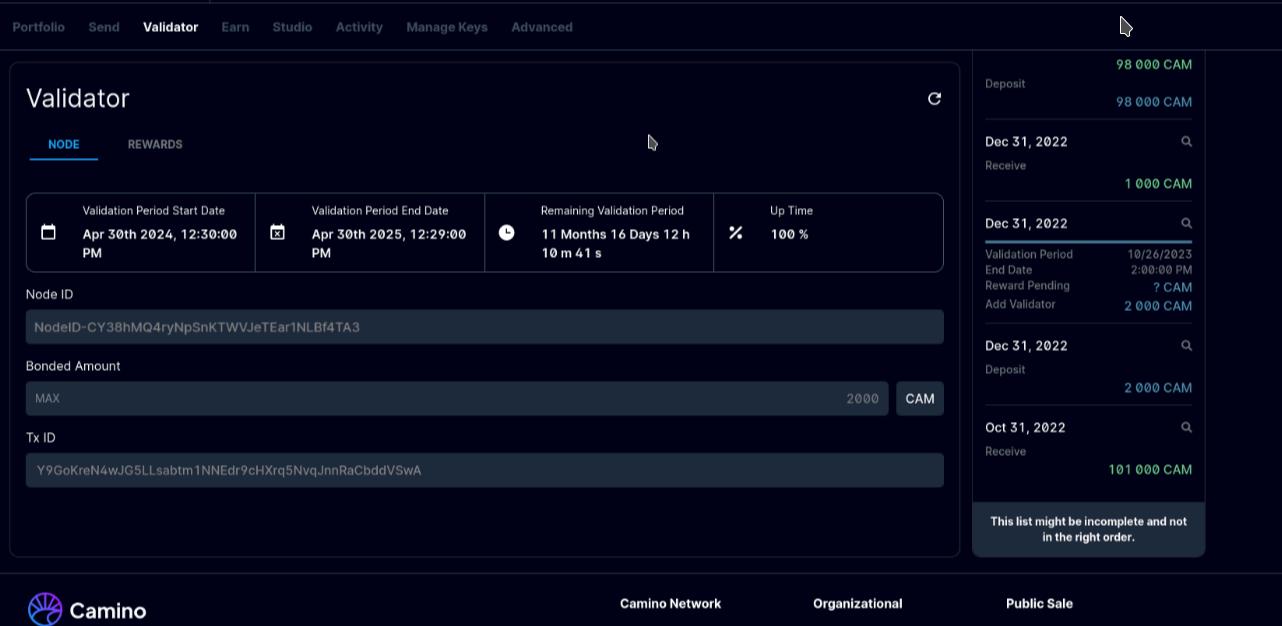
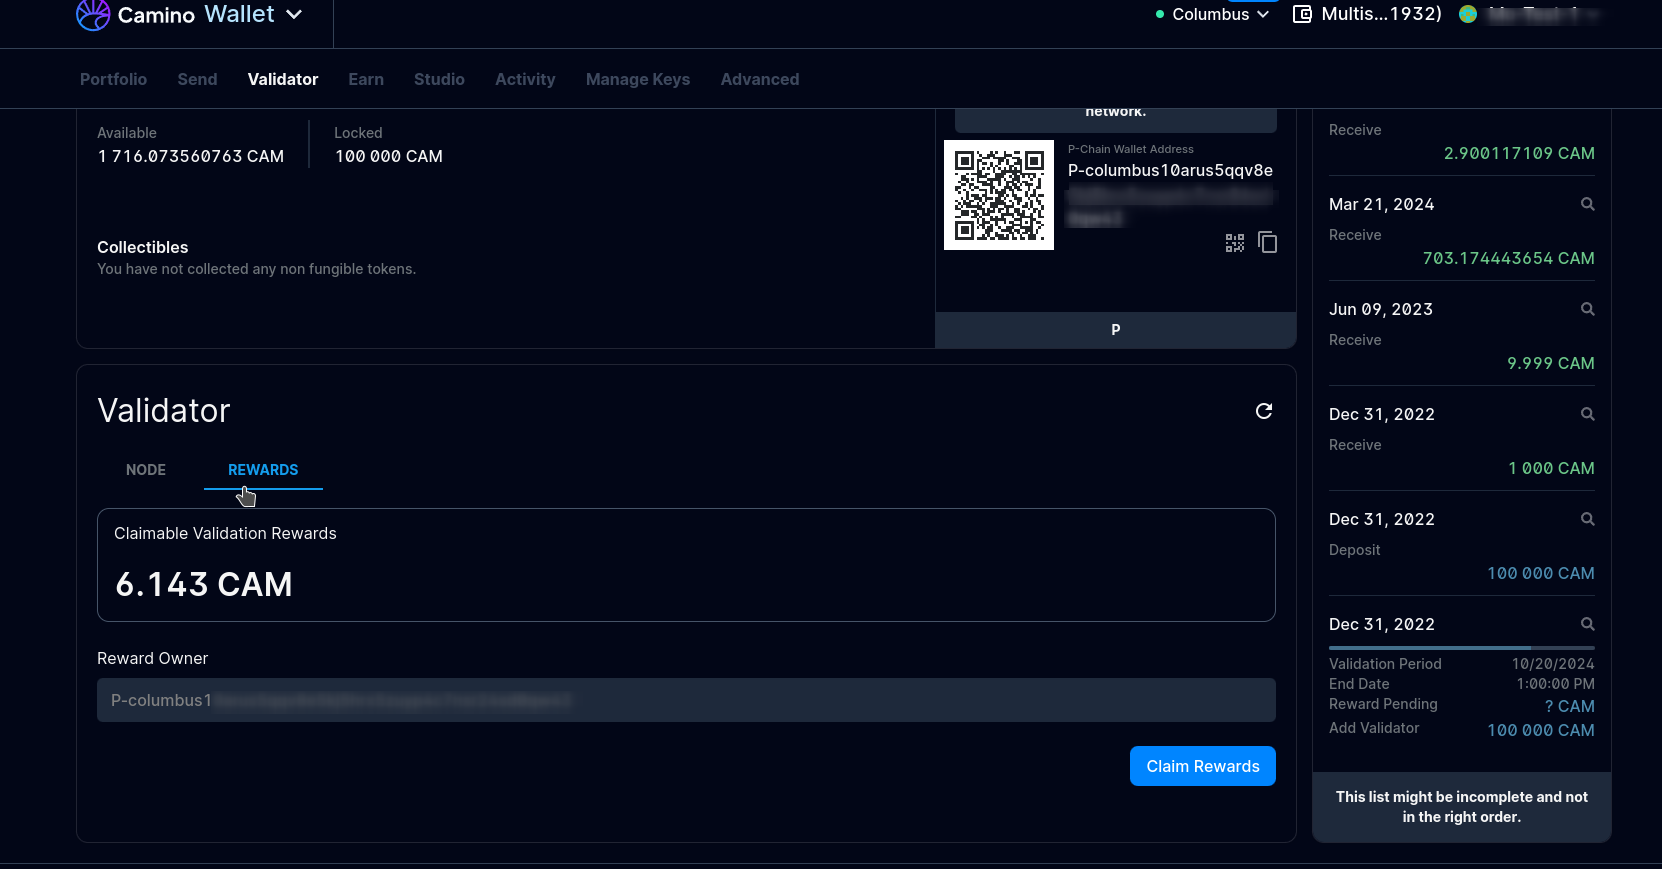
You can also check Validator Rewards on Camino Wallet in the Rewards section in Validator tab: