Setting Up Camino Node on Google Cloud Platform
This tutorial will walk you through the process of configuring a Camino Node on the Google Cloud Platform (GCP). You have three methods to choose from for the setup process: the GCP Marketplace deployment, the manual method, and the automatic method using Terraform.
-
Marketplace Deployment: This method leverages the Google Cloud Marketplace to deploy the Camino Node. It provides a streamlined, user-friendly interface, minimizing the intricacies of manual setup. Ideal for those who seek an efficient and straightforward deployment without delving deep into the underlying technical details.
-
Manual Method: If you prefer a more hands-on approach and want to understand the detailed steps, the manual method is for you. Starting with creating a firewall rule to open the necessary port, setting up a virtual machine (VM) instance, and configuring Camino Node to operate seamlessly on GCP. Whether you're a seasoned developer or a beginner exploring blockchain technology, this guide provides clear instructions to ensure a smooth setup process.
-
Terraform Method: For those who favor an automated approach and want to streamline the setup process, Terraform is the way to go. This method allows you to deploy Camino Node quickly with minimal effort, making it an attractive option for users familiar with Terraform's infrastructure-as-code paradigm.
Before diving into the technical details, it's crucial to understand the significance of the staking and API ports used by Camino Node. We'll also discuss the option of exposing your node as an API node for further utility. By the end of this guide, you'll have a fully operational Camino Node, ready to contribute to the decentralized network and participate in the Camino ecosystem.
Let's embark on the journey of setting up your Camino Node on Google Cloud Platform! Choose the method that best aligns with your preferences and needs.
GCP Marketplace Method
Navigate to the Camino Node on Google Cloud Marketplace
- Go to Camino Node on Google Cloud Marketplace
- Alternatively, you can search for "camino node" on gcloud marketplace.
Start Deployment
- Click on the "Launch" button.
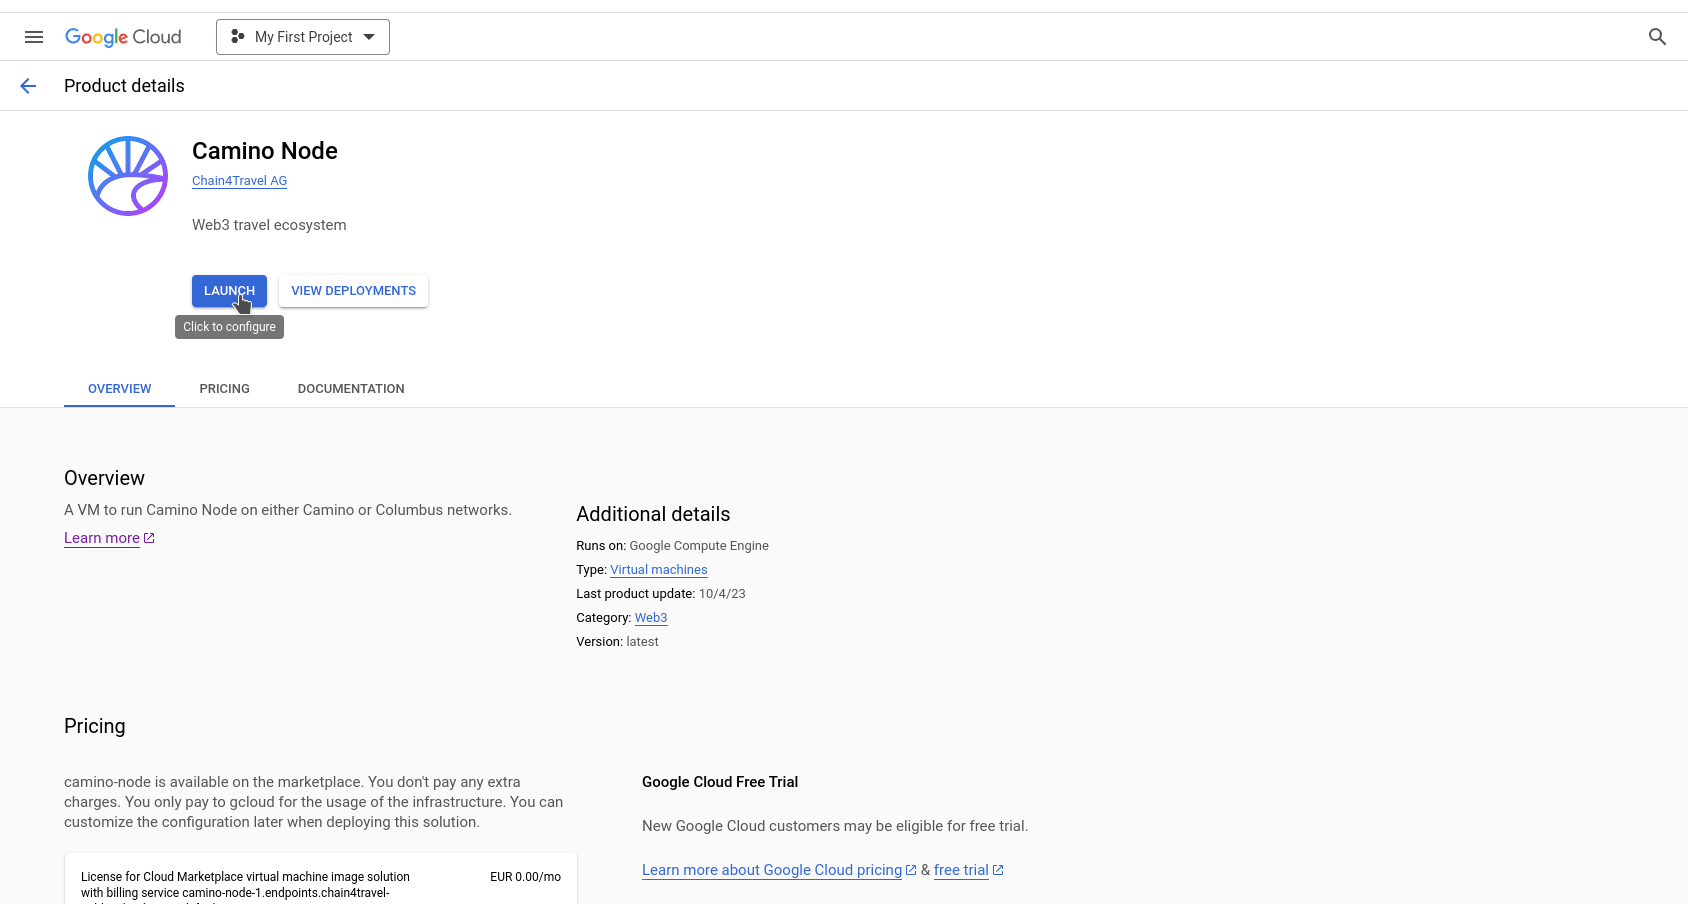
Edit Deployment Parameters
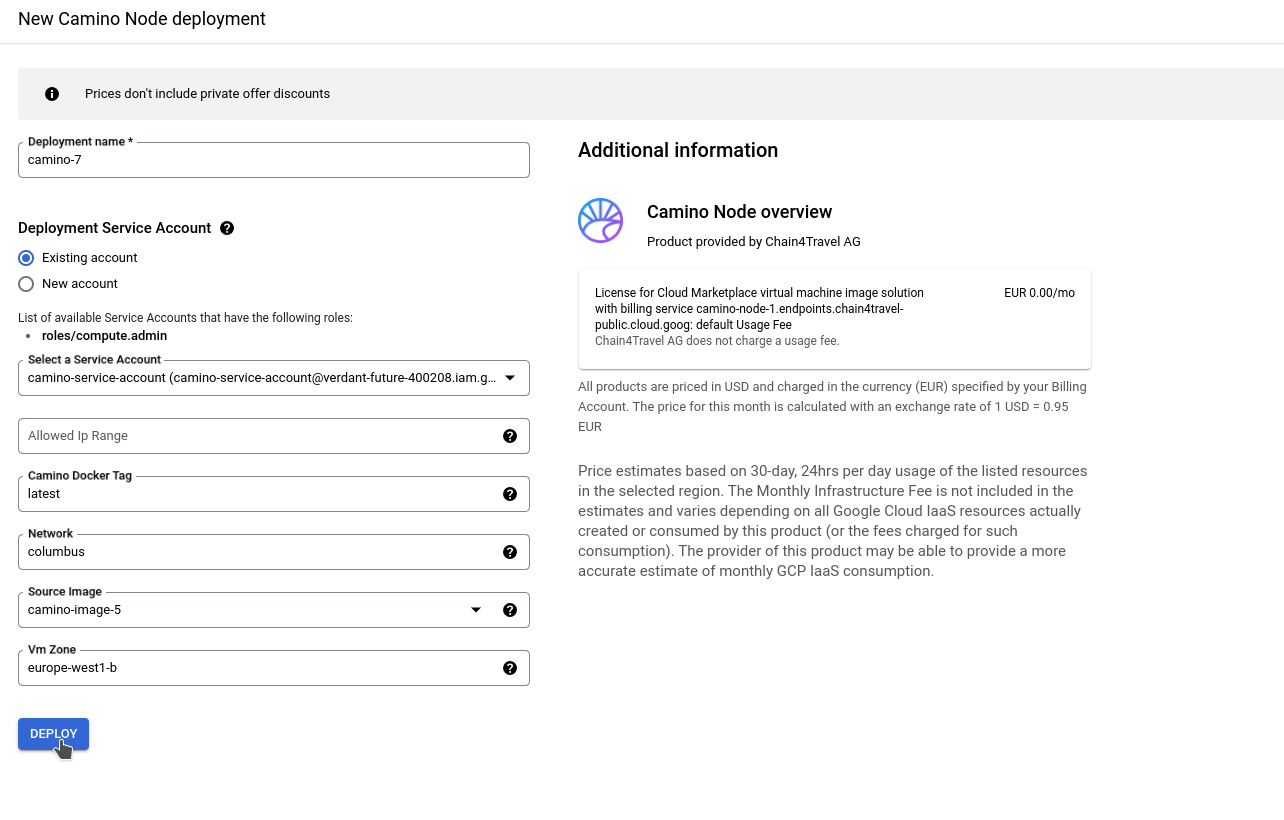
- Deployment Name: Enter the desired name for the deployment. This name will also be used for the created VM, and will be a part of the names for the VPC network, static external IP, firewall, and service account.
- Service Account: Choose an existing service account or create a new one. Ensure that it has the following permissions:
- Cloud Infrastructure Manager Agent
- Compute Admin
- Allowed IP Range: Specify the IP range if you wish to create a firewall rule. This rule will allow ports 9650 and 22 to the provided IP range. Format should be CIDR notation:
x.x.x.x/x. - Camino Docker Tag: Enter the desired Camino Node version, such as
vx.x.x(ex:v1.0.0). Alternatively, uselatestfor the most recent stable version. - Network: Specify the Camino Node network ID. Use
caminofor mainnet andcolumbusfor testnet. - Source Image: This is the base image for the VM. Retain the default value and avoid making changes.
- VM Zone: Select the appropriate location for the virtual machine. It should correspond to one of the provided gcloud VM zones.
Complete Deployment
- Click on the "Deploy" button to begin the deployment process.
Manual Method
Create Firewall Rule to Open Port 9651
- Access the Google Cloud Platform (GCP) Console and navigate to "VPC Network" > "Firewall."
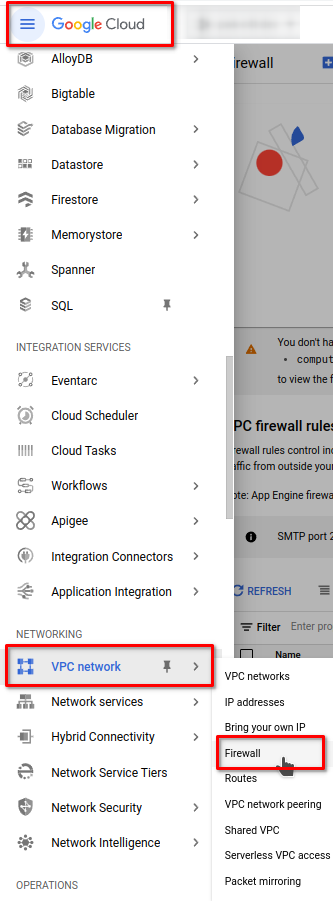
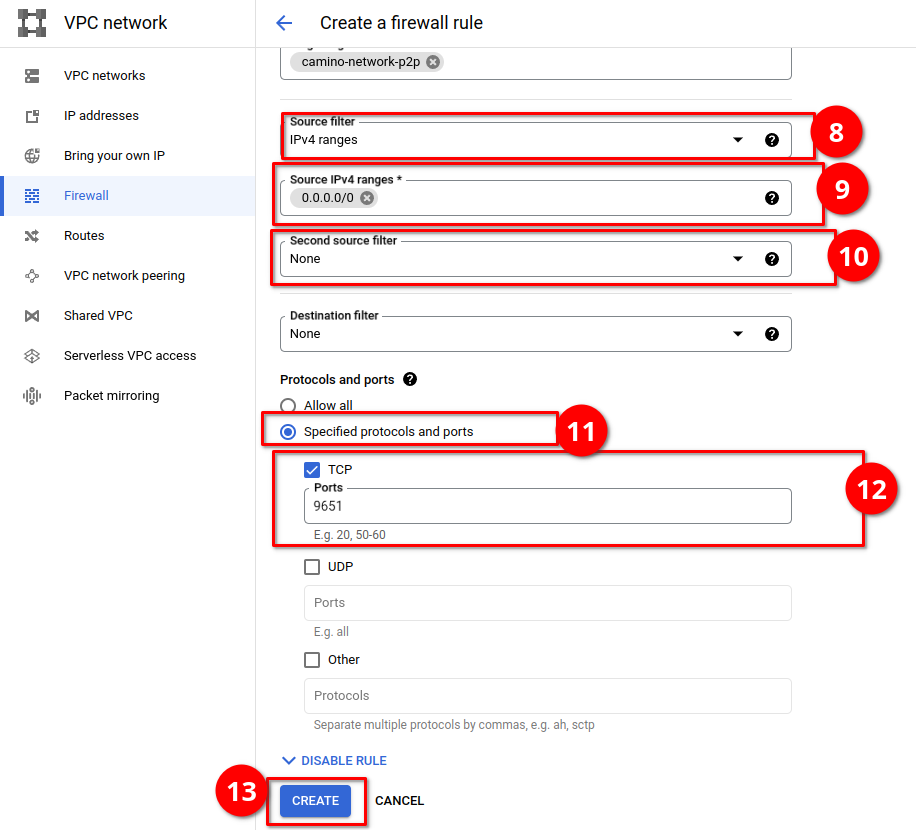
- Click on "Create Firewall Rule" and set it to allow TCP port 9651 for all inbound traffic. Set the target tag to be "camino-network-p2p."

- Configure the firewall rule as shown in the screenshots below:
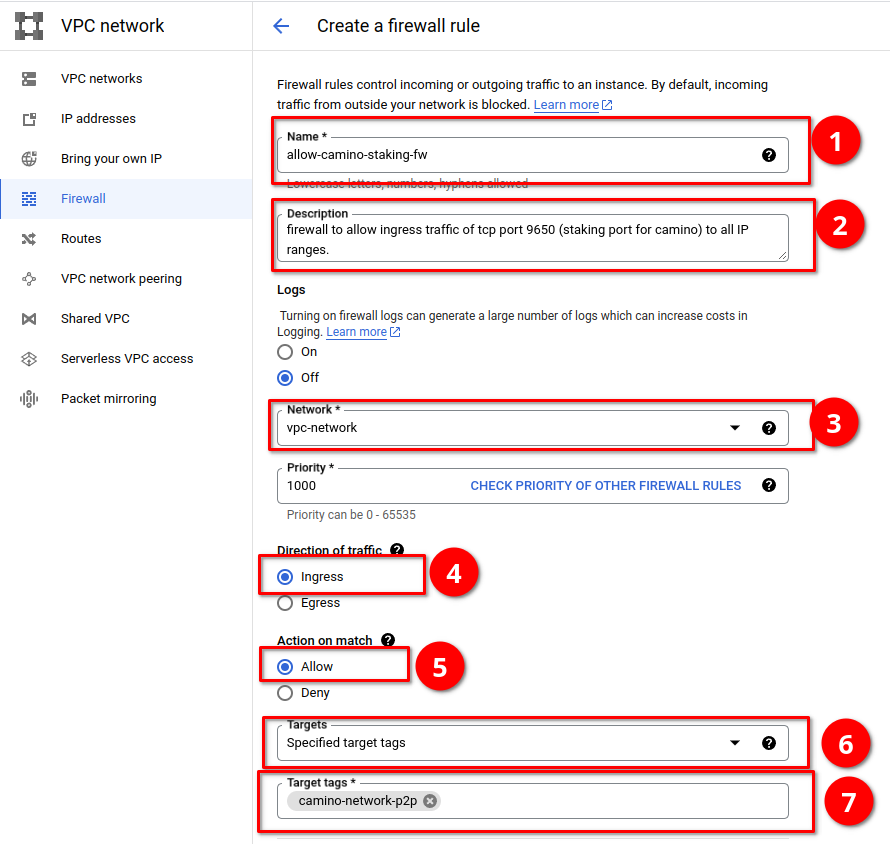
- Enter "9651" for TCP ports under "Specified ports and protocols." Set the other fields as shown in the screenshot below and click "Create".
Camino Node uses two ports for different features. Port 9651 is the staking port, used to communicate with the validator nodes on the Camino Network.
Another port, 9650, is utilized for exposing the API. If you wish to use your node as an API node, you can include port 9650 in the allowed ports during the firewall rule setup. To restrict API access to specific IP addresses or subnets, you can modify the source IP range accordingly. In this scenario, you would need to create a separate firewall rule to allow the staking port (9651) access to all IP addresses (0.0.0.0/0) without restrictions.
For more information about APIs, please refer to the Camino Node APIs documentation.
Create the VM Instance
- Navigate to "Compute Engine" > "VM Instances."
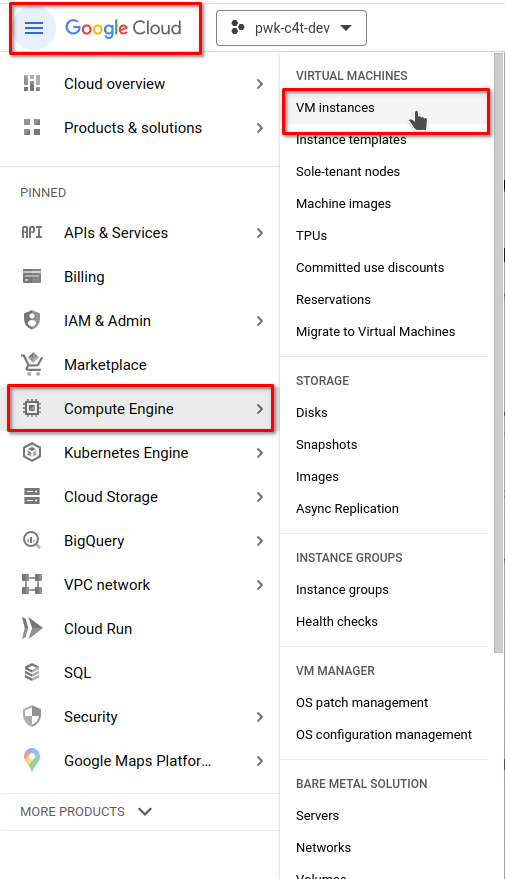
- Click on "CREATE INSTANCE".

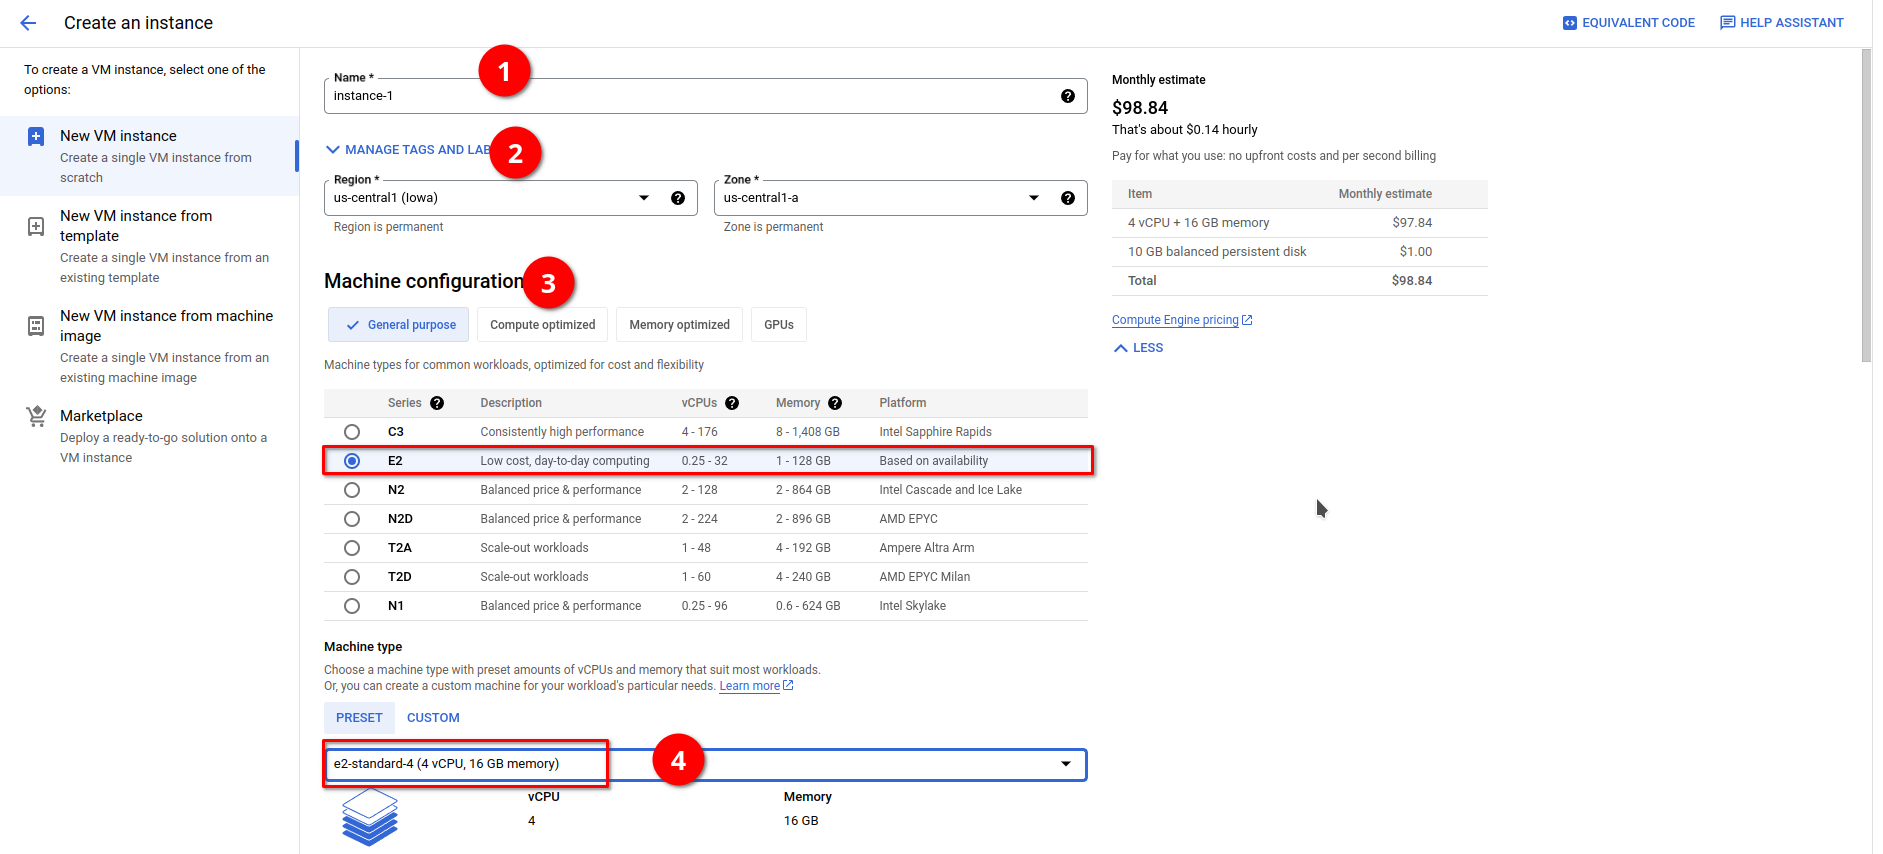
- Configure the VM instance with the following details:
- Enter a name for the instance.
- Choose your desired region and zone for the instance.
- Select E2 for the machine series.
- Choose the machine type as "e2-standard-4".
- Click on "DEPLOY CONTAINER".

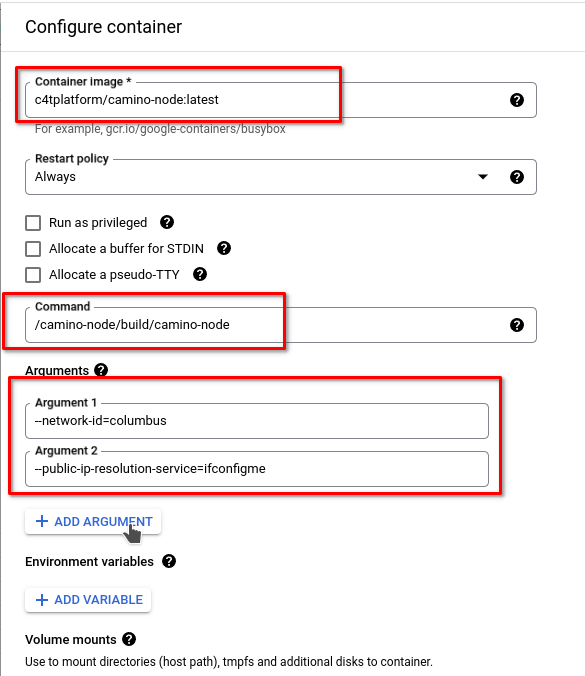
- Provide the following information for the container setup:
- Docker image:
c4tplatform/camino-node:latest - Command:
./camino-node - Arguments:
--network-id=columbusand--public-ip-resolution-service=ifconfigme
- Docker image:
If you intend to run your node on the mainnet, change the --network-id=columbus option to --network-id=camino.
Throughout this guide, we utilized a public IP resolution service to determine the public IP address.
However, it is advisable to have a static public IP for stability. If you have a static public IP,
please replace --public-ip-resolution-service=ifconfigme with --public-ip=<static-ip> instead.
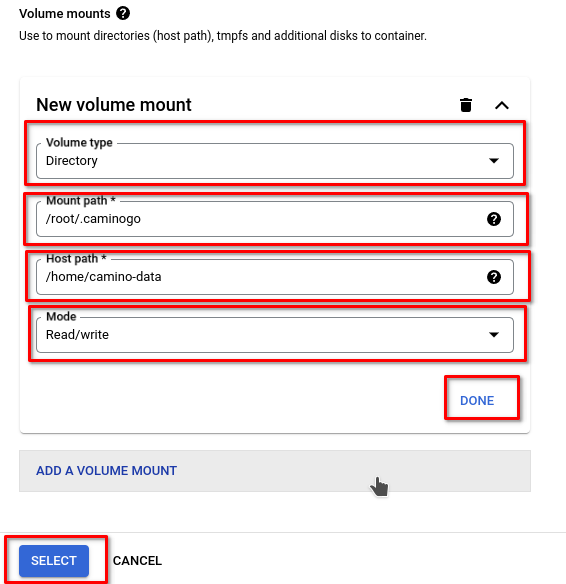
- Add a mounted volume to
/root/.caminogowith Read/Write access.
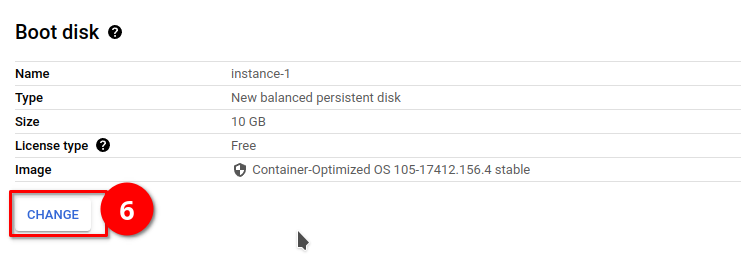
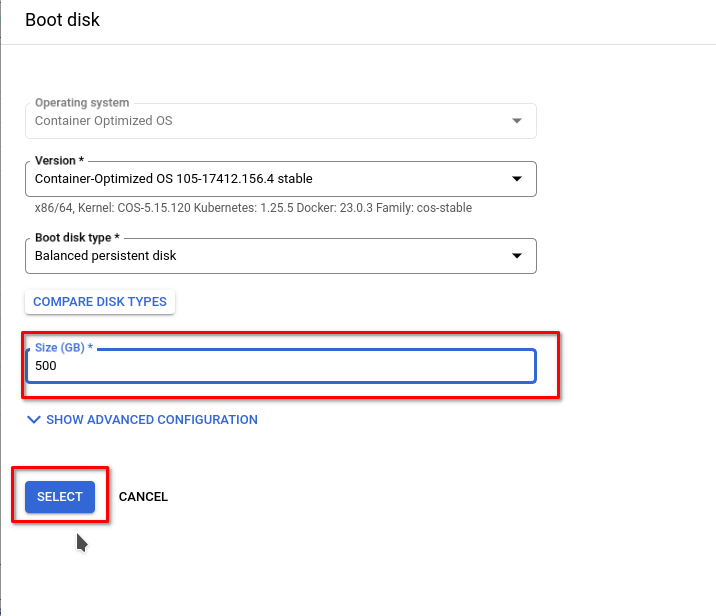
- Adjust the Boot Disk size to be 500 GB.
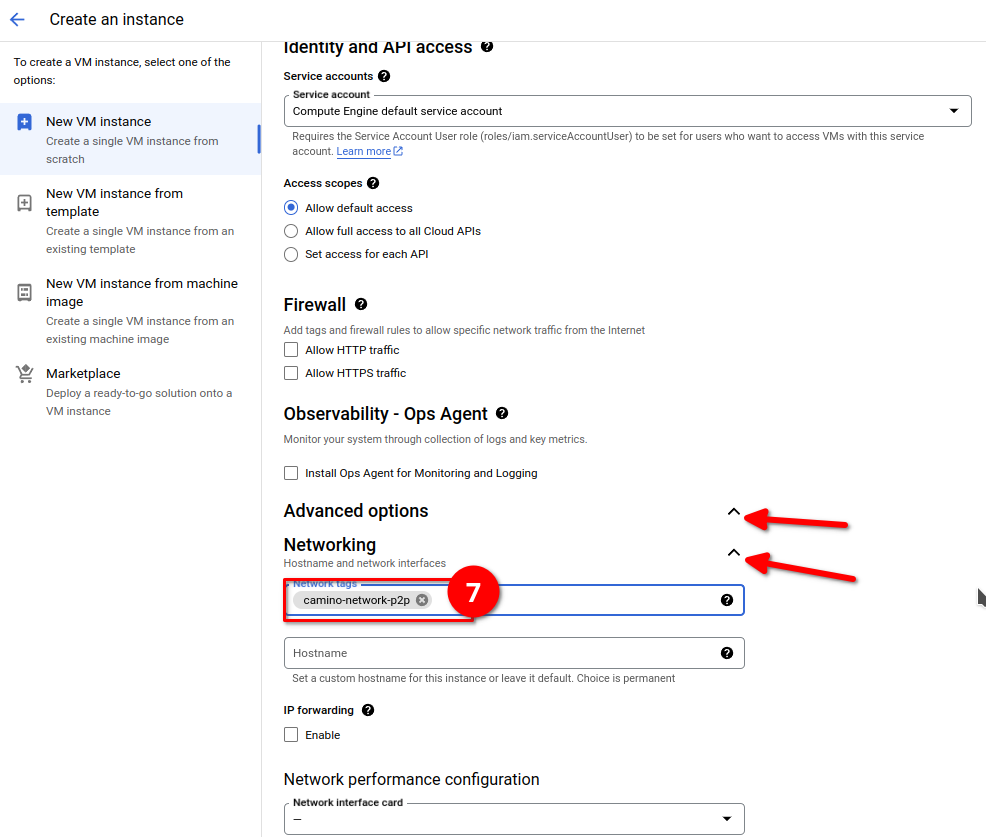
- Add the Network tag "camino-network-p2p."
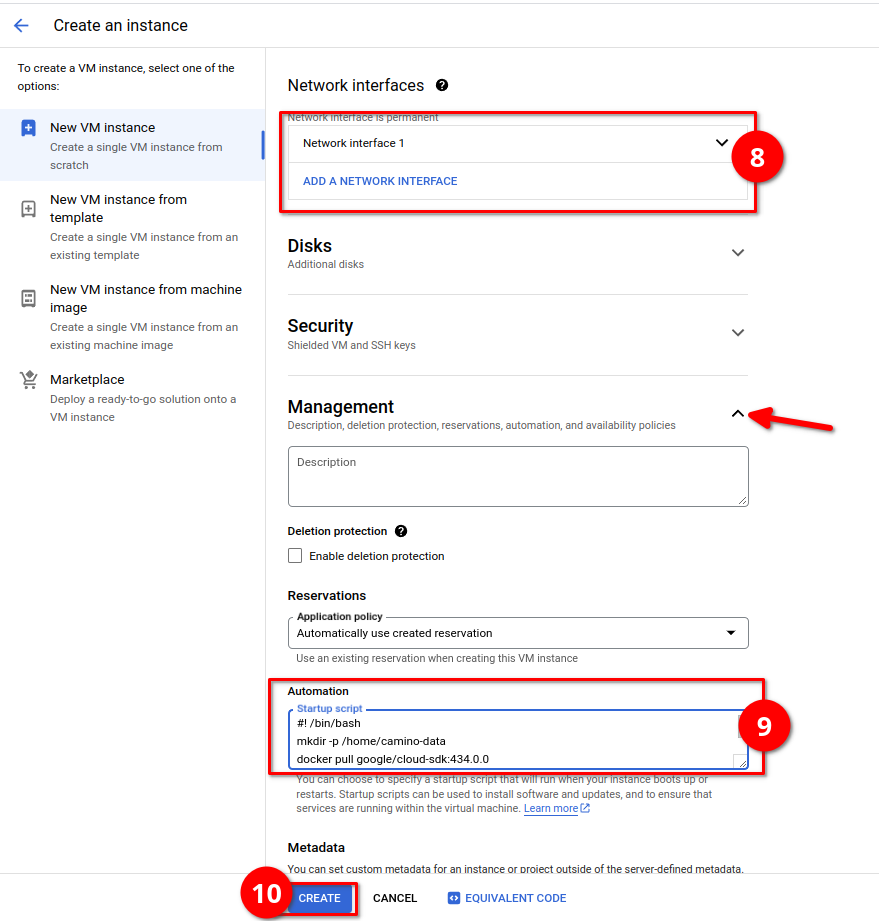
- Optionally, if you want to download the database and decrease the bootstrapping time, add the following startup script:
#! /bin/bash
mkdir -p /home/camino-data
docker pull google/cloud-sdk:434.0.0
export CONTNAME=$(docker ps -q  --filter ancestor=c4tplatform/camino-node:latest)
docker container stop $CONTNAME || true
mkdir -p /home/camino-data/db
## in the following line change <network-name> to columbus or camino
docker run -v /home/camino-data/db:/opt/db --name gcloud-config google/cloud-sdk:434.0.0 gsutil -m rsync -d -R  gs://<network-name>-db /opt/db
docker rm -f gcloud-config
docker container start $CONTNAME || true
Terraform Method
Setting Up Camino Node with Terraform
Automating the process of configuring Camino Node on Google Cloud Platform (GCP) is made easier with Terraform. Terraform allows you to create and manage infrastructure as code, simplifying the setup and deployment steps significantly.
Please note that this section outlines an alternative method for installing Camino Node on GCP. If you have already completed the steps outlined in this guide, you do not need to follow this alternative method.
This alternative method provides an additional approach for setting up Camino Node on GCP and may be useful for specific use cases or preferences.
To take advantage of Terraform for setting up Camino Node, follow these steps:
- Download the Terraform script.
- Run the following commands in your terminal or command prompt, making sure to update the values for
GOOGLE_CREDENTIALSandTF_VAR_gcp_project_id:
terraform init
terraform fmt
terraform validate

## REQUIRED variables
export GOOGLE_CREDENTIALS=<path/to/gcloud/credentials/json>
export TF_VAR_gcp_project_id=<gcp-project-id>

## OPTIONAL variables, below are the defaul values assigned
export TF_VAR_network=columbus    ## use camino for mainnet
export TF_VAR_vm_zone=europe-west1-b
export TF_VAR_vm_name=camino-node
export TF_VAR_template_name=camino-node-template
# write your ip range that will be allowed to ssh to the vm and also make api calls using port 9650. eg: 1.1.1.1/32
export TF_VAR_allowed_ip_range=""

terraform apply